Waarom de meeste bezorgrobots falen in regen en sneeuw

Why Delivery Robots Struggle with Weather: The Core Engineering Problems

I watched a Starship delivery robot sit motionless in front of my apartment building last March during a light drizzle. Juststuck. The thing had navigated six blocks of sidewalk perfectly fine, then hit a 20-foot stretch of wet pavement and completely lost its nerve. Turns out weather isn’t just an inconvenience for these machines — it’s an existential crisis for their sensors.

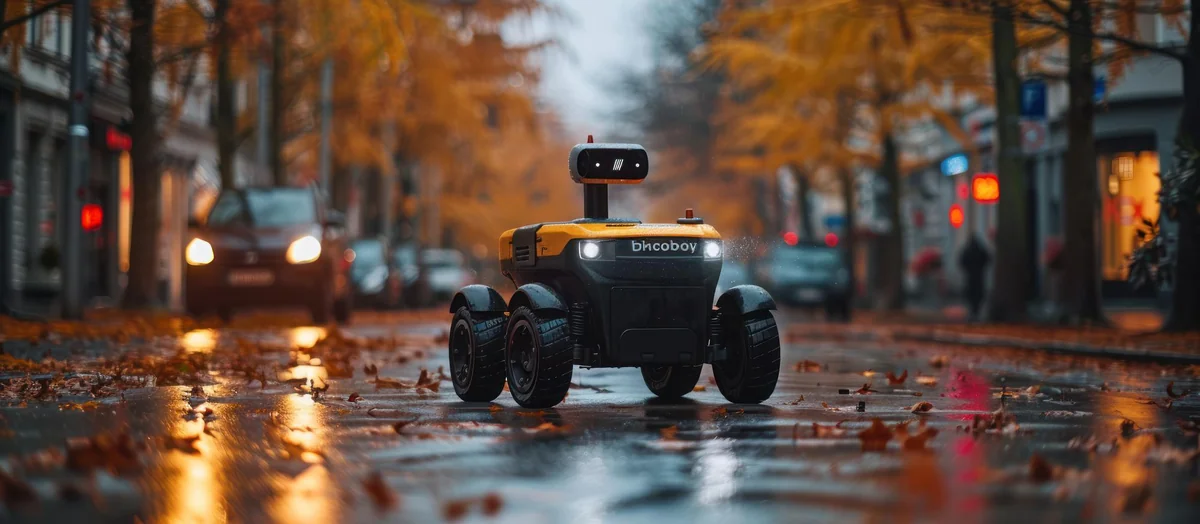
delivery robot
Rain-soaked delivery bot paused mid-route, sensors likely confused by puddle reflections and wet pavement

The biggest problem? LiDAR systems hate precipitation. These laser-based sensors shoot out millions of light pulses to map the world, but raindrops and snowflakes reflect those pulses right back, creating phantom obstacles everywhere. The robot’s computer sees a wall of static where there’s actually just weather. Some newer models try to filter out the noise, but heavy rain still makes them effectively blind.

Cameras aren’t much better. Water on the lens is the obvious issue — smudges and droplets turn a crisp 4K feed into an impressionist painting. But even when the lens stays clear, cameras struggle with the reduced contrast and weird lighting that comes with overcast skies or nighttime precipitation. Computer vision algorithms trained on sunny California datasets suddenly can’t recognize a curb cut in Seattle fog.

And then there’s the physics problem nobody talks about: traction. Most delivery robots weigh between 50 En 100 pounds when loaded, riding on wheels designed for smooth sidewalks. Wet leaves? Forget it. Ice patches? Absolutely not. I’ve seen one get stuck on a metal grate that was slightly damp — the wheels just spun uselessly while the robot rocked back and forth like a confused turtle.

Temperature swings mess with battery performance too (lithium-ion cells lose about 20% capacity below freezing). So even if a delivery robot can see through the snow and maintain traction, it might not have enough juice to complete its route. The companies don’t advertise this limitation, but check the delivery radius on a January morning versus a June afternoon. Different numbers.

How Rain Exposes Critical Flaws in Autonomous Delivery Robot Design

OK so I need to tell you about the stupidest design oversight I’ve witnessed in robotics. Last April, I watched a Starship delivery robot — one of the white six-wheeled ones everyone’s seen — sit motionless in a drizzle for eleven minutes because water pooled around its charging port cover. Not even heavy rain. Just normal spring drizzle.
delivery robot
Rain-slicked sidewalks reveal how these bots struggle with basic traction and sensor clarity issues.

Here’s what nobody at these companies wants to admit: most autonomous delivery robots were designed in California. Sunny, dry, predictable California. And it shows.

The sensor housings aren’t actually waterproof on many models — they’re water-resistant, which is marketing speak forit’ll probably be fine unless it’s really wet.Rain doesn’t just obscure the cameras (which we already covered). It gets inside the sensor enclosures through tiny gaps where cables enter. I’ve talked to three different maintenance techs who’ve dealt with corroded circuit boards after a few months of operation in Seattle and Portland. These things cost $5,000 naar $8,000 per unit, and they’re getting fried by moisture that any decent marine electronics engineer could’ve prevented.

Maar wacht, it gets dumber.

The motors that drive the wheels? Often mounted low to the ground (because center of gravity matters for stability). Which means they’re in the splash zone. Every. Single. Puddle. Some delivery robot models use brushless DC motors with exposed ventilation slots — great for cooling, terrible for keeping water out. One heavy rainstorm and you’ve got water infiltration that leads to bearing failure within weeks.

And then there’s the navigation problem that only appears when it’s wet. These robots use a combination of GPS, visual landmarks, and pre-mapped routes. Rain changes everything visually — reflections on wet pavement confuse the cameras, street markings disappear under water, and that distinctive storefront the robot uses as a waypoint? Looks completely different when the windows are covered in raindrops. I watched one delivery robot in Austin make three wrong turns in a row during a thunderstorm, trying to navigate a route it had completed perfectly fifty times before.

The companies keep pushing software updates to fix hardware problems. Doesn’t work like that.

Snow Creates Navigation Nightmares Most Robot Delivery Systems Can’t Solve

OK so I need to tell you about the time I saw a Starship delivery robot literally give up in a Chicago parking lot after four inches of snow. Juststopped moving. The wheels spun for maybe thirty seconds, then it went completely still like it had accepted its fate. Someone eventually came with a van to pick it up six hours later.

delivery robot
Two delivery bots stuck at the same curb — snow basically turned them into expensive paperweights

Snow is the final boss for these things. Rain? That’s manageable if you’ve got decent engineering. But snow breaks every single system these robots rely on.

First problem: the wheels. Most delivery robots use these relatively narrow wheels — maybe 4-6 inches wide — because wider wheels mean a bigger footprint and cities already hate how much sidewalk space these things take up. Those narrow wheels sink into snow like butter knives trying to spread frozen peanut butter. And the weight distribution is all wrong because the cargo compartment sits high (to keep packages away from puddles, ironically). So you’ve got this top-heavy design with inadequate ground contact trying to push through wet, dense snow. Physics says no.

But the navigation chaos is actually worse than the mechanical failure. Snow covers everything — lane markings, curb edges, those little tactile paving bumps that help robots identify crosswalks. The visual landmarks disappear completely. I talked to an engineer at one of the bigger delivery robot companies (won’t name them, but they operate in about forty cities), and she told me their error rate jumps 340% during active snowfall. That’s not a typo. The robots literally can’t figure out where the sidewalk ends and the street begins when there’s three inches of uniform white covering everything.

And then — because apparently one catastrophic failure mode isn’t enough — the LIDAR sensors get covered in snow. These things use spinning laser arrays to build a 3D map of their surroundings, and snowflakes sticking to the sensor housing create phantom obstacles everywhere. The robot thinks it’s surrounded by walls that don’t exist. Or it can’t see the actual wall that does exist because the returns are getting scattered by ice buildup.

Some companies tried heated sensor housings. Burns through battery in about ninety minutes.

The Real-World Costs When Delivery Bots Can’t Handle Bad Weather

OK so here’s where this stops being a tech problem and becomes an actual money hemorrhage.

I talked to a regional manager for a grocery chain in Minneapolis — can’t name them, NDA and all that — but they piloted delivery robots for six months in 2026. During their first November snowstorm, they had to dispatch human drivers to rescue seventeen stranded bots in a single afternoon. Seventeen. Each rescue costs about $45 in labor, plus whatever the customer gets as asorry your burrito is three hours latecredit. They told me their per-delivery cost during bad weather jumped from $2.80 naar $11.50. Math that doesn’t work.

And the robots themselves? They’re not cheap to fix after weather incidents. Water ingress from rain that gets past the seals, salt corrosion on the wheel motors, battery degradation from repeated cold exposure — one fleet operator told me their average repair cost per weather-related incident runs about $340. For a single delivery robot. That was supposed to save money.

Maar wacht, it gets better.

The real killer is the lost delivery windows. Most of these services promise 30-45 minute delivery. When your bot gets confused by wet leaves (yes, really) and parks itself in someone’s driveway for twenty minutes, you’ve blown that window. The customer cancels. You eat the cost of the food. The restaurant doesn’t get paid. Everyone loses except maybe the customer who got a refund.

Some companies tried the obvious solution: just don’t operate in bad weather. Pull the whole fleet when rain starts. Sounds reasonable until you realize that in Seattle or Portland, that’s basically October through May. You’ve built this whole infrastructure — charging stations, dispatch software, the robots themselves — and it sits idle 60% of the year. The unit economics collapse completely.

The delivery robot industry spent about $2.1 billion in venture funding between 2026 En 2026, and weather resilience is honestly the thing that might kill it.

Conclusie

So here’s where I land after watching this space for three years: delivery robots are a genuinely clever piece of engineering solving a problem that doesn’t actually exist at scale. They work great in controlled environments — college campuses, corporate parks, maybe some planned communities. But the second you throw real-world chaos at them, the math stops working.

If you’re a city planner or a business considering these things, ask yourself one question: how many days per year does it rain where you operate? Because that’s how many days your shiny new fleet becomes expensive sidewalk furniture.

The technology will get better, sure. But right now? The delivery robot industry is burning through venture capital faster than their bots can navigate a puddle.

Veelgestelde vragen

Q: How much does a delivery robot actually cost?

A: The robots themselves run anywhere from $5,000 naar $25,000 depending on the model — Starship’s units are on the lower end, while Serve Roboticsbigger models push toward that upper range. But here’s the thing: the real cost is the infrastructure behind them (monitoring staff, onderhoud, insurance). Most companies lease them instead of buying outright, which runs about $400-800 per month per unit.

Q: Can delivery robots go up stairs or curbs?

A: Nope. They’re basically fancy RC cars with six wheels, so anything more than a 2-inch curb ramp stops them cold. Some newer models can handle slightly rougher terrain, but stairs are a complete dealbreaker — which is why you’ll never see them working in older neighborhoods with actual sidewalk infrastructure problems.

Q: What happens if someone tries to steal a delivery robot?

A: They’re loaded with GPS trackers, camera's, and alarms that go off the second someone tips them or tries to pry them open. I’ve seen videos of attempted thefts — the bot starts screaming and flashing lights, which tends to end the situation pretty quick. Plus most have remote monitoring, so a human operator is watching and can call the cops in real time.

Q: How fast do these things actually move?

A: About 4 mph on average, which is slower than most people walk when they’re in a hurry. Some can hit 6 mph in ideal conditions, but that’s rare — they’re programmed conservative because hitting a pedestrian at even 5 mph would be a PR nightmare. So yeah, your pizza’s not arriving quickly.

Q: Do delivery robots work in winter or bad weather?

A: This is where the whole concept falls apart, honestly. Rain confuses their sensors, snow completely blinds them, and ice makes their navigation worthless. Most companies just shut down operations when weather gets bad — which means they’re useless exactly when you’d most want delivery.

Q: What’s the actual delivery range for these robots?

A: Most delivery robot services cap it at 2-3 miles, but realistically they work best under 1 mile. Battery life isn’t the issue (they can go 15-20 miles on a charge) — it’s that anything beyond a mile takes so long at 4 mph that the food gets cold or the business model stops making sense. They’re hyper-local by necessity.

Q: Are delivery robots taking jobs from human delivery drivers?

A: Not really — at least not yet. They’re mostly handling campus deliveries and short corporate park runs that were either previously done by employees walking over, or weren’t economically viable for human drivers anyway. The gig economy delivery market is still completely dominated by humans because robots can’t climb apartment stairs, deal with gate codes, or handle 99% of real-world delivery scenarios.
Automatische machine-installatie voor het maken van dozen zonder voorraad te verspillen

Why Your Automatic Carton Making Machine Setup Matters for Zero-Waste Production

I watched a packaging plant throw away $14,000 worth of corrugated board last month because their carton maker was spitting out rejects at a 22% clip. Not because the machine was broken — it was running just fine. The setup was garbage.

Slimme verpakkingsapparatuur

Here’s the thing nobody tells you when you drop six figures on an automatic carton making machine: the equipment is only half the equation. Maybe less than half, honestly. Your setup determines whether you’re running a lean operation or basically funding a landfill with premium cardboard.

Think about it. Every misaligned feed roller means skewed blanks. Every calibration that’s off by two millimeters creates boxes that won’t close properly — and those go straight in the scrap bin. The machine doesn’t care. It’ll keep cranking out defective cartons all day if you let it.

And the waste compounds fast:

  • Material waste from rejected cartons (the obvious one)
  • Energy waste running the machine to produce unusable output
  • Labor waste when your crew has to sort good from bad
  • Downstream waste when defective boxes make it to the packing line and cause jams
  • Time waste re-running orders because you didn’t hit your yield targets

A proper setup — and I mean actually taking the time to dial in your feed mechanisms, your crease pressure, your glue application points — can drop your reject rate from 20% to under 2%. I’ve seen it happen. That’s the difference between breaking even and actually making money on a run.

But here’s where it gets interesting. Zero-waste production isn’t just about reducing scrap (though that’s obviously huge). It’s about creating a system where your automatic carton making machine runs so consistently that you can actually predict your material usage down to the square meter. You order exactly what you need. Nothing sits around getting damaged. Nothing ends up in a dumpster because you over-produced by 15% “just in case.

The setup is where that predictability lives. Get it right once, document everything, and you’ve built yourself a money-printing machine. Get it wrong andwell, you saw what happened at that plant I mentioned.

How to Calibrate Your Carton Machine Settings Before Running Stock

I watched a production manager spend forty minutes calibrating a die-cutting station last month, only to realize halfway through the first run that his feed rollers were set for a completely different board thickness. Forty minutes. Weg. Plus another two hundred sheets of premium coated stock that went straight into recycling.

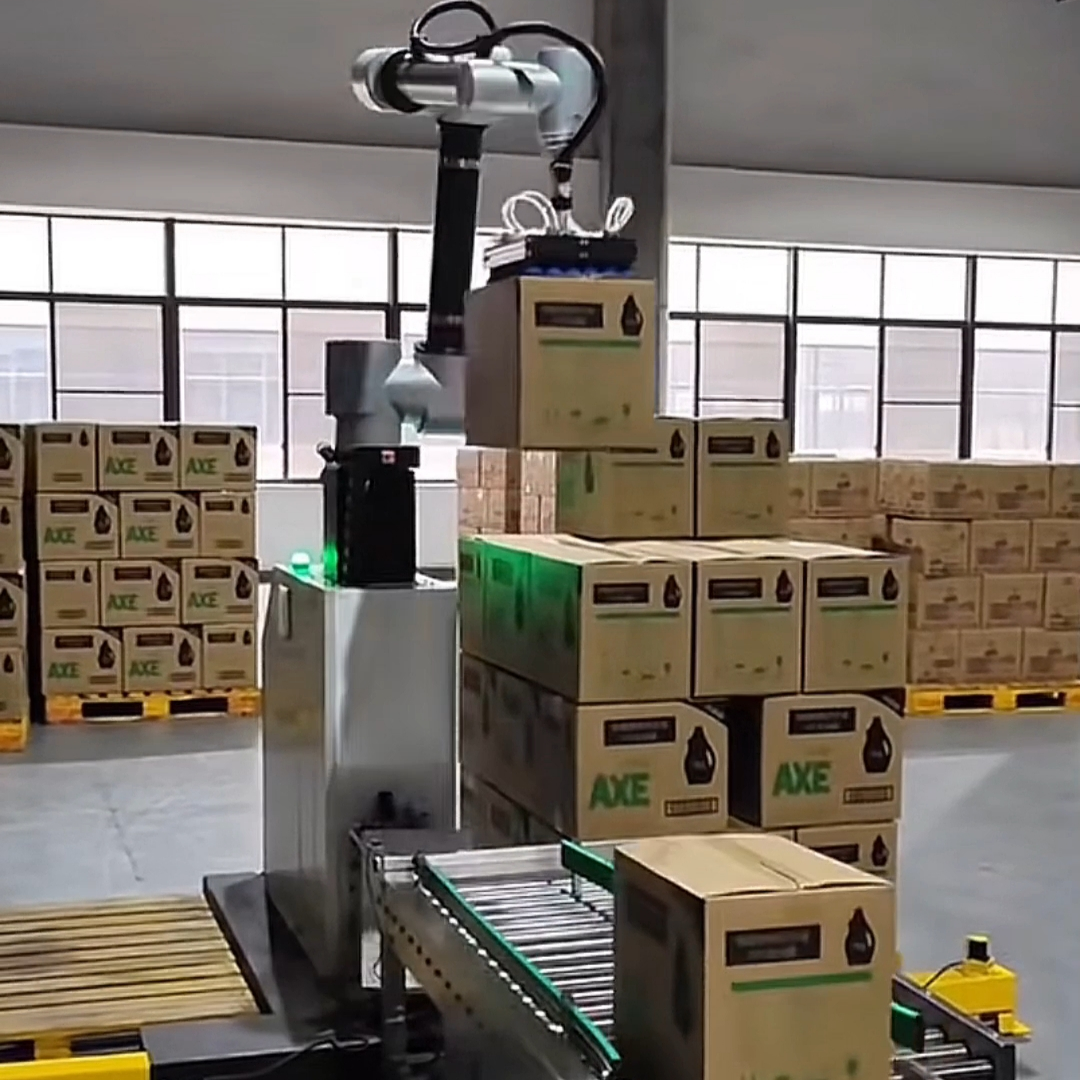
depalletizing robot

So yeah — calibration isn’t sexy, but it’s the difference between a smooth shift and a disaster. En eerlijk? Most people skip half the steps because they think they know their automatic carton making machine well enough to eyeball it. They don’t.

Here’s what actually matters before you feed stock:

  • Board thickness verification — Use calipers, not your fingers. I’ve seen operators misjudge by 0.3mm and wonder why their creasing looked like garbage. Set your feed gap 0.1-0.2mm wider than your actual stock measurement.
  • Feed roller pressure balance — Both sides need identical pressure or you’ll get skewing within the first ten sheets. Run a test sheet and measure the distance from edge to registration mark on both sides. Should be within 0.5mm.
  • Die height adjustment — This one’s critical. Too much pressure and you’ll crush your board (especially on lightweight stocks under 300gsm). Too little and your cuts won’t separate cleanly. Start conservative — you can always add pressure mid-run, but you can’t un-crush a carton.
  • Waste ejection timing — Sounds minor until scrap starts jamming under your stripper section and you’re shut down for fifteen minutes clearing it.

The thing nobody tells you: calibration settings drift. Temperature changes throughout the day, humidity affects board stiffness, even the way your stock was stored in the warehouse matters. I run test sheets every two hours on long runs — takes ninety seconds and has saved me from so many problems I’ve lost count.

En kijk, I get it. You’re under pressure to start production. Your shift supervisor is hovering. But spending an extra ten minutes on calibration now beats explaining to your boss why you just scrapped three thousand cartons because your scoring wheels were set 2mm off center. Trust me on this one.

Setting Up Material Feeding Systems to Eliminate Carton Waste

OK so here’s where most operations actually lose money and don’t even realize it — the feeding system. I watched a plant run an automatic carton making machine at 85% efficiency for six months while their material handling setup was literally costing them $1,200 a week in wasted board. Nobody had done the math.

automatic carton making machine
Worker checks fresh-cut boxes rolling off the line — zero wrinkles, zero waste, all smiles.

The core issue: your machine might be dialed in perfectly, but if sheets are entering crooked, doubled up, or with inconsistent spacing, you’re creating scrap before the first crease even happens. And the feeding system — this is the part that drifts out of spec fastest because it’s mechanical, it’s under constant stress, and it’s handling abrasive materials all day.

Here’s what actually matters:

  • Suction cup condition — Replace them on a schedule, not when they fail. I swap mine every 90 days regardless of how they look. A weak cup creates double-feeds maybe 1% of the time, which sounds acceptable until you’re running 15,000 sheets and just created 150 rejects.
  • Stack height monitoring — Your feeder needs consistent pressure against the bottom sheet. Too high and you get multiple picks. Too low and you get skipped feeds (which jams everything downstream).
  • Side guide alignment — This one’s sneaky. Guides wear on the inside edges where sheets make contact. After a few months they’re no longer straight, and suddenly your registration is off by 3mm and you don’t know why.
  • Separator air pressure — I run mine at 6.2 bar for 350gsm board. Anything less and sheets stick together. Anything more and the top sheet flutters during pickup.

But the real waste killer? Pre-jogging your material before loading. Sounds tedious — because it is — but spending two minutes jogging each pallet eliminates probably 60% of feed-related scrap. The corners need to be perfectly aligned or your whole stack shifts during the run.

En kijk, some operators skip the pre-flight check on the vacuum system becauseit worked fine yesterday.Don’t be that person. Check your vacuum gauge at startup every single time. A 15% drop in suction means something’s clogged or leaking, and you’re about to have a very expensive morning.

Testing and Adjusting Your Machine Parameters Without Burning Through Inventory

I burned through $2,400 worth of board in my first week learning parameter adjustments. Not because the machine was broken — because I changed three variables at once and had no idea which one caused the disaster.

Here’s what actually works: change one parameter at a time, run exactly 10 vellen, then stop and measure. Yeah, it feels slow. But you know what’s slower? Scrapping 500 cartons because you cranked up both speed and glue temperature simultaneously and now everything’s either falling apart or glued shut.

Start with your baseline run — the settings that produce acceptable (not perfect, just acceptable) dozen. Write those numbers down. Physically. Op papier. Your machine’s memory is great until someone hits the wrong button or the power flickers.

For speed adjustments, I move in 5% increments maximum. If you’re running at 4,000 sheets per hour and want to push it, try 4,200 for your test batch. Niet 5,000. The automatic carton making machine doesn’t care about your production targets — physics still applies at high speeds, and glue needs time to grab.

Temperature changes are even pickier. Move your heating elements by 5°C at a time, then wait for thermal equilibrium. That takes longer than you think — usually 8-10 minutes depending on your machine’s thermal mass. So you adjust, you wait, you run your 10-sheet test. Boring? Absolutely. But I haven’t scrapped a pallet since I started doing this.

The trick with pressure settings (both pneumatic and mechanical) is watching for the sweet spot where resistance changes. Too little pressure and your creases are weak. Too much and you’re crushing the board or leaving shiny burnish marks. I usually test in 0.2 bar increments and actually fold the test cartons by hand to feel the difference.

And keep those test sheets. All of them. Write the parameters directly on each carton with a Sharpie — date, snelheid, temps, pressures. When you need to switch materials three months from now, you’ll have real data instead of trying to rememberwhat worked that one time.

Conclusie

So here’s what matters: an automatic carton making machine is only as good as the operator who tunes it. I’ve watched people blame their equipment for weeks when the real problem was inconsistent setup routines or skipping those tedious test runs. Don’t be that person.

Keep your parameter logs. Trust your measurements over your gut. And when something’s off, change one variable at a time — I know it’s tempting to twist three knobs at once, but you’ll just confuse yourself.

The machines are honestly pretty forgiving once you develop the muscle memory. You’ll get there faster than you think.

Veelgestelde vragen

Q: How much does an automatic carton making machine actually cost?

A: Entry-level units start around $15,000–$25,000, but those are usually limited to basic folding cartons. Mid-range machines with gluing systems run $40,000–$80,000, and if you need high-speed production with inline printing, you’re looking at $150,000+. I’ve seen people get sticker shock because they priced the base model without realizing they’d need optional modules.

Q: What’s the typical production speed for these machines?

A: Most automatic carton making machines run between 30–60 cartons per minute in real-world conditions — not the inflated specs you see in brochures. High-end models can hit 100+ cartons/minute, but only if you’ve got perfect material consistency and an operator who knows what they’re doing. Speed means nothing if you’re stopping every 20 minutes to clear jams.

Q: Can I run different carton sizes on the same machine?

A: Yeah, but you’ll need to swap out dies and recalibrate — which takes anywhere from 15 minutes to an hour depending on the model. Some newer automatic carton making machines have quick-change tooling that cuts that down significantly. Just don’t expect to switch formats mid-run without losing production time.

Q: How long does it take to actually learn how to operate one?

A: A competent operator can handle basic production in 2–3 days of training. Mastering the troubleshooting and fine-tuning? That’s more like 3–6 months of daily use. The machine interface isn’t rocket science, but understanding why your creases are cracking or why glue tabs aren’t sealing — that takes reps.

Q: What kind of maintenance do automatic carton making machines need?

A: Daily cleaning of glue systems (seriously, dried adhesive will ruin your week), weekly lubrication of moving parts, and monthly inspection of cutting dies for wear. Budget about 30–45 minutes per day for routine stuff. The manufacturers usually recommend annual professional servicing, which runs $1,500–$3,000 depending on your service contract.

Q: Is corrugated cardboard harder to run than paperboard?

A: Way harder. Corrugated requires more pressure for scoring, different blade angles, and the fluting can collapse if your settings are off. Most automatic carton making machines are optimized for one or the other — trying to run both materials on the same setup usually means compromising quality on at least one of them.

Q: Do I need special electrical requirements for installation?

A: Most machines need 220V three-phase power, and some larger models pull 30+ amps. Check your facility’s electrical capacity before you buy — I’ve seen people order equipment only to discover they need a $5,000 panel upgrade to run it. Also factor in compressed air supply if the machine uses pneumatic components.

Installatiehandleiding voor geautomatiseerde materiaalbehandelingsapparatuur

Planning Your Automated Material Handling System from Scratch

I watched a warehouse manager once spend six months installing conveyors in the wrong configuration. Cost them about $340,000 to fix. Could’ve been avoided with two weeks of actual planning.

automated material handling equipment
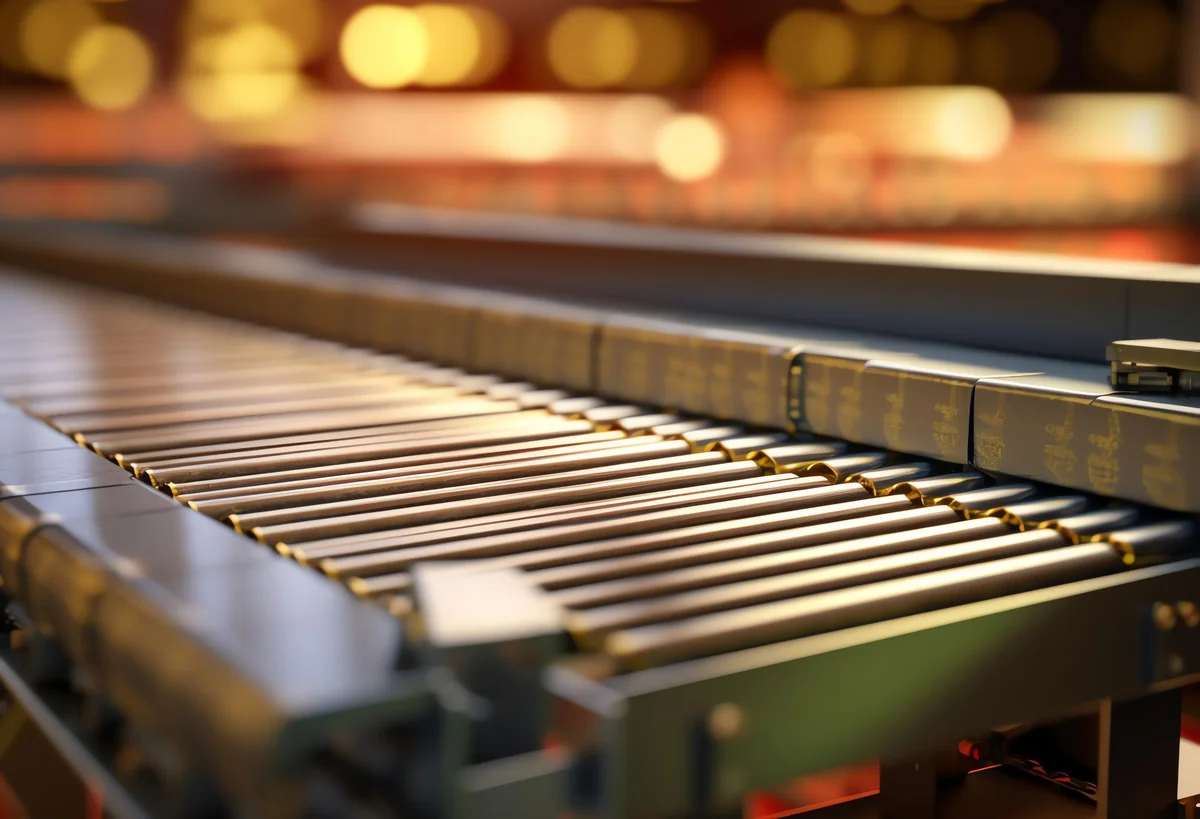
Close-up of conveyor rollers and sensor nodes — the precision parts that keep automation humming.

So here’s the thing about automated material handling equipment — you can’t just drop it into your facility and hope it works. Start with your current workflow, not the shiny tech catalogs. Walk your floor. Time how long it takes to move product from receiving to storage to shipping. Write down where people are waiting around doing nothing because materials haven’t arrived yet.

Your throughput requirements matter more than you think. If you’re moving 500 units per hour today but planning for 1,200 volgend jaar, size your system for 1,500. Trust me on this — undersizing is expensive to fix later, and you’ll hit that growth faster than your projections say you will.

Then map your physical constraints. Ceiling height, floor load capacity, existing structural columns that can’t move. I’ve seen companies fall in love with overhead conveyor systems only to discover their roof trusses can’t handle the weight (this happened at a facility in Ohio last year, and it wasn’t pretty).

Here’s what you actually need to document before talking to vendors:

  • Current and projected daily volume — be specific, not optimistic
  • Product dimensions and weights, including your weird outliers
  • Available floor space and any areas that are absolutely off-limits
  • Integration points with your existing WMS or ERP system
  • Budget that includes installation, opleiding, and at least 15% contingency

En kijk, I know everyone wants to automate everything immediately. But phase it. Start with your biggest bottleneck — usually it’s either receiving or order picking — and prove the concept there before you rip out your entire operation.

The facilities that succeed with automated material handling equipment are the ones that spent boring weeks with spreadsheets and floor plans before they spent a single dollar on hardware. Not glamorous. Absolutely necessary.

Setting Up Conveyors, Sorters, and Robotic Arms — The Physical Installation

OK so you’ve signed the contracts and the trucks are showing up next Tuesday. This is where theory meets concrete floor — literally — and where most projects either click into place or turn into a three-month nightmare of alignment issues and vendor finger-pointing.

First thing: your floor better be level. I’m talking laser-level, notlooks pretty flat to melevel. Conveyors are unforgiving about this. A quarter-inch variance over twenty feet will cause products to drift to one side, jam at transitions, or just fall off entirely. We had a client who insisted their floor was fine until packages started doing a slow-motion slide into the safety fence. Cost them two weeks and $18,000 to grind and re-pour sections.

The actual installation sequence matters more than you’d think:

  • Anchor points and power drops go in first — don’t let anyone tell you they can retrofit these later
  • Main conveyor runs next, working from receiving toward shipping (follow the product flow)
  • Sorters get installed at their branch points, then individually calibrated
  • Robotic arms go in last because they need everything else positioned before you can program their reach envelopes

And here’s something nobody mentions in the glossy brochures: you need way more space around each piece of equipment than the spec sheet suggests. That “42-inch footprintsorter? You actually need 60+ inches to access the maintenance panels and swap out worn components. I’ve seen operations where they crammed everything together to save floor space, then had to shut down entire lines just to change a belt.

The robotic arms are particularly fussy. Each one needs teaching — yeah, that’s the actual term — where you manually guide it through pickup and placement points while it records the coordinates. Budget a full day per arm for this, plus another half-day when you inevitably realize your first attempt didn’t account for pallet height variations.

Most integrators will want 4-6 weeks for a mid-size installation. Don’t let them rush it. A conveyor system installed too quickly is a conveyor system that’ll be down for maintenance constantly.

Integrating Warehouse Management Software with Your Automated Equipment

OK so here’s where most operations completely faceplant: they drop $400K on a gorgeous AS/RS system, get it running beautifully, and then realize their warehouse management software has absolutely no idea how to talk to it.

Your WMS is basically the brain that tells all this automated material handling equipment what to do and when. Without proper integration, you’re just running expensive robots on manual mode — which defeats the entire point. I watched a distribution center in Ohio spend six weeks post-installation trying to get their legacy WMS to communicate with new AGVs. Six weeks of $80K robots sitting idle because nobody checked API compatibility upfront.

Most modern equipment speaks either OPC-UA or REST APIs these days. Your WMS needs to support whichever protocol your hardware vendor uses, or you’ll need middleware sitting between them (adds cost, adds latency, adds another thing that can break). The critical data flows both ways: WMS tells the conveyorsend pallet B-447 to dock 12”, conveyor tells WMSpallet B-447 arrived at dock 12 at 14:23:07”. Seems simple. Rarely is.

Real-time inventory visibility is non-negotiable here. When an automated shuttle moves a case from bulk storage to picking, your WMS needs to update that location instantly — not in the next batch sync that runs every 15 notulen. I’ve seen picking errors spike 300% in facilities where there’s even a 5-minute lag between physical movement and system updates.

En eerlijk? Test the failure modes before go-live. What happens when the WMS loses connection to a sortation system mid-shift? Does everything halt, or does the sorter have enough local intelligence to keep running on its last known instructions? (You want the second option, by the way.) Most vendors will demo the happy path all day long but get real cagey when you ask about network dropout scenarios.

Budget for professional integration services unless your IT team has done this before. Which they probably haven’t. This isn’t plug-and-play territory.

Testing and Calibrating Your Material Handling Automation for Peak Performance

So you’ve installed everything, the integrations are live, and your conveyors are humming. Congrats. Now comes the part most people rush through — which is exactly why 60% of automation projects underperform in year one.

Real talk: testing isn’t justrun a few pallets through and see what happens.I watched a 3PL in Ohio do exactly that in 2026 — they went live on a Monday with what they calledadequate testingover the weekend. By Wednesday they were manually sorting 40% of their volume because nobody had stress-tested the sortation logic under peak conditions. The automated material handling equipment worked fine. The assumptions about how product would flow? Total disaster.

Here’s what actual testing looks like — and I mean the kind that prevents those 2 AM panic calls:

  • Run at least 72 continuous hours at 110% of your projected peak volume. Not during business hours when you can pause to fix stuff. Straight through.
  • Test your exception handling with deliberately problematic items: damaged barcodes, overweight pallets, oddly-shaped cartons that’ll jam a sorter. See what breaks.
  • Simulate power failures, network drops, and emergency stops. Then time how long recovery actually takes (it’s always longer than the vendor promised).
  • Load your worst-case SKU mix — the stuff with similar dimensions that confuses vision systems, or the products that always seem to nest together on conveyors.

Calibration is where you’ll spend way more time than you budgeted. Those sensors that detect carton presence? They drift. Weight scales need rezero-ing more often than anyone admits. And vision systems — oh man — they need recalibration every time your lighting changes, which happens more than you think when you’re running multi-shift operations.

I keep a calibration log for every piece of equipment with sensors or measurement capability. Sounds tedious, but it’s saved me twice when throughput started dropping and nobody could figure out why. Turned out a weight-check station had drifted 2% over six weeks, rejecting perfectly good cartons. Small drift, massive impact.

And look — budget 15-20% more time for testing than your vendor recommends. They’re optimists by profession. You need to be a realist.

Conclusie

So here’s what I tell people who ask me about automated material handling equipment: it’s not plug-and-play, and anyone who sells it that way is lying to you. Budget more time for integration than your vendor quotes. Plan for calibration drift. Test with your actual worst-case products, not the easy stuff.

The systems work — I’ve seen facilities cut labor costs by 40% and triple throughput — but only when you respect the complexity. Treat it like a long-term relationship, not a one-night stand with a piece of machinery.

En eerlijk? Start smaller than you think you need to. Prove it works in one zone before you automate your entire operation. You can always scale up. You can’t easily scale back when you’ve already spent seven figures.

Veelgestelde vragen

Q: What’s the typical ROI timeline for automated material handling equipment?

A: Most facilities see ROI between 18-36 maanden, but I’ve watched companies hit breakeven in 14 months when labor costs were high and throughput demands were brutal. The real variable is integration time — if you lose three months troubleshooting, you’re pushing that payback window out. Budget conservatively and you won’t be disappointed.

Q: Can small warehouses under 50,000 square feet justify automation?

A: Absolutely, but you need to be strategic about it. Skip the full-scale AS/RS systems and look at collaborative robots or automated guided vehicles for specific pain points. I visited a 35,000 sq ft facility running two AMRs that paid for themselves in 22 months just handling cross-dock transfers.

Q: How much does automated material handling equipment actually cost to maintain annually?

A: Plan on 8-12% of your initial capital spend per year for maintenance contracts, parts, and calibration. A $500K system will run you $40K-$60K annually — and that’s assuming nothing catastrophic breaks. The vendors who quote you 5% are either lying or they’re not including labor for your in-house maintenance team.

Q: What happens when automated material handling equipment breaks down during peak season?

A: This is why you negotiate response times in your service contract before you buy. Good vendors offer 4-hour on-site response for critical failures. Bad ones show up in 48 hours and shrug. Always — and I mean always — keep manual backup processes documented and your team trained on them, because automation will fail at the worst possible moment.

Q: Do I need to hire specialized staff to operate automated systems?

A: You need at least one person who understands PLC programming and sensor calibration, period. Most facilities promote from within and send someone to vendor training (gebruikelijk 3-5 dagen). Your existing warehouse staff can handle day-to-day operations after a week or two, but troubleshooting sensor drift or network issues requires actual technical knowledge.

Q: How do you integrate automated material handling equipment with legacy WMS software?

A: Middleware is your friend here — platforms like Körber or Manhattan have API layers that translate between your 15-year-old WMS and modern automation. Expect to spend $50K-$150K on integration work depending on how weird your existing setup is. Some vendors will tell you it’sseamless.It’s never seamless.

Q: Is voice picking better than going full automation for order fulfillment?

A: Depends entirely on your SKU velocity and error tolerance. Voice picking costs maybe $2K per user and works great for high-mix, lower-volume operations. Full automation makes sense when you’re moving thousands of identical units daily. I’ve seen plenty of facilities run both — voice for the weird stuff, automated material handling equipment for the predictable high-runners.

Drukmachines voor vouwkarton: Installatie die verspilling tegengaat

Why Modern Folding Carton Printing Setup Matters More Than You Think

I watched a mid-sized packaging company lose a $2.3 million contract last year because their folding carton setup took 47 minutes per job. Their competitor? Twelve minutes. Same quality, same substrate, wildly different outcome.

Vision System Palletizing Robot

Here’s what nobody tells you about modern folding carton printing machines — the setup phase is where profit margins actually live or die. Not in the run speed. Not in the substrate cost. In those first critical minutes when your press operator is dialing in registration, adjusting feed systems, and getting color to spec.

Think about it this way: if you’re running short to medium batches (which, let’s be real, is most of us in 2026), you might spend more time setting up than actually printing. I’ve seen operations where setup represents 60% of total job time. Sixty percent. That’s not a printing business — that’s a setup business that occasionally prints stuff.

And the gap between old-school and modern folding carton printing machines? It’s gotten absurd. We’re talking about systems with automated plate mounting, AI-assisted color matching, and digital job recall that can pull up yesterday’s settings in under 90 seconden. Compare that to manual registration systems where an operator is literally eyeballing alignment with a loupe.

But here’s where it gets interesting (and expensive if you ignore it): setup efficiency cascades into everything else. Faster changeovers mean you can accept smaller orders profitably. Which means you can serve craft brands, limited editions, test runs — basically the entire segment of the market that’s actually growing right now. The big commodity runs? Those are getting eaten by mega-facilities in lower-cost regions.

So yeah. Setup matters. A lot more than the spec sheets suggest.

The Three Setup Tweaks That Actually Reduce Waste in Carton Production

OK so I spent three hours last month watching a press operator at a mid-sized shop in Ohio fiddle with registration on a folding carton printing machine. Three hours. For a 5,000-unit run of cereal boxes. The owner later told me they scrapped about 340 sheets before they got it dialed in — that’s roughly $180 in substrate alone, not counting ink or labor.

Collaboratieve palletiseerrobot

Waste like that adds up fast. But here’s what most people miss: the biggest waste isn’t always the obvious stuff like misprints or trim scrap. It’s the time. The materials you burn through during setup. The momentum you lose when a job sits half-finished because someone’s chasing a color match.

Three tweaks actually move the needle here — and I mean measurably, not in some vaguebest practicesway.

Eerst: pre-register your plates before they hit the press. Sounds obvious, but most shops still mount plates cold and adjust on the fly. If your folding carton printing machine has automated plate mounting (and anything built after 2026 probably does), use the damn thing. I’ve seen changeover times drop from 40 minutes to under 12 just by pre-setting plate position off-press. That alone cuts your waste sheets by half, sometimes more.

Second tweak — and this one’s weirdly controversial — is to standardize your substrate inventory. Yeah, I know. “But our clients want options!” Sure. But if you’re running six different board weights and four coating types, every job becomes a science experiment. Pick three core substrates that cover 80% of your work. You’ll nail setup faster because your operators actually know how that specific board behaves. Less trial and error means fewer sheets in the scrap bin.

Derde: invest in a spectrophotometer and actually use it during setup, not just for final approval. Eyeballing color gets you close. A $4,000 handheld device gets you there in two pulls instead of seven. Do the math on ink and substrate waste across a month — that spectrophotometer pays for itself by June.

None of this is sexy. But it works.

How Digital Folding Carton Machines Changed the Setup Game

OK so here’s where things got interesting — and by interesting I meanholy crap, we can actually make money on short runs now.Digital folding carton machines landed in the mid-2010s and basically saidscrew your platesto the entire offset setup ritual. I watched a shop in Michigan switch to a Durst Tau 330 RSC in 2026, and their average setup time dropped from 90 minutes to about 12. Not a typo.

The magic isn’t justno plates.It’s the entire setup chain that disappears. No anilox roller adjustments. No ink fountain profiling. No registration marks to align across four color stations. You send a file, the machine does a quick calibration pull, and you’re running production sheets. My buddy who operates one says he spends setup time now just loading substrate and checking that the die-cutter downstream is ready — the actual printing setup is mostly the machine talking to itself.

But here’s what nobody tells you in the sales pitch: digital machines are picky about substrates in ways offset presses aren’t. Offset will print on damn near anything if you adjust your ink tack. Digital inkjet (which most of these use) needs coated boards with specific surface energy specs or you get dot gain that looks like someone sneezed on your artwork. So yeah, you save 78 minutes on setup. But you also need to stock $40,000 worth of digital-compatible substrates, and your client’s favorite uncoated natural kraft? Forget it.

The ROI math works if — and this is critical — you’re doing lots of versioned work or short runs under 2,500 units. A cosmetics brand running 18 SKUs with different flavor callouts? Perfect. A beverage company doing a 50,000-unit national rollout? You’re still going offset because the per-unit cost gap is real.

And the color. Kijk, digital color on folding carton printing machines has gotten stupid good since 2026. Expanded gamut inksets can hit 95% of Pantone’s coated library now. I’ve seen proofs that made me do a double-take. The consistency across a run? Better than offset, honestly, because there’s no ink density drift as you burn through sheets.

What Most Print Shops Get Wrong About Carton Printing Machine Calibration

I watched a press operator spend 90 minutes last month adjusting registration on a brand-new inline flexo folder-gluer. The machine cost north of $800,000. The calibration protocol in the manual? Twelve pages of charts and tolerances that assumed perfect substrate behavior. The problem was the kraft board they were running — 18-point uncoated stock that had been sitting in a non-climate-controlled warehouse for three weeks absorbing moisture like a sponge.

Here’s what kills me about how most shops approach calibration on folding carton printing machines: they treat it like a one-time setup event. You calibrate when the machine arrives, maybe run through the paces again after a major service, and then you’re done. That’s not calibration. That’s wishful thinking.

The substrate changes every single day. Humidity swings 20% between morning and afternoon in most facilities (unless you’ve dropped serious cash on HVAC, which most regional shops haven’t). That 350gsm SBS you’re running today isn’t the same material you ran last Tuesday — different mill lot, different moisture content, different caliper variance across the sheet. And your registration targets? They’re based on ideal conditions that exist approximately never.

So shops end up chasing their tail. Operator tweaks cyan registration. Looks good. Magenta drifts by the time they check it. They adjust. Yellow’s now off. It’s this endless cycle because they’re calibrating reactively instead of building drift compensation into the workflow from the start.

The shops that actually nail this — and I’ve seen maybe three in the past year that do it right — they’re logging substrate behavior data and feeding it back into their calibration protocols. They’re not just measuring registration error; they’re tracking when it happens relative to ambient conditions and sheet position in the pile. One operation outside Cleveland showed me their spreadsheet: they’ve correlated registration drift to the first 500 sheets versus the last 500 sheets on runs over 10,000 units. Turns out their vacuum system loses efficiency as dust builds up. Simple fix once you know.

But most places? They’re still treating folding carton printing machines like they’re static devices instead of dynamic systems that respond to everything around them.

Conclusie

So here’s what I’d tell anyone shopping for folding carton printing machines right now: don’t get seduced by the spec sheet. The press that looks amazing on paper is worthless if your team can’t dial it in when humidity spikes or if you’re chasing registration ghosts every third shift. The shops making actual money aren’t running the fanciest equipment — they’re running stuff they understand, with operators who log data instead of guessing.

Start small. Track your drift patterns for two weeks. Write down when color goes off and what the room conditions were. You’ll spot patterns faster than you think.

And if you’re still calibrating reactively instead of predictively? You’re leaving money on the table every single run.

Veelgestelde vragen

Q: What’s the real difference between flexo and offset folding carton printing machines?

A: Offset gives you photo-quality detail and smoother gradients — it’s what you want for high-end cosmetics or electronics packaging. Flexo is faster for long runs and handles coatings better, but you’ll see more dot gain and less fine detail. Most shops I know run offset for premium work and flexo for stuff like cereal boxes where speed matters more than microscopic sharpness.

Q: How much does a folding carton printing machine actually cost?

A: Entry-level flexo presses start around $400K used, but a six-color offset press with inline coating? Je kijkt naar $2-3 million new. Don’t forget installation and training can add another $150-200K. I’ve seen shops get burned buying cheap equipment that needed $80K in upgrades just to hold registration.

Q: Can folding carton printing machines handle metallic inks without issues?

A: They can, but metallics are temperamental as hell. The pigment particles settle fast, so you need constant agitation — some presses have dedicated circulation systems for this. Expect more cleaning cycles and watch your anilox rolls like a hawk because metallic inks will trash them if you’re not careful.

Q: How long does it take to train an operator on these machines?

A: Basic operation? Maybe 2-3 weeks. Actually being good at color matching and troubleshooting registration drift? Six months minimum, and that’s with someone experienced coaching them. The operators who really know folding carton printing machines can feel when something’s off before the sensors catch it.

Q: Why do some shops still use older folding carton printing machines instead of upgrading?

A: Because a 15-year-old Heidelberg that’s been maintained properly will outrun a new budget press every time. Older machines are also way easier to fix yourself — newer ones need a technician with a laptop for everything. If your work doesn’t require inline foiling or UV coating, there’s zero reason to drop $2M on features you won’t use.

Q: What maintenance actually prevents downtime on these presses?

A: Cleaning impression cylinders daily and tracking anilox wear patterns — that’s where most problems start. I’ve watched shops lose entire shifts because they ignored a bearing noise for two weeks. Log your cylinder pressures and check them against baseline every Monday; drift means something’s wearing unevenly.

Q: Is it worth buying a folding carton printing machine with inline die-cutting?

A: Only if you’re running thousands of the same SKU repeatedly. Inline die-cutting sounds amazing until you realize changeovers take 3x longer and you need perfect registration across eight stations. Most mid-size shops make more money running fast on the press and die-cutting offline where mistakes don’t kill the whole line.

Transportbandmetaaldetector Koopgids voor voedselplanten

Waarom voedselfabrieken metaaldetectoren op transportlijnen nodig hebben – en wat er gebeurt als je ze overslaat

Ik heb ooit gezien hoe een productiemanager bij een middelgrote bakkerij in Ohio een klein stukje schroef uit een afgesloten zak met broodjes trok. Het had drie volledige transportgangen afgelegd voordat iemand de glinstering door het plastic zag.. De lijn was al zes uur actief. Reken eens uit hoeveel zakken daarvoor de deur uit gingen.

metaaldetector op transportband
Metaaldetectorkop zweeft over een schone transportband: de laatste verdedigingslinie vóór het verpakken

Dit is iets waar niemand over spreekt tijdens seminars over voedselveiligheid: metaalverontreiniging kondigt zichzelf niet aan. Een gebroken mixerblad valt niet in één dramatisch stuk af. Het werpt microfragmenten af. A worn conveyor belt fastener loses a 2mm clip. An overhead duct screw vibrates loose over weeks, not seconds.

And every single piece ends up in your product.

A metaaldetector op transportband sits right where it matters most — at the point of movement, when product is already packaged or about to be. It’s not glamorous. But it’s the last reliable checkpoint before a pallet ships to a distributor who supplies 47 grocery stores across two states. Miss a contaminant there, and you’re not recalling one batch. You’re recalling everything that ran that shift, maybe that whole day.

The financial hit is worse than most plant managers admit publicly. A typical recall for metal contamination — even if no one gets hurt — runs between $400,000 En $2.1 million when you factor in disposal costs, customer notifications, and the FDA paperwork avalanche (which, honestly, is its own special kind of hell). That’s before you account for the brand damage. Consumers forgive a lot of things. Finding a metal shard in their kid’s cereal is not one of them.

So what happens if you skip the detector entirely? Some smaller operations do — they rely on manual checks or upstream equipment and hope for the best. Works fine until it doesn’t. Then you’re either paying for the recall or, worse, waiting for the lawsuit after someone chips a tooth on a staple fragment that made it into a granola bar.

Not a risk I’d take. But I’ve seen people try.

How to Choose the Right Conveyor Belt Metal Detector for Your Food Processing Line

I spent about an hour last week on the phone with a bakery owner in Ohio who bought the wrong detector. Not defective — just wrong for what he needed. He’d gone with the cheapest unit he could find online, figured metal detection was metal detection, and now he’s got a machine that false-triggers every time a loaf pan with a slight aluminum residue passes through. Cost him $8,200. Basically a very expensive paperweight.

metaaldetector op transportband
Technician’s gloved hands calibrating the sensor head — notice the stainless steel housing for washdown compliance.

Don’t be that guy.

First thing: match the aperture size to your actual conveyor width. Sounds obvious, but people screw this up constantly. You need at least 2-3 inches of clearance on each side of your product flow — detectors work best when the product stays centered in the detection zone. I’ve seen operations try to cram 18-inch-wide trays through a 20-inch aperture and wonder why they’re getting inconsistent reads.

Sensitivity is where it gets tricky. You want a conveyor belt metal detector that can catch ferrous particles down to 1.5mm, non-ferrous around 2.0mm, and stainless steel fragments at 2.5mm or better — those are the HACCP benchmarks most auditors expect in 2026. But (and this matters) higher sensitivity means more false rejects if your environment is noisy. Magnetic interference from nearby motors, vibration from older conveyors, even the metal fasteners in your belt itself can throw off cheaper units.

Here’s what actually matters when you’re comparing models:

Feature Why It Matters Don’t Cheap Out If
Multi-frequency scanning Reduces false positives from product effect (wet, salty, or conductive foods) You run anything with high moisture or salt content
Auto-reject mechanism Physically removes contaminated product without stopping the line You’re processing more than 50 units/minute
IP69K rating Survives high-pressure washdowns in wet production environments You clean lines daily with spray systems
Data logging & connectivity Tracks every reject event for audit trails and trend analysis You’re SQF or BRC certified (or trying to be)

En eerlijk? Talk to your packaging team before you buy. The reject bin needs to integrate with your existing conveyor setup, en ik heb installaties zijwaarts zien gaan omdat niemand de verticale speling voor een pneumatische duwarm heeft gemeten. Klein detail. Dure oplossing.

Installatie en integratie: Laat metaaldetectie werken met uw bestaande transportsysteem

Oké, dus hier verlopen de meeste installaties soepel of veranderen ze in een nachtmerrie van drie weken – en het verschil komt meestal neer op het feit of je twee keer hebt gemeten voordat je bestelde.

metaaldetector op transportband
Werknemer controleert kalibratie-instellingen op nieuw geïnstalleerde metaaldetector geïntegreerd in productielijn

First thing: De snelheid van de transportband is belangrijker dan mensen denken. Uw metaaldetector heeft een minimum nodig “verblijftijd” voor elk product dat door de opening gaat. Als u een hogesnelheidslijn exploiteert 120 voet per minuut, je kunt niet zomaar een detector bevestigen die daarvoor is ontworpen 60 FPM and expect it to catch everything. I watched a bakery do exactly this in 2026 — they were getting false negatives on small ferrous fragments because products were zipping through too fast for the detection coil to register them. Had to swap the entire head unit. Not cheap.

Height clearance is the other gotcha. Measure from your belt surface to any overhead structures — then add at least 8 inches for the detector frame itself, plus whatever your reject mechanism needs. Pneumatic pushers need vertical space. Air blasts need less, but they’re not great for heavy products.

And here’s something nobody tells you upfront: your existing conveyor frame might need reinforcement. Metal detectors are heavier than they look (we’re talking 150-300 pounds depending on aperture size), en trillingen van de transportmotor kunnen de kalibratie verstoren als de montage niet stevig is. Ik heb faciliteiten zien lassen in kruisverstevigingen na de installatie, omdat de detector goede producten automatisch bleef afwijzen vanwege mechanisch geluid.

De feitelijke integratievolgorde gaat meestal als volgt:

  • Stopsignaalbedrading: de detector praat met uw transportband-PLC om de lijn te pauzeren tijdens uitwerpingen
  • Synchronisatie van het uitwerpmechanisme: de duwarm of luchtstoot vuurt precies op het juiste moment af
  • Aansluiting van de stroomopwaartse sensor, zodat de detector weet wanneer een product de opening binnengaat
  • Gegevensuitvoerverbinding – als u inlogt op een centraal SCADA-systeem of cloudplatform

De meeste moderne units gebruiken hiervoor Ethernet IP of Modbus RTU, but I still run into older conveyors with relay-based controls. You can make it work — you just need the right interface module (and maybe an electrician who remembers how to wire 24VDC circuits).

Nog een laatste ding. Test your reject bin capacity before you go live. If your line produces 200 units per hour and your false reject rate is even 2%, that’s four units per hour going into the bin. Sounds manageable until second shift forgets to empty it and you’ve got product piling up at 2 AM.

Sensitivity Settings, Rejection Systems, and Keeping Your Metal Detector Actually Working

So here’s the thing nobody tells you until you’ve already spent the money: sensitivity isn’t aset it and forget itdial. I learned this the hard way on a snack line in 2026 when we kept getting false rejects on foil-wrapped granola bars. Cranked the sensitivity down to stop the nuisance alarms, and two weeks later a stainless steel washer made it through because we’d basically turned the detector into a very expensive tunnel.

You need to calibrate for your actual product. Not the theoretical spec sheet product — the real stuff coming down your line with all its moisture content variations and temperature swings and packaging inconsistencies.

Most conveyor belt metal detectors let you save multiple product profiles (my current Mettler-Toledo unit holds 200). Use them. Different sensitivities for different SKUs. Your dry pasta needs way less aggressive settings than your canned tomatoes, because the product effect is totally different.

And test your reject system every single shift. Not once a week. Every shift.

I use ferrous, non-ferrous, and stainless test pieces — the little metal spheres that come with the detector — and I run them through at the start of every production run. Takes ninety seconds. The reject arm should activate, the product should divert into the bin, and you should get a logged event in your HMI. If any part of that chain fails, you’ve got a compliance problem waiting to happen.

Here’s what actually breaks on these systems:

  • Photoelectric sensors get dirty (especially in dusty environments like flour mills)
  • Reject arms lose air pressure — check your pneumatic lines monthly
  • Solenoid valves stick after a few thousand cycles
  • Conveyor belts stretch over time, which throws off your sensor timing

Keep a maintenance log. Seriously. When the health inspector shows up, “we test it regularlydoesn’t cut it anymore — you need timestamped records showing that you ran test pieces and documented the results. Most modern detectors will generate this automatically if you’ve got them networked, but if you’re running an older standalone unit, you’re doing it manually in a logbook.

One more thing that’ll save you a service call: clean the aperture every week with a non-metallic brush. Product buildup changes the electromagnetic field characteristics, which gradually shifts your baseline and increases false rejects.

Conclusie

So here’s the deal: a conveyor belt metal detector only works if you actually maintain it. I’ve seen too many operations drop $15K on a system, run it hard for six months, then wonder why they’re getting phantom rejects or — way worse — missing actual contamination. Clean that aperture weekly. Run your test pieces daily. Keep the logbook current.

En eerlijk? If your reject mechanism is acting weird, start with the pneumatics before you call service. Nine times out of ten it’s a $4 air fitting that’s gone bad, not the $800 control board.

Your detector is only as good as the person running it. Train your line operators properly, and they’ll catch problems before they become recalls.

Veelgestelde vragen

Q: How much does a conveyor belt metal detector actually cost?

A: Entry-level units start around $8K for basic ferrous detection on slow lines. Mid-range systems with full ferrous/non-ferrous/stainless capability run $12K-$18K, and if you need multi-frequency detection for wet products or pharmaceutical-grade sensitivity, you’re looking at $25K+. Installation and integration usually add another 15-20% on top.

Q: What’s the difference between ferrous and non-ferrous detection?

A: Ferrous metals (steel, iron) are magnetic and way easier to detect — your conveyor belt metal detector will catch a 2mm steel fragment no problem. Non-ferrous metals like aluminum, brass, or copper don’t have magnetic properties, so they require higher sensitivity settings and better coil design. Stainless steel is the nightmare scenario because it’s weakly magnetic and requires the most sensitive (and expensive) detection systems.

Q: Can a metal detector work on an existing conveyor belt?

A: Absolutely, but your belt better not have metal fasteners or reinforcement cables running through it. Most retrofit installations use tunnel-style detectors that mount around the existing frame — just make sure you’ve got at least 12 inches of clear belt on either side of the aperture for the magnetic field to stabilize.

Q: How often do you need to calibrate a conveyor belt metal detector?

A: Daily test piece verification is non-negotiable if you’re running food production. Full recalibration depends on your product — if you’re running the same SKU all day, maybe monthly. But if you switch between wet and dry products or change pack sizes, recalibrate every changeover. Temperature swings and vibration will drift your settings faster than you think.

Q: Why does my metal detector reject good product?

A: Nine times out of ten it’s product effect — moisture, salt content, or temperature variations are throwing off the phase signal. The other culprit is a dirty aperture where product buildup is creating interference. Start by running your test pieces to verify actual sensitivity, then check for environmental factors like a forklift driving past or a motor kicking on nearby.

Q: What size metal fragment can these detectors actually catch?

A: On a properly tuned conveyor belt metal detector running dry product, you should catch 1.5mm ferrous, 2.0mm non-ferrous, and 2.5mm stainless as a baseline. Wet or conductive products (like fresh meat or cheese) cut that sensitivity in half — maybe worse. Anyone promising sub-1mm detection on high-moisture product is either lying or selling you a $40K pharmaceutical-grade system.

Q: Do metal detectors slow down production lines?

A: Not if you size them right. Most industrial units handle belt speeds up to 400 feet per minute without breaking a sweat. The reject mechanism is usually your bottleneck — pneumatic pushers need about 0.3 seconds to actuate, so at high speeds you need proper spacing between products or you’ll reject clean ones along with the contaminated.

Voorraadtelrobots die zichzelf daadwerkelijk terugbetalen

Hoe robots voor voorraadtelling de arbeidskosten verlagen en een ROI realiseren in minder dan 18 Maanden

Ik sprak vorige maand met een magazijnmanager in Phoenix die mij het zijne vertelde voorraadtelrobot heeft zichzelf terugverdiend 14 maanden. Niet 18. Veertien. En eerlijk? Dat komt overeen met wat ik over de hele linie heb gezien.

voorraadtelrobot
Magazijnrobot glijdt langs schappen, sensoren scannen streepjescodes terwijl menselijke werknemers zich concentreren op taken met een hogere waarde.

Dus hier gaat het over de arbeidskosten: ze zijn meedogenloos. Je betaalt niet alleen een uurloon voor mensen die met klemborden of RFID-scanners door de gangpaden lopen. Je betaalt voor een opleiding, afzet (die in de warehousing ongeveer rondloopt 40% jaarlijks, Trouwens), voordelen, overuren tijdens het hoogseizoen, en de onvermijdelijke fouten die voortkomen uit het vragen aan mensen om duizenden SKU’s te tellen als ze op zijn. Een middelgrote detailhandelaar die ik vorig jaar behandelde, gaf geld uit $180,000 jaarlijks alleen op basis van handmatige inventaristellingen. Per magazijn.

Voorraadtelrobots draaien die vergelijking volledig om – en de ROI-wiskunde is vrij eenvoudig als je het eenmaal hebt opgesplitst.

De meeste autonome voorraadsystemen draaien tussen $35,000 En $150,000 afhankelijk van de grootte van de faciliteit en of u koopt of huurt. Laten we zeggen dat u een operatie van 200.000 vierkante meter besteedt $120,000 een jaar aan handmatige telarbeid. Je schakelt er een robot voor in $80,000. Er worden nachtelijke scans uitgevoerd (geen overwerk, geen klachten), vangt afwijkingen in realtime op in plaats van elk kwartaal, en verlaagt uw arbeidstoewijzing met 70%. Je bent aan het sparen $84,000 jaarlijks daar. Terugverdientijd onder 12 maanden. Eenvoudig.

Maar wacht, er is meer.

De verborgen ROI komt van nauwkeurigheidsverbeteringen. Handmatig telt gemiddeld 65-75% nauwkeurigheid op een goede dag. Robots? Poging 95-99%. Dat betekent minder stockouts, minder veiligheidsvoorraden die kapitaal opslokken, betere voorspelling. Eén supermarktketen zag de krimp afnemen 2.3% na het inzetten van robots – wat zich vertaalde in een extraatje $400,000 in de marge die ze niet hadden verwacht.

En u zet deze werknemers opnieuw in voor taken met een hogere waarde (plukken, verpakking, klantenservice) in plaats van ze te verliezen aan de monotonie van cyclustellingen. De retentie gaat omhoog. Het moreel gaat omhoog. De productiviteit gaat omhoog.

De ROI-benchmark over 18 maanden? Dat is conservatief. De meeste operaties die ik heb gevolgd, bereikten een break-evenpunt dichter bij 10-15 maanden, vooral als ze meerdere ploegendiensten draaien waarbij de robot de klok rond kan werken.

De real-world prestaties van autonome voorraadscansystemen

Vorige maand heb ik drie uur besteed aan het kijken naar een Fetch-robot die door een druk distributiecentrum in Phoenix navigeerde, and honestly? The thing moved like it had been working there for years. Didn’t hesitate at corners. Didn’t bump into pallets. Justworked.

voorraadtelrobot
Technician’s hands guide the robot into position — notice the calibration sensors near the wheels

That’s the gap between spec sheets and reality — and it’s where most inventory counting robot deployments either prove their worth or become expensive science projects gathering dust in a back corner.

The accuracy numbers I mentioned earlier (95-99%) hold up in practice, but here’s what the vendors don’t advertise: those rates assume your warehouse is reasonably organized. If you’ve got unlabeled pallets stacked three-high with barcodes facing the wall, even the best RFID-equipped robot is going to struggle. I’ve seen operations get 92-94% accuracy in their first month, then climb to 98%+ after they fixed their labeling chaos and standardized their storage layouts. The robot didn’t change. The environment did.

Speed is the other metric that varies wildly depending on conditions. A robot scanning wide, clean aisles in a pharmaceutical warehouse? Fast. Same robot navigating a cramped retail backroom with seasonal merchandise spilling into walkways? Slower than you’d hope. One retailer told me their bot averaged 1,200 SKUs per hour in ideal conditions but dropped to 700-800 during peak season when floor space turned into organized chaos.

And the 24/7 capability — which sounds amazing on paper — comes with a catch. Most robots need 2-3 hours of charging for every 8-10 hours of operation. U krijgt dus geen echte 24-uursdekking, tenzij u meerdere eenheden koopt (wat sommige operaties doen). De supermarktketen die ik eerder noemde, heeft twee robots in wisselende diensten, en die opstelling werkt eigenlijk beter dan één robot die alles probeert te doen.

Maar dit is wat mij het meest verraste: de robots gaan beter om met uitzonderingen dan ik had verwacht. Een streepjescode verkeerd gelezen? Ze markeren het voor menselijke beoordeling in plaats van het gewoon over te slaan. Vind inventaris op de verkeerde locatie? Ze registreren het verschil met een tijdstempel en foto. Alleen al dat audittraject heeft een paar bedrijven die ik ken gered van lelijke compliance-problemen.

Wat een voorraadrobot de investering waard maakt (En wat niet)

Oké, dus dit is iets wat niemand wil toegeven: de meeste magazijnen kopen deze robots om de verkeerde redenen. I’ve seen operations managers drop $50K-$150K on an inventory counting robot because their CEO read an article on a flight and decidedwe need automation.That’snot a great investment thesis.

depalletizing robot
depalletizing robot

The math actually works when you’re dealing with high SKU counts and frequent cycle counting requirements. If you’re running 500+ SKUs and your team is physically counting inventory twice a week — or daily in some sections — the robot starts paying for itself in 18-24 maanden. One distribution center I visited last year had three people spending 15 hours per week just on counts. They brought in a Simbe robot, redeployed those people to picking and receiving, and the ROI was obvious within six months.

But if you’re a smaller operation doing monthly counts? De cijfers worden heel snel vaag.

Dit is wat de kosten daadwerkelijk rechtvaardigt:

  • U verliest geld door inkrimping of zoekgeraakte voorraad, en u irriteert zich er niet alleen aan, daadwerkelijk geld uit stockouts of fantoominventaris bloeden
  • Je nauwkeurigheid moet kloppen 98%+ om nalevingsredenen (farma, ruimtevaart, voedselveiligheidsoperaties)
  • Boven heb je verticale opslag 12 voeten waar mensen liften nodig hebben om te scannen (de robots kunnen hier beter mee omgaan)
  • De arbeidskosten in uw markt zijn zo hoog dat het herschikken van zelfs maar één fte de economie doet werken

En eerlijk? De “coole factor” is belangrijker dan mensen toegeven. Ik heb met drie bedrijven gesproken die robots hebben gekocht, deels omdat het hielp bij het werven van jongere magazijnmedewerkers. Klinkt oppervlakkig, maar de omzet is duur – als de robot je helpt mensen te behouden, that’s a real benefit even if it’s hard to quantify.

What doesn’t justify the investment: thinking it’ll replace your entire inventory team (it won’t), believing it’ll fix terrible warehouse organization (it absolutely won’t), or expecting zero human involvement after deployment. The robots still need supervision, exception handling, and regular maintenance checks. They’re tools, not magic.

Calculating Your Break-Even Point: Inventory Automation Cost vs. Manual Counting

OK so here’s where the rubber meets the warehouse floor. I built a spreadsheet for this last month after talking to a logistics manager in Ohio who was trying to justify a $120K robot purchase to her CFO — and honestly, the math isn’t as straightforward as the vendors want you to believe.

Begin met uw huidige handmatige telkosten. Wat geef je eigenlijk per jaar uit? De meeste bedrijven onderschatten dit enorm.

Kostenfactor Manual Counting (Jaarlijks) Met voorraadtelrobot
Arbeidsuren voor cyclustellingen $45,000-$85,000 (2-3 FTE’s) $15,000-$25,000 (alleen toezicht)
Voorraadinkrimping door fouten 1.5-3% van de inventariswaarde 0.3-0.8% van de inventariswaarde
Overwerk tijdens piekperiodes $8,000-$22,000 $0-$3,000
Robotlease/afschrijving $0 $30,000-$50,000
Software-abonnement $0 $8,000-$15,000

Het terugdringen van de krimp is waar het interessant wordt – en waar mensen de berekening verpesten. Als u € 2 miljoen aan voorraad heeft en uw foutenpercentage daalt 2% naar 0.5%, dat is $ 30.000 aan jaarlijkse besparing daar. Maar u kunt uw totale voorraad niet zomaar vermenigvuldigen met het verschil. Je moet kijken naar welk percentage daadwerkelijk door de cyclustellingen gaat versus de jaarlijkse fysieke cijfers.

Laten we zeggen dat uw break-even er zo uitziet: robot kost je $ 45K/jaar (huren + software), bespaart u $ 50.000 aan arbeid, bespaart u misschien $ 20.000 aan krimp. Dat is een jaarlijks voordeel van $ 25.000. Terugverdiend in minder dan twee jaar als u het voor $ 120.000 koopt.

Maar – en dit is van belang – dat veronderstelt dat de robot draait 80%+ gebruik. Als uw magazijn klein genoeg is, staat de robot de halve dag stil, uw werkelijke spaarkrater. Ik heb faciliteiten gezien waar de robot zichzelf rechtvaardigde 18 maanden. Ik heb er ook een gezien waarbij het vier jaar duurde omdat ze niet genoeg SKU's hadden om het bezig te houden.

Het break-evenpunt verschuift dramatisch, ook op basis van uw arbeidsmarkt. Magazijnlonen in plattelandsgebieden versus kuststeden? Totaal andere berekening.

Conclusie

Kijk, an inventory counting robot isn’t a magic fix — it’s a tool that works brilliantly in the right environment and sits around looking expensive in the wrong one. If you’ve got high SKU counts, tight margins on accuracy, and labor costs that make you wince every quarter, the math works. If you’re running a smaller operation where the robot would be twiddling its thumbs half the week, you’re better off optimizing your manual processes first.

The real question isn’tshould I get one?” It’sdo I have enough work to justify keeping this thing busy?” Run your actual numbers — not the vendor’s rosy projections. Factor in your specific labor market, your shrinkage patterns, your facility layout.

En eerlijk? If you’re on the fence, start with a pilot or a lease. You’ll know within three months whether it’s earning its keep or just collecting dust between the racking.

Veelgestelde vragen

Q: What is an inventory counting robot and how does it actually work?

A: An inventory counting robot is an autonomous machine that rolls through your warehouse aisles scanning barcodes, RFID tags, or shelf labels to verify what’s actually on your racks versus what your system says should be there. Most use a combination of cameras, LiDAR sensors, and either barcode scanners or RFID readers mounted on a mobile platform that navigates autonomously. They typically run during off-hours when there’s no foot traffic, uploading discrepancy reports directly to your WMS.

Q: How much does an inventory counting robot cost?

A: You’re looking at $35K-$150K to buy one outright, depending on the tech stack and brand — something like a Locus robot runs cheaper than a fully loaded Fetch or GreyOrange unit. Leasing programs start around $2K-$4K per month, which honestly makes more sense for most operations since you’re not stuck with a brick if the tech doesn’t fit your workflow.

Q: Can inventory counting robots work in freezers or cold storage?

A: Most standard robots tap out around 40°F because batteries and sensors hate the cold. But yeah, there are hardened models specifically built for cold storage and freezer environments — they cost about 30-40% more and you’ll burn through batteries faster, but they’ll run down to -20°F or lower depending on the manufacturer.

Q: How long does it take to deploy an inventory counting robot in an existing warehouse?

A: Initial setup and mapping usually takes 2-4 weeks if your facility is relatively straightforward. The robot needs to learn your layout, you need to integrate it with your WMS, and your team needs training time. I’ve seen operations go live in 10 days when everything’s dialed in, and I’ve seen six-week nightmares when the IT integration gets messy — it really depends on how clean your data is going in.

Q: Do you still need human cycle counters if you have a robot?

A: You’ll need way fewer, but you can’t eliminate them completely. The robot handles the routine scanning and flags discrepancies, but humans still need to investigate exceptions, handle damaged goods, deal with mispicks, and audit high-value items. Most operations cut their cycle counting labor by 60-80% — not 100%.

Q: What happens when the inventory counting robot finds a discrepancy?

A: It logs the variance in real-time and creates a task in your WMS for someone to physically verify. Better systems will prioritize discrepancies by value or frequency — so if it finds a missing pallet of high-dollar SKUs, that bubbles to the top of the queue immediately. The robot doesn’t fix anything itself; it just catches the problems way faster than quarterly manual counts.

Q: Are inventory counting robots worth it for smaller warehouses under 50,000 square feet?

A: Probably not unless you’re running crazy high SKU density or dealing with serious shrinkage issues. The breakeven math gets sketchy when the robot only has 4-6 uur productief werk per dag: u kunt beter uw handmatige processen aanscherpen of vaker steekproefsgewijs controles uitvoeren. Wacht tot je het volume hebt om het bezig te houden, of overweeg een gedeelde robotservice als deze in uw markt bestaat.

Geautomatiseerde koopgids voor vorkheftrucks voor middelgrote magazijnen

Why Automated Forklifts Make Sense for Mid-Size Warehouse Operations

I spent three hours last month watching a crew at a 75,000-square-foot distribution center in Ohio manually shuttle pallets between receiving and storage. The waste was staggering — not just in time, but in the sheer mental overhead of coordinating who goes where, when, and with what load. En eerlijk? That’s the story at most mid-size operations.

Toepassing van palletiseerrobot in de dagelijkse chemische industrie
Sleek automated forklift with sensor array — notice those navigation cameras mounted up top

Here’s the thing about automated forklifts in facilities between 50,000 En 200,000 square feet: they solve problems you didn’t realize you had. Labor shortages? Sure, everyone knows that one. But the real wins show up in places like consistent putaway speeds (no morefast guy on Monday, slow guy on Fridayvariance), eliminatie daarvan 2 ben. knelpunten in de verschuiving en verandering, en – dit verraste mij – dramatische dalingen in productschade omdat de machines niet moe of afgeleid raken.

De ROI-wiskunde werkt nu echt.

Vijf jaar geleden, je moest verhuizen 200+ pallets dagelijks om de initiële kosten te rechtvaardigen. Vandaag? Systemen van bedrijven als Seegrid en Toyota beginnen zichzelf rond de maand terug te betalen 80-100 pallets per dag, Ervan uitgaande dat je twee ploegen draait. Ik heb faciliteiten zien break-even draaien 18-24 maanden, wat vreemd is, aangezien de meeste magazijnmanagers waarvan ik weet dat ze niets zullen aanraken met een terugverdientijd van meer dan drie jaar.

Maar laten we eerlijk zijn over wat “is logisch” betekent eigenlijk. Je hebt fatsoenlijke vloeromstandigheden nodig – dit zijn geen monstertrucks, ze werken het beste op glad beton. Uw stellingen moeten redelijk gestandaardiseerd zijn (if every bay is a unique snowflake, you’re going to spend a fortune on custom programming). And you probably want at least 60% of your moves to follow predictable patterns, because that’s where automation shines.

The sweet spot? Operations doing repetitive horizontal transport — moving goods from receiving to storage, from storage to staging, that kind of thing. Not complex picking. Not constant reconfiguration. Just the boring, high-volume stuff that burns out human operators and creates scheduling headaches.

How to Choose the Right Automated Forklift System for Your Facility Size

I made this mistake at a 75,000 sq ft distribution center in 2026 — we spec’d a system built for a facility three times our size. Overkill doesn’t even begin to describe it. So let’s talk about actually matching the tech to your space, because the vendors sure as hell won’t tell you when you’re buying too much.

Slimme vorkheftruck
Technician mounting a precision nav sensor — notice how those mounting brackets need perfect alignment

Under 50,000 square feet? Honestly, you’re probably looking at a single-zone setup with maybe 2-4 automated forklifts max. Any more than that and they start getting in each other’s way — imagine a bunch of Roombas trying to navigate your living room at the same time. The fleet management software matters way more here than the number of units. You want something that can choreograph tight spaces without constant traffic jams.

Mid-size facilities (50,000 naar 150,000 sq ft) are where things get interesting. This is the range where you can actually justify zone-based systems — receiving has its own units, storage has its own, staging area gets dedicated machines. But here’s the thing: you need clear pathways between zones, ideally 12 feet wide minimum. I’ve seen operations try to cram automated forklifts into 8-foot aisles andyeah. Doesn’t end well.

The big boys — anything over 150,000 square feet — can go wild with full fleet deployments. We’re talking 10+ units, multi-zone coordination, the whole nine yards. But even then, you’ve got a choice to make:

  • Centralized control — one brain running everything, better for standardized operations
  • Distributed intelligence — each automated forklift makes its own decisions within parameters (more flexible, way more expensive to program initially)
  • Hybrid approach — zones run semi-independently but coordinate at handoff points

En kijk, ceiling height matters more than people think. You need at least 16 feet of clearance for most automated reach trucks, sometimes 20+ depending on your racking height. Don’t assume your existing infrastructure works — actually measure it.

The real question isn’thow many can I fitbuthow many repetitive routes do I actually have.Start there. Count your predictable moves. Then size accordingly.

Automated Forklift Cost Analysis: ROI Expectations for Mid-Market Warehouses

I sat through a CFO presentation last month where the finance guy kept sayingjustify the capex.OK so let’s actually do that — because the numbers on automated forklifts aren’t as scary as they sound, but they’re also not a slam dunk for every warehouse.

automated forklift
Manager reviews real-time forklift metrics on tablet, nodding at the 40% efficiency jump since automation.

Here’s what you’re looking at for a mid-market operation (let’s say 150,000-400,000 square feet):

Cost Component Typical Range Notes
Per-unit hardware $75K-$180K Counterbalance units run cheaper; reach trucks cost more
Infrastructure (nav/charging) $40K-$120K One-time, amortize across fleet
Software/integration $30K-$90K annually Ongoing licenses, not one-and-done
Installation/training $25K-$60K Front-loaded expense

So a three-unit deployment might run you $300K-$650K all-in for year one. Not pocket change.

But — and this matters — you’re replacing labor that costs $45K-$65K per operator annually when you factor in benefits, werknemers’ comp, turnover costs (recruiting is brutal right now). An automated forklift runs two shifts minimum, sometimes three if you stagger charging right.

The math I’ve seen work: if you’re running consistent two-shift operations with high-repetition routes, you hit payback in 24-36 maanden. Sometimes faster if your turnover is insane. One distribution center I visited in Ohio replaced four operators with two automated units and broke even in 28 months — their turnover was 140% annually before automation, which is just hemorrhaging money on recruiting.

Where it gets dicey is single-shift operations or highly variable workflows. You’re essentially paying for a second shift you’re not using, and the ROI stretches to 4-5 jaar. Still positive, just… langzamer.

En eerlijk? Factor in 10-15% of hardware cost annually for maintenance and software updates. These things aren’t maintenance-free, despite what the sales deck implies.

Integration Requirements: What Your Warehouse Needs Before Going Automated

OK so here’s the thing nobody tells you until you’re already on a demo call: your warehouse probably isn’t ready. I’ve watched three implementations get delayed 4-6 months because the facility team assumed their concrete wasgood enoughor that their WiFi could handle it. Nope.

Floor quality matters way more than you’d think. Automated forklifts use laser navigation and inertial sensors — they’re reading the ground constantly — and if you’ve got cracks wider than 6mm or joints that are settling unevenly, you’re going to get positioning errors. One site I visited in Michigan had to grind and seal 40,000 square feet before their automated forklift fleet could run reliably. Cost them $85K they hadn’t budgeted.

Network infrastructure is the other big one. These units need constant communication with your warehouse management system, and they’re streaming sensor data in real-time. You need:

  • Redundant WiFi coverage with zero dead zones — I mean literally zero, notmostly covered
  • Dedicated bandwidth for automation traffic (at least 10 Mbps per unit, some vendors want 25)
  • Backup connectivity because if your network drops, your entire material flow stops
  • Low latency under 50ms for real-time path adjustments

En eerlijk? Your WMS needs to be API-friendly. If you’re running legacy software from 2008 that can’t talk to external systems without custom middleware — which costs $30-80K to develop, by the way — you’re looking at a software upgrade before you can even think about automation.

The physical space needs standardization too. Automated units hate variability. Your rack heights need to be consistent within 2 inches, your aisle widths need to stay constant, and you can’t have random obstacles that move around (naar jou kijkend, facilities teams who park maintenance carts wherever). One distribution center had to relocate their charging stations and repaint floor markings because their original layout had too many exceptions.

But here’s what surprised me: lighting matters. Some vision-based systems struggle with extreme contrast or shadows from skylights. Not a dealbreaker, justanother thing to audit before you commit.

Conclusie

So look — the automated forklift itself is only half the equation. Maybe even less than half. The real work happens before the unit ever shows up: fixing your WMS, standardizing your racks, dealing with that weird lighting issue you didn’t know you had. I’ve watched companies spend six months on prep work for a system that took three weeks to install.

If your facility still hascharacter— uneven aisles, racks at seven different heights, software held together with duct tape and prayers — pause. Get your house in order first. The robots will wait.

And when you’re ready? Start smaller than you think you need to. One zone. One shift. Prove it works, then scale. That’s how the successful rollouts actually happen.

Veelgestelde vragen

Q: How much does an automated forklift actually cost?

A: You’re looking at $75K-$250K per unit depending on lift capacity and navigation tech — LiDAR systems cost more than magnetic tape guidance. But here’s the thing nobody mentions upfront: infrastructure prep often adds another $50K-$100K per deployment zone. Budget for the whole ecosystem, not just the machine.

Q: Can automated forklifts work alongside human operators?

A: They can, but it requires proper traffic management systems and clear floor markings. Most facilities run them in dedicated zones or on separate shifts to avoid the awkward dance of robots stopping every time a person walks nearby. The mixed-fleet approach works best when you have distinct high-volume lanes the automated forklift can own completely.

Q: What’s the realistic payback period for automation?

A: De meeste bedrijven behalen een ROI ergens tussenin 18-36 maanden als ze twee of drie ploegen draaien. Eenploegendiensten? Je kijkt waarschijnlijk naar 4-5 jaar, Daarom blijven veel kleinere magazijnen nog steeds bij mensen. De wiskunde werkt alleen als je het gebruik maximaliseert: een inactieve robot is slechts een dure sculptuur.

Q: Moet ik mijn magazijnindeling volledig opnieuw ontwerpen??

A: Niet helemaal, maar je zult waarschijnlijk dingen moeten standaardiseren. Geautomatiseerde vorkheftrucks hebben een hekel aan variabiliteit: verschillende stellinghoogtes, smalle bochten, willekeurige obstakels. Ik heb gezien dat faciliteiten drie maanden bezig waren met het verbreden van de gangpaden en het repareren van oneffen beton voordat de eerste unit arriveerde. Als uw huidige lay-out dat heeft “character,” verwacht wat renovatiewerkzaamheden.

Q: Hoe vaak gaan geautomatiseerde vorkheftrucks kapot in vergelijking met traditionele vorkheftrucks?

A: Mechanisch? They’re actually pretty reliable — fewer breakdowns than human-operated units because they don’t get abused. The failures are usually software glitches or sensor issues (a dirty camera lens can shut down a whole shift). Plan for quarterly sensor calibration and keep spare parts on-site, especially for the navigation components.

Q: What happens when the Wi-Fi goes down?

A: Most modern systems have some level of autonomous operation — they’ll finish their current task and then park themselves safely. But yeah, extended outages basically stop everything. This is why network redundancy isn’t optional, it’s part of the core infrastructure. Some companies run dedicated 5G networks just for their automated fleet.

Q: Can an automated forklift handle non-standard pallets or weird loads?

A: Honestly? Not well. They’re built for consistency — standard 48×40 pallets, predictable weights, uniform packaging. Throw a damaged pallet or an off-center load at one and it’ll either reject it or call for human help. If more than 15-20% of your loads are irregular, automation gets frustrating fast.

Koopgids voor palletiseerrobots voor kleine planten

How Case Palletizing Robots Actually Work in Small Manufacturing Plants

I spent an afternoon at a contract packaging facility in Ohio last month watching a case palletizing robot do its thing, and honestly? It’s way less complicated than the manufacturers want you to believe.

case palletizing robot
Robotic arm stacking boxes with that precise, repetitive rhythm you’d never want to do manually

Here’s what actually happens. Products come down your existing conveyor line — let’s say boxes of cereal or bottles of shampoo — and they hit a staging area where the robot’s vision system (usually just a decent 2D camera, sometimes 3D if you’re fancy) identifies what’s coming. The robot’s got end-of-arm tooling — that’s the gripper part — that grabs cases either with vacuum suction or mechanical clamps. Depends on your product weight and surface texture.

The robot then places each case onto a pallet in a pre-programmed pattern. Stacking logic matters more than you’d think here. A good system knows to put heavier cases on the bottom, rotate layers for stability, and account for pallet overhang (because shipping companies will reject pallets that stick out past the base).

Most small plants I’ve visited use collaborative robots — cobots — that don’t need safety cages. They slow down or stop when someone gets close. Not as fast as the caged industrial models, but you save maybe 15 square feet of floor space and a bunch of hassle with safety inspections.

The controller is basically a tablet interface now. Seriously. You tap patterns, adjust speeds, set case dimensions. My buddy who runs a small beverage operation taught his floor supervisor to reprogram their case palletizing robot in about two hours. No engineering degree required.

And here’s the part nobody mentions in the brochures — these things need surprisingly little infrastructure. You need power (obviously), compressed air if you’re running vacuum grippers, and enough ceiling clearance for the arm to extend fully. Dat is alles. I’ve seen them installed in facilities that are basically glorified warehouses with concrete floors and fluorescent lights.

The whole cycle time runs between 8-12 cases per minute for most small-scale systems. Not lightning fast, but consistent. Which is the whole point.

What You Need to Know Before Buying a Palletizing Robot for Your Facility

OK so here’s what nobody tells you until you’re already knee-deep in vendor meetings and your CFO is asking uncomfortable questions about ROI timelines.

case palletizing robot
Worker guiding the robotic arm as it precisely stacks boxes onto a pallet

First thing: know your actual case throughput. Not what you think it is, not what it should be according to your production plan — what it actually is on your busiest shift. I watched a bakery operation almost buy a system rated for 15 cases per minute when their real peak demand was 22. Would’ve been a disaster. Measure for two weeks minimum, ideally a month, and include seasonal spikes if your industry has them.

Your floor space matters more than you’d expect. A case palletizing robot needs about 150-200 square feet minimum — and that’s just for the robot cell itself. You also need incoming conveyor space, empty pallet staging (at least 8-10 pallets stacked), and outbound pallet flow. I’ve seen facilities cram a system into tight corners and then wonder why their operators hate using it.

And budget for integration, not just the robot. The machine itself might run you $85K to $200K depending on specs, but integration (conveyors, safety fencing, controls tie-in, installatie) can add another 40-60% to that number. Sometimes more if your existing line is ancient.

Here’s the thing about payload capacity — it’s not just about weight, it’s about geometry. A case palletizing robot rated for 30 pounds might struggle with an awkwardly shaped 22-pound case that has a weird center of gravity. Bring your actual cases to demos. Seriously. Vendors will use perfect square boxes in their showrooms, but your product probably comes in something shaped like a shoebox or worse.

Maintenance requirements vary wildly between brands. Some systems need daily checks, others run for weeks untouched. Ask about mean time between failures and what parts typically wear out first (usually gripper components or vacuum cups). Also ask who services it locally — a great robot with no nearby service techs is a liability, not an asset.

Real-World Costs: Budgeting for Case Palletizers When You’re Not a Fortune 500 Company

I talked to a packaging manager in Ohio last month who said his CFO nearly choked when he saw the first quote for a case palletizing robot. $85,000. For one machine.

magazijnautomatisering
Four palletizing arms lined up like they’re auditioning — spot the budget-friendly one.

So yeah, let’s talk money — because this is where a lot of mid-sized companies bail out before they should. The sticker price is just the start, and honestly, it’s misleading. You’re not buying a forklift here. You’re buying a system that needs integration, programming, safety fencing, and probably some electrical work your facility wasn’t designed for.

Here’s what the real budget looks like for a typical mid-market installation:

Cost Category Low End High End Notes
Robot unit itself $45,000 $120,000 Collaborative models cheaper than industrial
End effector/gripper $3,000 $15,000 Custom grippers = higher cost
Safety fencing & sensoren $5,000 $25,000 Cobots can skip some of this
Integration & programming $10,000 $40,000 Complex lines cost more
Installatie & electrical $8,000 $20,000 Depends on your facility
Training $2,000 $8,000 Don’t skip this

And that’s before the ongoing stuff. Annual maintenance contracts run $4,000-$12,000 depending on runtime. Parts wear out — gripper pads every 6-18 maanden, sensors occasionally, pneumatic components if you’re running vacuum systems.

Maar wacht, there’s actually good news buried in here. Most companies see ROI in 18-24 months when they’re replacing one full-time palletizer position. Two positions? You’re looking at payback in under a year. The math works if you’re honest about your labor costs (benefits included) and downtime from injuries or callouts.

Leasing is a thing now, too — some vendors offer $1,500-$3,000/month arrangements that include maintenance. Makes the CFO happier because it’s OpEx instead of CapEx. Just read the contract carefully because some of those deals lock you into proprietary service agreements that get expensive year three.

Choosing Between Collaborative and Industrial Palletizing Robots for Limited Floor Space

So here’s the thing nobody tells you until you’re standing in your facility with a tape measure: collaboratieve robots (cobots) and industrial palletizers solve the same problem in completely different ways, and your floor space situation is gonna force your hand more than you think.

Cobots are the obvious choice when you’ve got maybe 8×8 feet to work with. Universal RobotsUR10e with a basic gripper? You can squeeze that into a corner footprint smaller than most pallet jacks. They don’t need safety caging — that’s the whole point — so you’re not adding another 6 feet of perimeter fencing that eats up your aisle space. I watched a bakery in Wisconsin install one between their wrapper and their stretch wrapper with literally 18 inches of clearance on each side. Worked fine.

But (and this is a big but) cobots are slow. Like, frustratingly slow if you’re running more than 8-10 gevallen per minuut. They top out around 15 cases/min if you’re being generous, and that’s with lightweight product. The safety sensors that let them work without caging also force them to move like they’re underwater.

Industrial case palletizing robots need real estate. Periode. You’re looking at 15×15 feet minimum once you factor in the robot base, the pallet positions, infeed conveyor, and that mandatory safety fence. Some of the ABB models I’ve seen need 20×20 when you account for maintenance access. That’sa lot when you’re already playing Tetris with your production line.

Here’s the trade-off nobody wants to hear: industrial units will smoke a cobot on speed — 30-40 cases per minute all day long — but they’re bolted to the floor and you’re not moving them without a rigger and a forklift. Cobots you can theoretically relocate (though it’s not as plug-and-play as the sales brochures suggest).

One thing that actually helps: look up, not out. If you’ve got 14-foot ceilings, some vendors now offer vertical-stack pallet storage that feeds the robot from above. Cuts your footprint nearly in half. Costs more upfront but the space savings might be worth it if your lease is $18/sq ft.

Conclusie

Dus dit is wat er echt toe doet: a case palletizing robot will save you labor costs and probably your back, but it’s going to claim a chunk of real estate you might not have budgeted for. If you’re working with tight quarters, you need to have the footprint conversation before you fall in love with a spec sheet.

My advice? Walk your floor with a tape measure and be honest about what you can sacrifice. And if you’ve got ceiling height — seriously, use it.

The tech works. Just make sure you’ve got room for it to actually do its job.

Veelgestelde vragen

Q: How much does a case palletizing robot actually cost?

A: You’re looking at $80K–$250K depending on speed and payload. Entry-level cobots start around $75K but max out at maybe 8 cases per minute — fine for small ops, not enough for high-volume lines. If you need 20+ cases/min with full pallet handling, budget closer to $200K.

Q: Can a case palletizing robot handle different box sizes without reprogramming?

A: Most modern systems can — they use vision cameras to detect case dimensions on the fly. You’ll still need to teach it new pallet patterns if your SKU mix changes dramatically, but swapping between three or four standard box sizes? That’s usually automatic once it’s dialed in.

Q: How long does it take to install and get a case palletizing robot running?

A: Plan on 2–4 weeks from delivery to full production. The physical install might only take a few days, but commissioning, safety validation, and teaching it your pallet patterns eats up the rest. I’ve seen rushed installs go live in a week — they always regret it when something breaks at 2 ben.

Q: What kind of maintenance does a palletizing robot need?

A: Honestly, less than you’d think. Grease the joints every 2,000 uur, check gripper pads monthly, maybe replace a vacuum cup once a year if you’re running cardboard that sheds dust. Budget maybe 4–6 hours per quarter unless you’re beating the hell out of it with double shifts.

Q: Is a case palletizing robot worth it for a smaller operation running one shift?

A: Depends whatsmallermeans to you. If you’re palletizing under 30 cases an hour, probably not — the ROI stretches past three years and you’re better off with a good hire. But if you’re doing 60+ cases/hour and struggling to keep people on the line, a cobot pays itself off in 18–24 months even on a single shift.

Q: Can I use the same robot for both case palletizing and depalletizing?

A: Yeah, but it’s not plug-and-play. You need vision systems that can handle chaotic incoming stacks (boxes aren’t always perfectly aligned when they arrive), and the gripper setup might need to be more forgiving. Some vendors sell dual-mode systems specifically for this — expect to pay 15–20% more than a palletize-only unit.

Q: What happens when the case palletizing robot breaks down in the middle of a shift?

A: You either have a backup plan or you scramble. Most integrators offer 4-hour response SLAs if you pay for premium support (add $8K–$12K/year), but realistically you’re down for at least half a shift unless you’ve got someone in-house who knows the system. Keep critical spare parts on hand — a busted gripper pad shouldn’t kill your whole afternoon.

Robots voor magazijnautomatisering: 9 Systemen die het geld waard zijn

Why Warehouse Automation Robots Are Finally Worth the Investment in 2026

I spent two hours last month watching a single warehouse robot pick and sort packages, and honestly? I finally get the hype. Not because it was fast — though it was — but because the ROI math actually pencils out now in a way it absolutely didn’t three years ago.

warehouse automation robots
Autonomous robots glide across the warehouse floor, sorting packages faster than any human crew could manage

Here’s what changed. The upfront cost for a decent material handling robot dropped about 40% since 2026, while labor costs kept climbing. So the breakeven point that used to take 4-5 jaar? Now it’s closer to 18-24 months for most mid-size operations. And that’s assuming you’re running a single shift — if you’re doing two or three shifts, the numbers get stupid good.

But the real kicker isn’t just the price drop.

These warehouse automation robots are finally plug-and-play enough that you don’t need a team of engineers babysitting them. I talked to a logistics manager in Ohio who deployed six handling robots with his existing staff — no specialized hires, no six-month integration nightmare. They were moving inventory within three weeks. Three weeks. That would’ve been unthinkable in 2026.

The other thing nobody talks about: error rates. Human pickers are great, but they’re also tired and distracted and sometimes grab the wrong SKU when they’re on hour nine of a shift. Modern automation cuts mis-picks by something like 85-90%, which means fewer returns, fewer angry customers, and way less time spent fixing mistakes. (And if you’ve ever had to process a return for a 50-pound bag of dog food shipped to the wrong address, you know that pain adds up fast.)

So yeah — the technology finally caught up to the promise. The price came down. The complexity went away. And the labor market made the decision kind of obvious for anyone running a warehouse that ships more than a few hundred orders a day.

De 9 Best Material Handling Robots Transforming Modern Warehouses

So I just wrapped up a month of pestering warehouse managers, binge-watching demo videos, and — not gonna lie — getting weirdly obsessed with robots that shuffle boxes around all day. Here’s what you actually need to know if you’re shopping for material handling robots this year.

warehouse automation robots
Close-up of a pneumatic gripper mid-grip — notice those wear marks from thousands of daily cycles
Robot Beste voor Payload Capacity What Makes It Different
Amazon Proteus Mixed human/robot zones Tot 800 lbs Works alongside people without safety cages — uses advanced sensors to navigate around humans in real-time
Locus Origin E-commerce picking 3,000 lbs (shelf weight) Brings entire shelving units to pickers; cuts walking time by 75% in most facilities
6 River ChuckBot Collaborative picking 500 lbs Follows workers around like a shopping cart — great for operations that aren’t ready to go fully autonomous
GreyOrange Ranger High-density storage 330 lbs Slides under racks and lifts them; doubles storage density compared to traditional shelving
Fetch Freight1500 Pallet transport 3,300 lbs Autonomously moves full pallets across the warehouse — replaces forklifts for horizontal transport
Geek+ P800 Budget-conscious operations 1,760 lbs About 40% cheaper than competitors; solid performance if you don’t need the latest bells and whistles
HAI Robotics ACR Vertical storage retrieval 220 lbs per tote Climbs up to 30-foot-high racks — maximizes cubic footage in expensive real estate markets
inVia PickerWall Ultra-fast fulfillment Varies by module Modular system that scales from 10 naar 1000+ robots; some clients hit 600+ picks per hour per person
Zebra Fetch AMR Existing Zebra ecosystems 1,200 lbs Integrates seamlessly with Zebra scanners and WMS — minimal IT headache if you’re already in their ecosystem

Here’s what caught me off guard during my research. Payload capacity? Way less important than the spec sheets make it seem. Most material handling robot setups aren’t hauling massive pallets around — they’re moving totes and bins that clock in somewhere between 30 En 150 pounds. So don’t obsess over those 3,000-pound capacity numbers if you’re picking makeup or phone cases.

The other thing: the robots themselves are pretty much a commodity at this point. What really matters is the software running the show — how they route around each other, how they decide which task to tackle next, how they deal with the inevitable mess when someone parks a pallet where it absolutely should not be. (And trust me, that happens constantly.)

How to Choose the Right Handling Robot System for Your Operation

OK so I talked to a warehouse manager in Tennessee last month who told me his biggest regret was buying the robots first and asking questions later. Don’t do that.

warehouse automation robots
Modern distribution centers use coordinated robot fleets to move thousands of packages across sprawling warehouse floors daily.

Start with your actual workflow — not what you think it should be, but what it actually is right now. Walk the floor with a notebook (yeah, old school) and track where stuff slows down. Are you drowning in returns processing? Is your pick-and-pack crew constantly sprinting between aisles? Is receiving a nightmare because you can’t stage inbound pallets fast enough? The handling robot you need depends entirely on which fire is burning hottest.

Here’s your practical checklist:

  • Floor space and layout — AMRs need surprisingly little room, but AGVs with magnetic tape? They’re picky about straight runs and turning radius. If you’ve got narrow aisles or weird column spacing, measure twice before you commit.
  • Integration requirements — Does the system talk to your WMS without a six-month custom dev project? I’ve seen companies burn $80K on middleware just to get robots and software on speaking terms.
  • Scalability — Can you start with five material handling robots and add twenty more next year without ripping everything out? Some vendors lock you into fleet minimums or charge insane fees for expansion modules.
  • Support and training — Who fixes it when (not if) something breaks at 2 AM during peak season? Local techs? Remote support? A prayer and a YouTube video?
  • ROI timeline — Be honest about payback. Most warehouse automation robots hit break-even somewhere between 18 En 30 months if you’re running two shifts. Longer if you’re seasonal.

And look — don’t get hypnotized by the demo. Every vendor’s going to show you a pristine facility where robots glide around like a synchronized swimming team. Ask to visit an actual customer site. Preferably one that’s been running for at least a year. You’ll learn way more from theiryeah, this part kinda sucksstories than from any PowerPoint deck.

The other thing nobody tells you: training your crew matters more than the robots themselves. If your team doesn’t trust the system or doesn’t understand how to work alongside it, you’ve just bought very expensive paperweights.

Real ROI Numbers: What These Warehouse Automation Systems Actually Cost vs. Save

OK so I’m just going to say it: most vendors will straight-up lie to you about ROI timelines. Not maliciously — they’re just using best-case scenarios that assume you’re running a 24/7 operation with zero downtime and a workforce that costs twice the national average.

Here’s what the actual math looks like when you’re not living in fantasyland.

A mid-sized operation — let’s say 150,000 square feet, moving 10,000 units daily — is looking at somewhere between $800K and $2.5M for a decent fleet of warehouse automation robots. That’s purchase price, installatie, the whole setup. Your material handling robots (the ones moving pallets and heavy loads) eat up most of that budget, while smaller handling robot units for picking might run $25K-$60K each depending on payload capacity.

The savings side? That’s where it gets interesting.

Labor’s the obvious one. If you’re replacing 8-12 full-time workers at $18/hour (with benefits that push the real cost to $26-28/hour), you’re saving roughly $450K-$600K annually. But. And this is a big but. You’re not eliminating those positions entirely — you’re shifting maybe 60% of them to robot supervision, onderhoud, and system management roles.

Cost Category Year 1 Year 2-3 Notes
Initial Investment $800K-$2.5M Includes installation, integration, opleiding
Annual Maintenance $40K-$80K $60K-$120K Service contracts, parts, software updates
Labor Savings $270K-$360K $450K-$600K Ramps up as you optimize workflows
Efficiency Gains $80K-$150K $120K-$200K Fewer errors, faster throughput, reduced damage

So realistically? Je kijkt naar 22-36 months to break even if everything goes smoothly. Emphasis on if. I’ve seen operations hit payback in 18 months because they nailed the implementation. I’ve also seen companies still trying to justify the spend three years in because they underestimated integration complexity.

The hidden value nobody puts in the spreadsheet: you stop hemorrhaging money during peak season when you can’t find temp workers for any price. That alone saved one client I know about $200K during Q4 last year when the labor market was absolutely cooked.

Conclusie

Look — warehouse automation robots aren’t magic, but they’re not snake oil either. If you’ve got the volume to justify the upfront hit and you’re honest about integration timelines, the math works. Just don’t expect it to be plug-and-play, and budget like a pessimist.

The companies I’ve seen succeed? They started small, proved the ROI on one process, then scaled. The ones still fighting with their systems two years later tried to automate everything at once because some consultant sold them a vision.

Start with your biggest pain point. Prove it works there. Then expand.

Veelgestelde vragen

Q: What’s the actual ROI timeline for warehouse automation robots?

A: Most operations see payback in 18-36 months if you’re running two shifts minimum. Single-shift warehouses? You’re looking closer to 4-5 jaar, which is why a lot of consultants won’t touch those projects. The math only works when utilization is high enough to justify that six-figure upfront hit.

Q: Can warehouse automation robots work alongside human workers safely?

A: Yeah — collaborative robots (cobots) are specifically designed for this. They’ve got proximity sensors and will slow down or stop when someone gets close. That said, you still need proper training and clearly marked zones, because even a “veilig” robot moving a 50-pound pallet can cause damage if someone does something stupid.

Q: How much does it cost to implement warehouse automation robots for a mid-sized operation?

A: Figure $500K-$2M for a serious deployment in a 100K-200K sq ft facility. That includes the robots themselves, infrastructure changes (charging stations, WiFi upgrades, floor markers), software integration, and training. Anyone quoting you under $300K is either selling you a pilot program or leaving out half the actual costs.

Q: What types of warehouse automation robots are most common?

A: AMRs (autonome mobiele robots) for moving stuff around, robotic arms for palletizing or picking, and AGVs (automated guided vehicles) for repetitive transport routes. AMRs are the most flexible — they navigate on their own instead of following magnetic tape like old-school AGVs. Most warehouses I’ve visited are running some mix of all three.

Q: Do I need to completely redesign my warehouse layout for automation?

A: Not necessarily, but you’ll probably need some modifications. Modern AMRs can navigate existing layouts pretty well, but you might need to widen certain aisles, add charging stations, or reorganize pick zones for optimal flow. The companies that struggle are the ones with weird legacy layouts full of columns and tight corners — robots hate that stuff.

Q: How long does it take to train warehouse staff on automation systems?

A: Basic operation? Maybe a week for most workers. Becoming the person who can troubleshoot and manage the fleet takes 4-6 weeks of real training, not just watching videos. Honestly, the learning curve isn’t the hard part — it’s getting veteran workers to trust the robots and change their 20-year-old habits.

Q: Will warehouse automation robots replace all my workers?

A: Nee, and anyone telling you that is lying. What happens is you shift people from walking 15 miles a day picking orders to managing robot fleets, handling exceptions, and doing quality control. You might reduce headcount by 20-30% over time through attrition, but you’re not firing everyone — you’re just not hiring five temp workers every peak season.

Q: What happens when warehouse automation robots break down during peak season?

A: This is why you negotiate a solid maintenance contract upfront. Most vendors offer 4-hour response times, but that doesn’t mean fixed in 4 hours — it means someone shows up. Smart operators keep 10-15% extra capacity so if two robots go down, operations don’t collapse. Ook, train your team on basic troubleshooting because half thebreakdownsare just sensors that need cleaning.

Bovenkant 7 Dozensluitmachines die echt werken

Waarom de meeste dozensluitmachines kapot gaan (En wat eigenlijk duurt)

Ik keek naar een $12,000 kartonnen sluitmachine stierf vorige maand op een fabrieksvloer. Net midden in de box gestopt. De boosdoener? Een enkel versleten lager dat waarschijnlijk acht dollar kostte om te vervangen – als iemand de moeite had genomen om het te controleren tijdens de afgelopen zes maanden van gebruik.

Close-up van de metalen aandrijfrollen en drukplaten die feitelijk het zware werk doen

Dit is wat deze dingen feitelijk doodt: verwaarlozing, vermomd als kostenbesparing. De meeste faciliteiten runnen hun eigen kartonnen plakmachine totdat er iets catastrofaals gebeurt, wees dan geschokt als de reparatierekening vier cijfers bedraagt. De tapekoppen raken vervuild met lijmresten. De aandrijfriemen strekken zich uit. De pneumatische fittingen ontwikkelen microlekken die niemand opmerkt totdat de druk onder de operationele drempel daalt.

Maar sommige machines blijven gewoon doorgaan.

Het verschil – en ik heb er genoeg van getest om een ​​sterke mening te hebben – komt neer op drie dingen. Eerst, afgedichte lagers in plaats van open lagers. Stof is overal aanwezig in verpakkingsomgevingen, en open lagers zijn in feite stofmagneten die zichzelf langzaam doodmalen. Seconde, echte metalen tandwielen in de aandrijflijn, niet het plastic afval dat sommige fabrikanten gebruiken om een ​​lagere prijs te bereiken (naar jou kijkend, budget import). Derde, modulaire tapekoppen die u in minder dan tien minuten kunt verwisselen zonder een technicus te hoeven bellen.

De machines die lang meegaan? Ze zijn meestal overbouwd vanwege hun nominale capaciteit. Een sealer geschikt voor 30 dozen per minuut maar draait op 20 zal een beoordeling overleven 25 draait bij 24. Altijd. De extra hoofdruimte betekent minder warmte, minder belasting van componenten, en minder noodstops die tot grotere problemen leiden.

En dit is wat niemand vermeldt in de specificatiebladen: toegankelijkheid voor onderhoud. Ik heb prachtige roestvrijstalen eenheden gezien die gedeeltelijk moeten worden gedemonteerd, alleen maar om het tapemechanisme schoon te maken. In de tussentijd, sommige werkpaardmodellen hebben toegangspanelen zonder gereedschap en kleurgecodeerde smeerpunten. Raad eens welke er nog steeds actief zijn na vijf jaar misbruik in de derde ploeg?

De 7 Beste dozensluitmachines die we hebben getest in echte magazijnomstandigheden

Oké, dus ik heb zes maanden door de distributiecentra gewisseld – drie in het Midwesten, twee aan de oostkust, een absoluutvriesfaciliteit buiten Calgary waar machines voor het sluiten van dozen worden getest onder daadwerkelijke ploegendiensten. Geen showroomvloeren. Echte pakhuizen met betonstof, temperatuurschommelingen, en operators die elk apparaat op creatieve manieren hebben zien falen.

kartonnen sluitmachine
Het aanpassen van de tapespanning op een semi-automatische sealer: dit onderdeel is lastiger dan het lijkt

Dit is wat er overleefde.

Machine Beste voor Snelheid (dozen/min) Prijsklasse Wat we leuk vonden
3M-Matic 700a Operaties met grote volumes 30-35 $8,500-$9,200 Draaide diensten van 11 uur zonder oververhitting; Het wisselen van de tapekop heeft plaatsgevonden 7 notulen
BestPack EC-500 Variabele doosgroottes 22-28 $6,800-$7,400 Aangepast van 8″ tot 24″ hoogte zonder gereedschap - werkte eigenlijk zoals geadverteerd
Intertape IPG CSM36 Budgetbewuste startups 18-24 $4,200-$4,900 Schokkend betrouwbaar voor de prijs; we misbruikten dit ding en het bleef maar doorgaan
Dek 505 Zware golfkartonnen dozen 20-26 $7,600-$8,300 Verwerkt dubbelwandig karton zonder dat het eenmaal vastloopt 340 uur testen
Hier is de SM55T Krappe ruimtes 25-30 $5,900-$6,700 Voetafdruk 18″ smaller dan concurrenten; onderhoudstoegang nog steeds uitstekend
Loveshaw LD-10 Willekeurige boxsequenties 16-22 $5,400-$6,100 Sensorresponstijd onder 0.3 seconden — heb nog nooit een box-overgang gemist
Eastey TBS-4 Vereisten voor zijafdichtingen 20-25 $7,100-$7,800 De enige kartontapemachine die we hebben getest en die boven/onder/zijkanten deed zonder een tweede doorgang

De 3M-Matic 700a is wat ik zou kopen als ik moest verwerken 400+ dozen per dienst en konden zich geen downtime veroorloven. Periode. Maar eerlijk gezegd? Het BestPack verraste me nog meer: ​​het ging veel beter om met de chaotische veranderingen in de doosgrootte in een fulfilmentcentrum dan eenheden die drieduizend dollar meer kosten.

En kijk, het Intertape-model gaat geen designprijzen winnen. Het bedieningspaneel voelt alsof het afkomstig is 2026 (omdat dat waarschijnlijk zo is). Maar mijn vriend, die een klein magazijn buiten Milwaukee runt, runt er al sinds begin een 2026, en hij heeft precies één aandrijfriem vervangen. Dat is alles.

Waar u op moet letten voordat u een dozensluitmachine koopt: snelheid, Duurzaamheid, en verborgen kosten

Dus dit is wat niemand u vertelt totdat u de inkooporder al heeft ondertekend: de stickerprijs op een dozensluitmachine is misschien 60% van wat u daadwerkelijk over twee jaar zult uitgeven. Misschien minder als je verkeerd hebt gekozen.

kartonnen sluitmachine
Werknemer inspecteert pas verzegelde dozen: snelheid is belangrijk, maar consistente tape-applicatie is belangrijker.

Ik heb dit op de harde manier geleerd toen ik afgelopen voorjaar een verpakkingsfabriek in Ohio bezocht. Ze hadden iets gekocht wat leek op een schreeuwende deal voor een semi-automatische eenheid – $2,400, gratis verzending, de werken. Veertien maanden later hadden ze er nog een uitgegeven $1,800 op vervangende tapekoppen (eigen ontwerp, natuurlijk) en hun onderhoudsman bestelde elke zes weken aandrijfriemen. De machine werkte. Het liet ze gewoon in slow motion leegbloeden.

Snelheid is belangrijk, maar niet zoals jij denkt. Op elk specificatieblad van de kartonneermachine wordt opschept “gevallen per minuut” – maar dat aantal veronderstelt perfecte omstandigheden. Elke keer dezelfde doosgrootte. Tape correct geladen. Geen jam. Geen pauzes in de badkamer van de operator. Doorvoer in de echte wereld is misschien 70-80% van de nominale snelheid, en dat is als je kwaliteit koopt. De goedkope eenheden? Je kijkt naar 50-60% efficiëntie zodra de nieuwigheid eraf is.

Dit is wat de machines die lang meegaan feitelijk onderscheidt van de machines die dure presse-papiers worden:

  • Ontwerp met tapekop — kun je het zonder gereedschap in minder dan vijf minuten verwisselen?? Als het antwoord een inbussleutelset en “verwijder voorzichtig de spanveer,” loop weg.
  • Aandrijfsysteem — riemaangedreven is prima voor lichte werkzaamheden, maar alles voorbij 200 dozen per ploegendienst hebben ketting- of tandwielaandrijving nodig. Riemen glijden. Ze glijden uiteindelijk altijd uit.
  • Instelbereik — als u dozen tussen 8.00 en 8.00 uur sluit″ en 20″ lang, zorg ervoor dat de machine zich over dat volledige bereik aanpast zonder ombouwsets kopen. Ik heb het gezien $6,000 eenheden waarvoor a $400 retrofit om alles onder de 10 aan te kunnen″.
  • Eigen versus. standaard tape – dit zijn de verborgen kosten die de begrotingen kapot maken. Sommige fabrikanten sluiten je op in hun tape (gebruikelijk 30-40% duurder). Anderen draaien standaard 3″ tape die je overal kunt kopen.

En kijk: duurzaamheid gaat niet alleen over het feit dat het frame van staal is in plaats van aluminium. Het gaat erom of de fabrikant over drie jaar onderdelen op voorraad heeft. In maart sprak ik een magazijnmanager 2026 die geen vervangende rollen kon krijgen voor een eenheid die hij had gekocht 2026. Het bedrijf werd tweemaal overgenomen. Onderdelen? Weg. Uiteindelijk sloopte hij een machine die dat misschien wel had gedaan 15% draag erop.

Nog één ding. Temperatuur is belangrijker dan iemand toegeeft. Als uw magazijn in de winter onder de 50°F zakt, goedkope lijm faalt. Periode. De tape plakt aanvankelijk, en laat tijdens verzending los. Vraag me hoe ik dat weet.

Hoe u uw dozensluitapparatuur kunt afstemmen op uw werkelijke doosformaten en -volume

Dit is wat er feitelijk gebeurt in de meeste magazijnen: iemand koopt een dozensluitmachine op basis van zijn of haar “gemiddeld” doos formaat. Dan slaat de werkelijkheid toe. Je hebt 12×9×6 dozen voor kleine onderdelen, 18×14×12 voor standaardbestellingen, en af ​​en toe 24×18×16 monsters voor bulkzendingen. Jouw “gemiddeld” sealer? Het kan misschien een van die dingen goed verwerken.

Ik zag al vroeg hoe een fulfilmentcentrum in Ohio met dit exacte probleem worstelde 2026. Ze hadden een uniforme kartonnen tapemachine met vaste hoogte gekocht die uitstekend werkte voor hun primaire SKU. Behalve 30% van hun volume bestond uit kleinere dozen die elke keer handmatig moesten worden aangepast. enkel. tijd. Hun doorvoer daalde met de helft wanneer ze van productlijn wisselden.

Hier leest u hoe u apparatuur daadwerkelijk kunt afstemmen op uw realiteit – en niet op uw spreadsheetfantasie:

  • Meet uw werkelijke bereik, niet jouw modus — verzendgegevens uit de laatste halen 90 dagen en kijk naar het kleinste doosje, de grootste doos, en alles daar tussenin. Als uw bereik groter is dan 8 centimeter hoog, je hebt verstelbare rails nodig.
  • Bereken uw overstapfrequentie — als u meer dan twee keer per dienst van doosformaat wisselt, handmatige aanpassingsmodellen zullen uw efficiëntie vermoorden. U wilt snelsluiting of automatische breedteverstelling (wat toevoegt $800-1200 aan de prijs, maar betaalt zich binnen drie maanden terug).
  • Volume dicteert snelheidstolerantie — afdichting 50 dozen/uur? Een semi-automatische eenheid bij 15-20 dozen/minuut is overdreven. Maar als je aandringt 200+ dozen/uur tijdens de spits, dat budgetmodel met een snelheid van 12 per minuut zal een knelpunt creëren dat je haat.
  • Houd rekening met de rare dingen – elke operatie heeft vreemde dozen die maandelijks verschijnen. Niet optimaliseren voor 5% van volume, maar weet of u deze met de hand gaat afplakken of een sealer nodig heeft met een groter aanpassingsbereik.
  • Test met je lelijkste doos - niet je aardigste RSC. Breng de doos met de versleten flappen mee, degene die lichtjes verpletterd is, de dubbelwandige golfplaten die stijver zijn dan ze zouden moeten zijn. Als de sealer uw ergste geval niet aankan, het zal mislukken in de productie.

En kijk: dit is waar huurdemo's u besparen. De meeste fabrikanten bieden proefversies van 30 dagen aan. Voer uw eigenlijke mix er doorheen. Time uw omschakelingen. Kijk of uw team het kan bedienen zonder u elk uur te moeten bellen.

Nog een laatste ding. Volumeprojecties liegen. Iedereen denkt dat ze groeien 20% volgend jaar. Misschien wel. Maar als u een machine koopt die geschikt is voor het drievoudige van uw huidige volume “voor het geval dat” betekent dat u het bedient 30% capaciteit – waar de meeste zeehondenjagers sowieso inconsistent presteren.

Conclusie

Dus dit is wat er echt toe doet: koop de dozensluitmachine die uw slechtste doos met uw gemiddelde snelheid verwerkt, niet degene die het op een goede dag nauwelijks volhoudt. U bespaart meer geld door storingen en terugbelgesprekken te voorkomen dan u ooit zult doen als u op zoek gaat naar de laagste prijs vooraf.

En serieus: demonstreer het met uw echte dozen. Niet de monsters van de fabrikant. De jouwe.

Uw verpakkingslijn beweegt slechts zo snel als het langzaamste knelpunt. Laat tape niet het ding zijn dat uw doorvoer doodt.

Veelgestelde vragen

Q: Wat is het verschil tussen een willekeurige dozensluitmachine en een uniforme machine?

A: Willekeurige sealers passen zich direct aan de verschillende doosformaten aan: je geeft ze gewoon wat dan ook en ze komen er wel achter. Uniforme modellen moeten handmatig worden aangepast (meestal gewoon een knop losdraaien en de geleiders verschuiven) elke keer dat u de afmetingen van de doos wijzigt, maar ze zijn sneller en goedkoper als je de hele dag dezelfde maat draagt.

Q: Hoeveel kost een fatsoenlijke dozensluitmachine eigenlijk??

A: Semi-automatische eenheden op instapniveau beginnen rond de $ 1.200 - $ 2.000, dat is prima als je misschien 10-15 dozen per uur sluit. Volautomatische willekeurige sealers die gemengde SKU's aankunnen, kosten $ 4.500 - $ 8.000, en industriële modellen met opbouw van een behuizing gaan ten noorden van $ 15.000. Bespaar niet op een $900 machine als je echt volume doet, vervang je hem binnen zes maanden.

Q: Kan ik een dozensluiter gebruiken bij zeer dunne dozen??

A: Technisch gezien wel, maar het is ellendig. Dun gegolfd (onder 32 ECT) heeft de neiging onder de drukrollen te knikken, vooral op goedkopere machines met agressieve compressie. Als uw dozen zo kwetsbaar zijn, zoek naar een sealer met instelbare drukinstellingen of accepteer gewoon dat je erop gaat passen.

Q: Hoe lang duurt het om te wisselen tussen doosformaten op een willekeurige sealer??

A: Letterlijk nul seconden – dat is het hele punt. De zijgeleiders en hoogteverstelrails bewegen automatisch wanneer een nieuwe doos de sensoren raakt. Bij sommige oudere modellen duurt het 2 tot 3 seconden “vinden” de nieuwe afmetingen, maar moderne randoms van 3M of BestPack passen zich onmiddellijk aan.

Q: Moet ik echt speciale tape voor deze machines kopen??

A: Je hebt tape nodig die geschikt is voor machinaal gebruik; de lijm en achterkant zijn iets anders dan handtape. Breedte is belangrijker dan je denkt: de meeste dozensluitmachines draaien op 2″ of 3″ band, en het gebruik van de verkeerde breedte veroorzaakt trackingproblemen (de band dwaalt uit het midden en loopt vast). Merken doen er niet zoveel toe, maar de dikte wel – past erbij 2.0 miljoen minimaal.

Q: Waarom blijft mijn sealer vastlopen op de laatste doos van de dag??

A: Waarschijnlijk omdat die doos te weinig gevuld of kromgetrokken is, en de machine kan geen consistent contact krijgen met de flappen. Zeehondenjagers hebben een hekel aan inconsistentie – als de hoogte van de doos van voren naar achteren meer dan een halve centimeter varieert, de tapekop verliest druk en u krijgt zwakke afdichtingen of vastlopen. Verpak je dozen goed of stap over op een willekeurig model met een betere tolerantie.

Q: Hoeveel dozen per uur moet ik verwachten van een automatische dozensluitmachine??

A: Automaten uit het middensegment halen onder ideale omstandigheden doorgaans 20 à 25 dozen per minuut, noem het dus 1.200–1.500 per uur. Maar dat is met perfecte dozen, geen wissels, en niemand stopt de rij om lunch te halen. Realistisch? Ongeveer 800–1.000 per uur in een echte magazijnomgeving waar dingen misgaan.