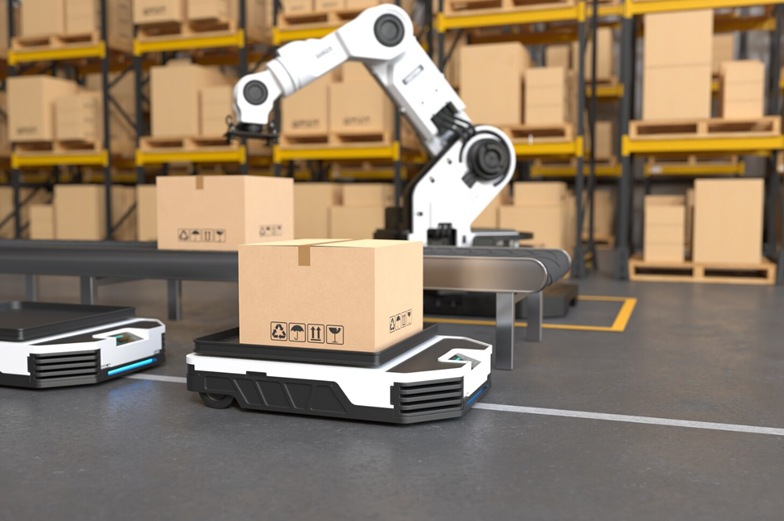
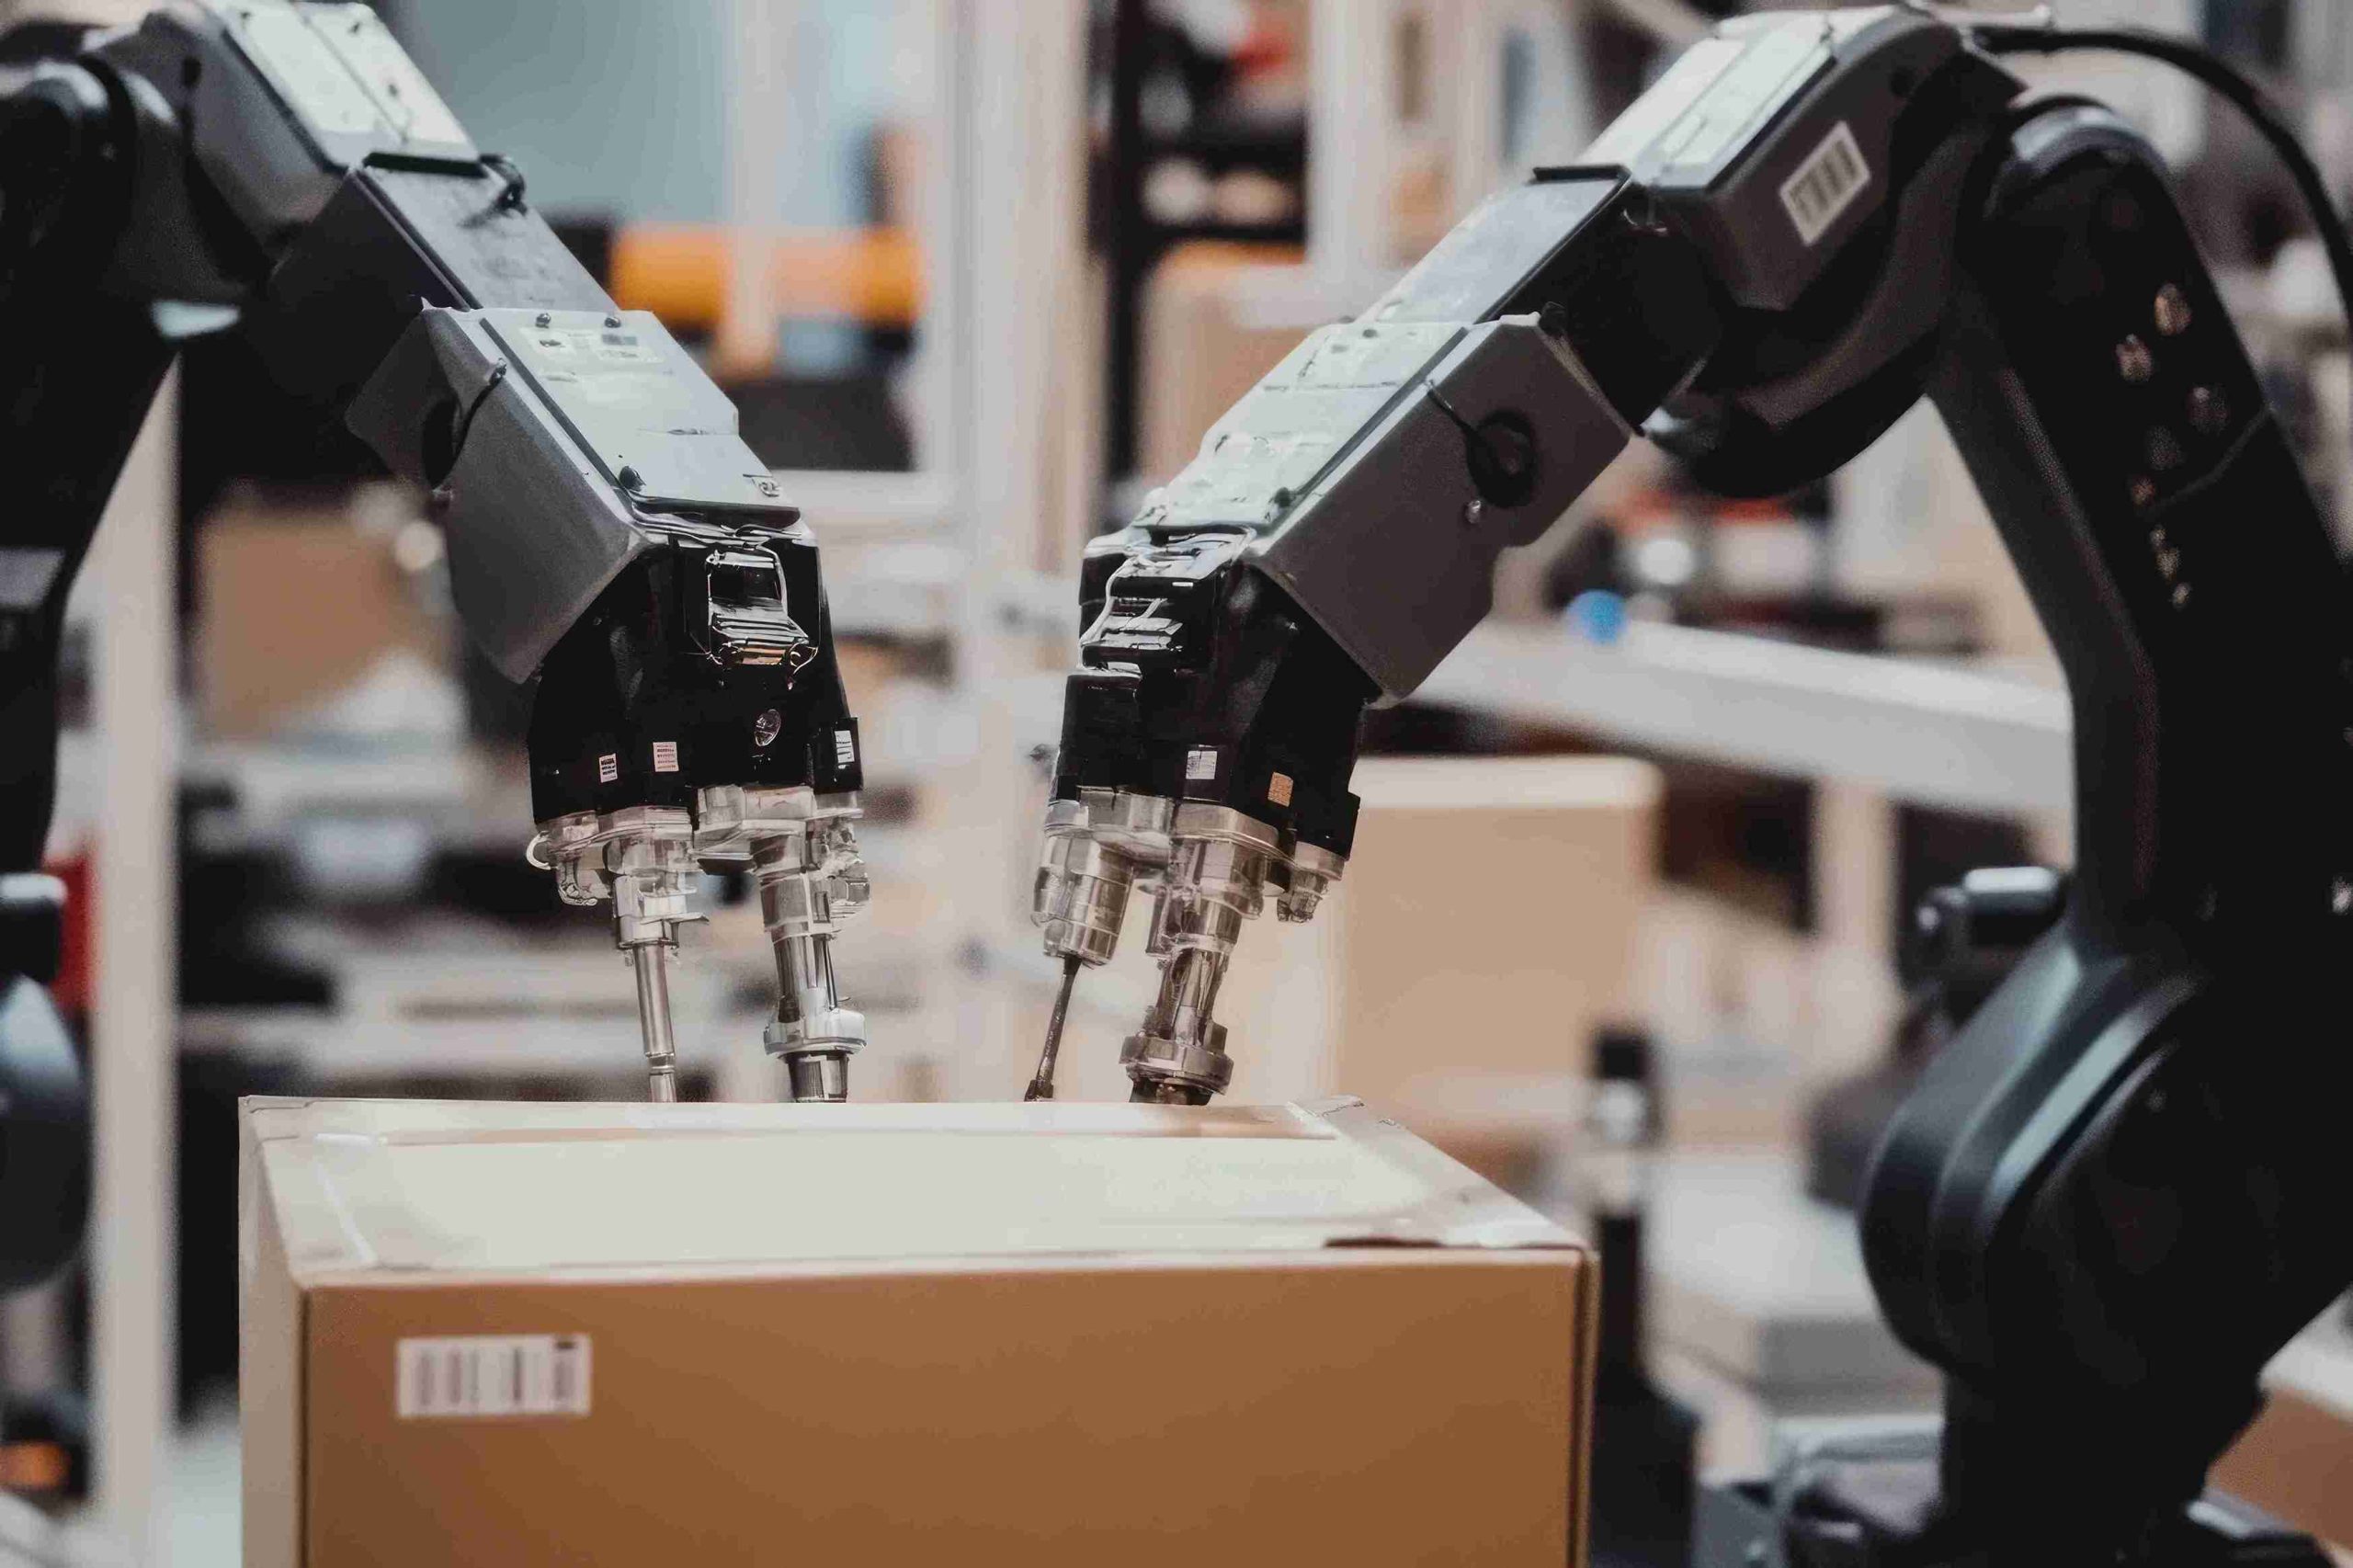
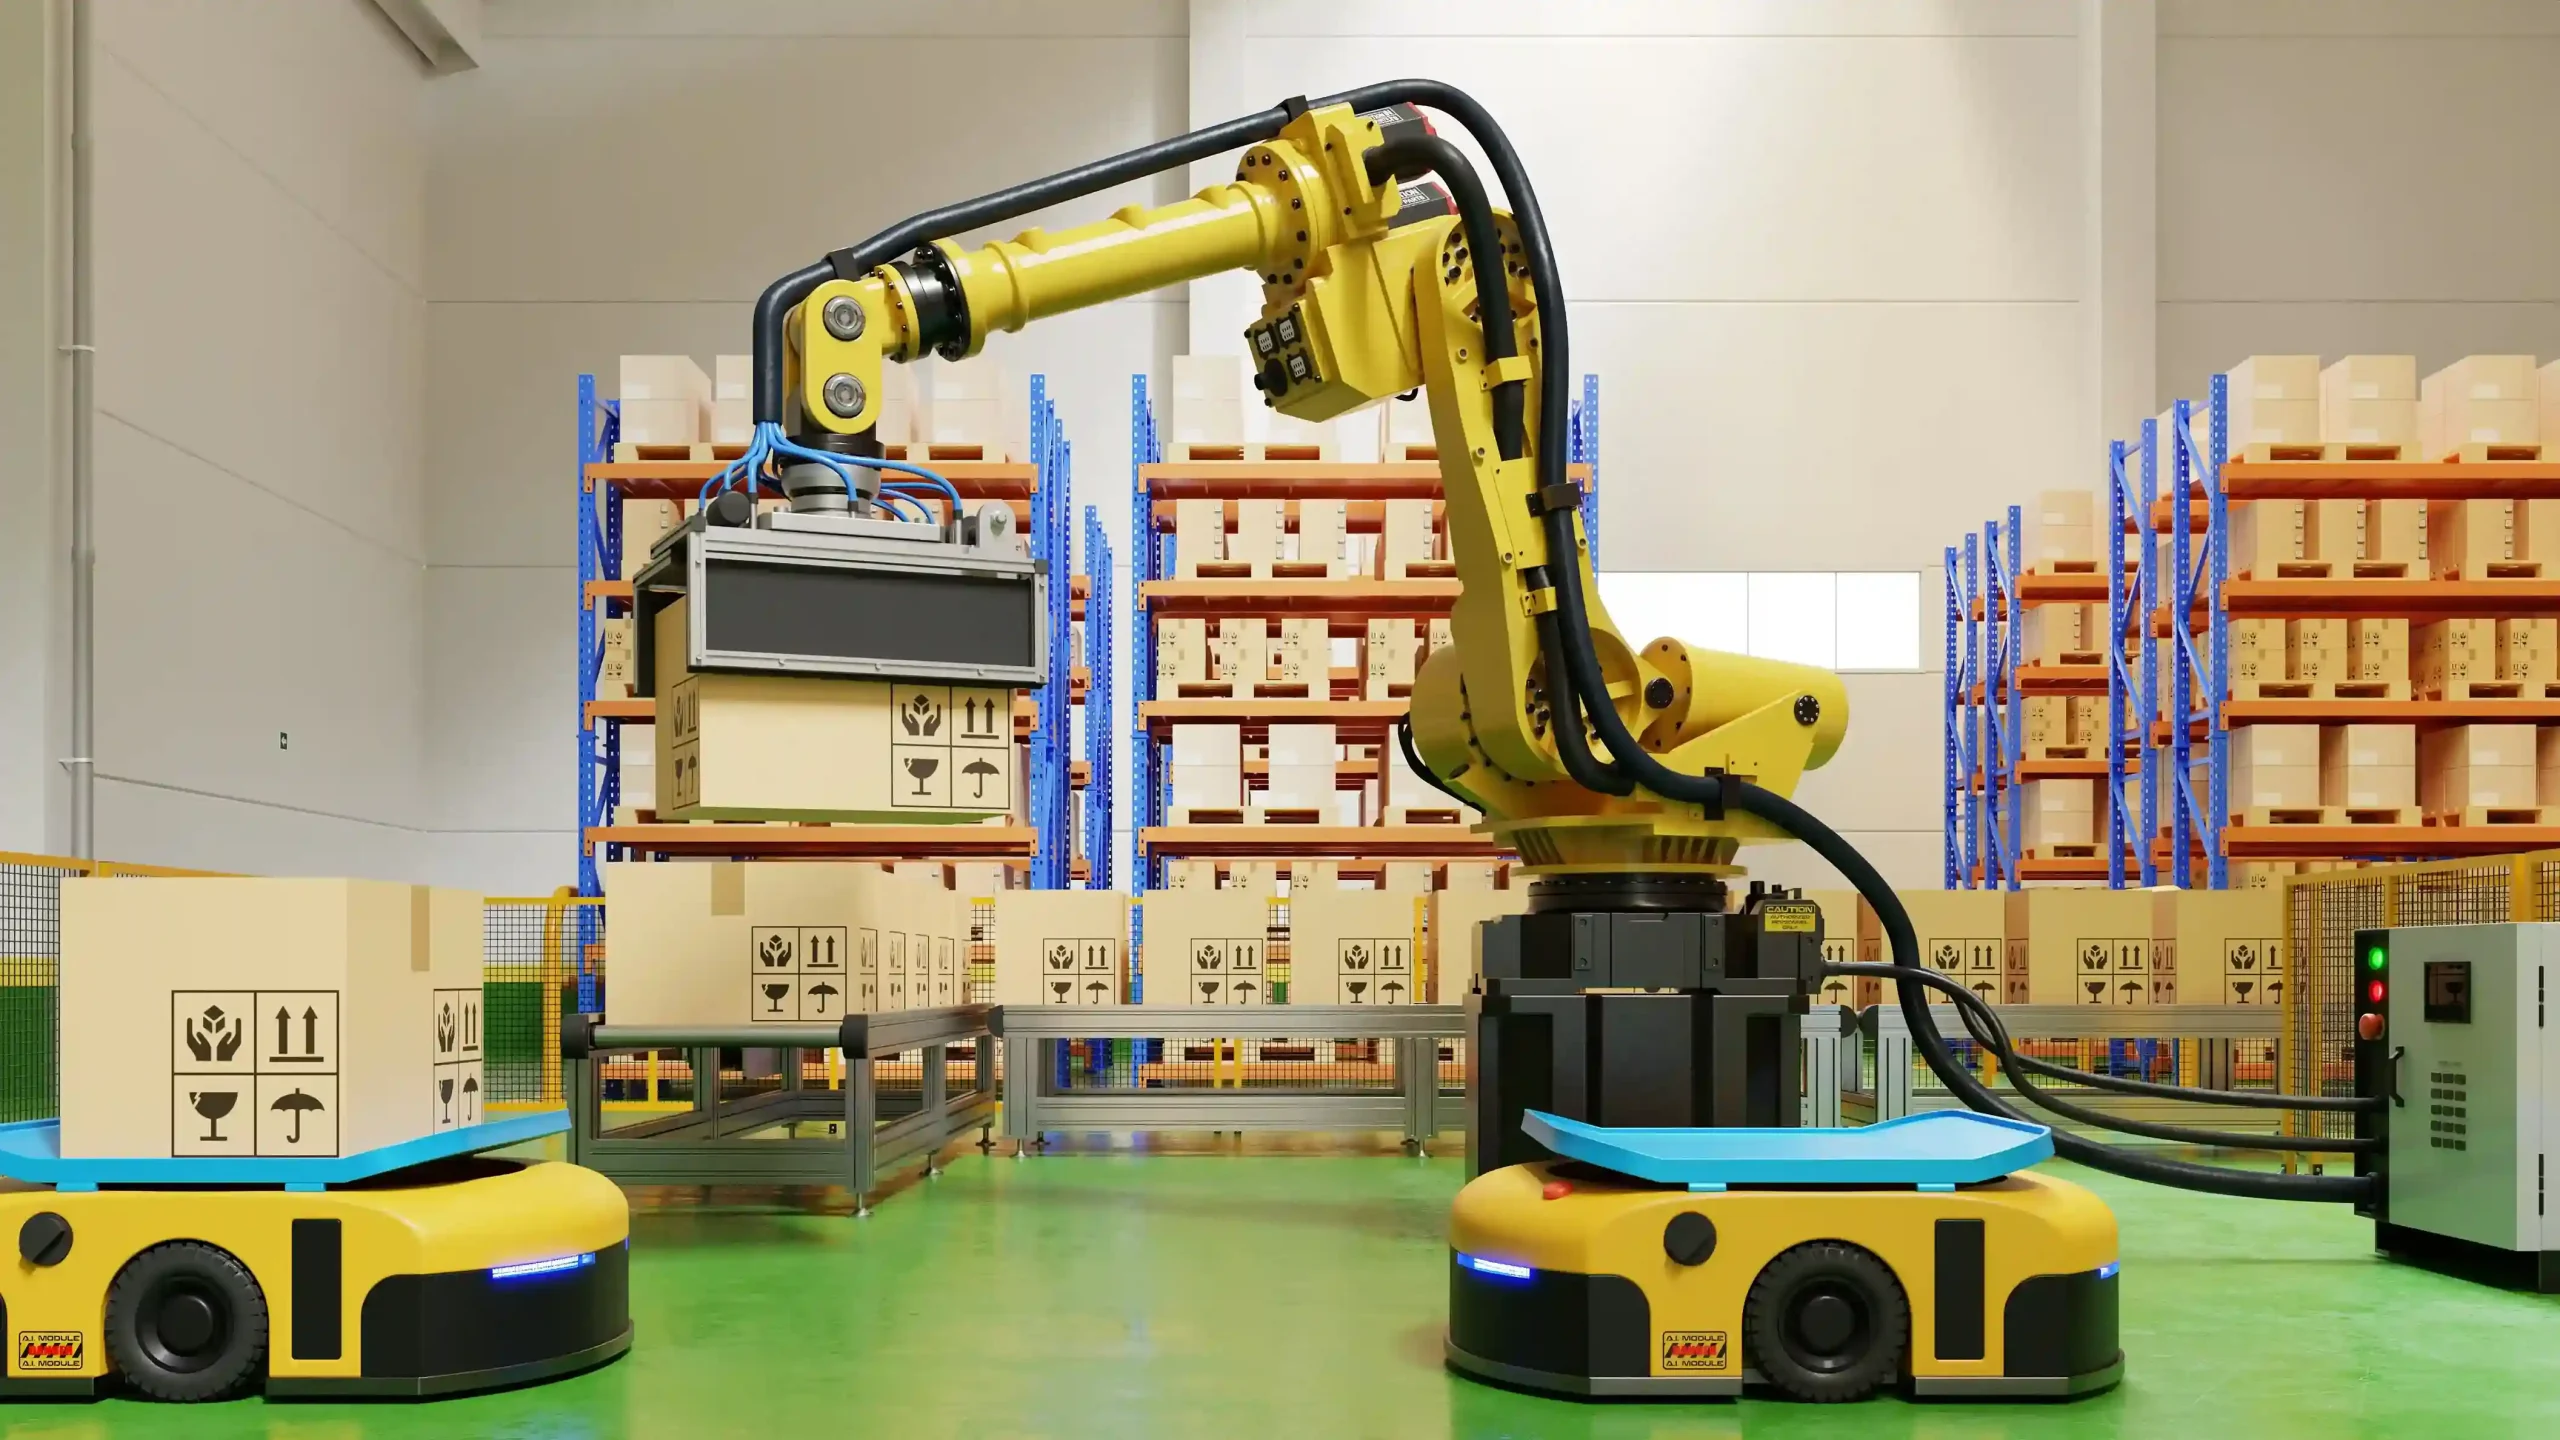
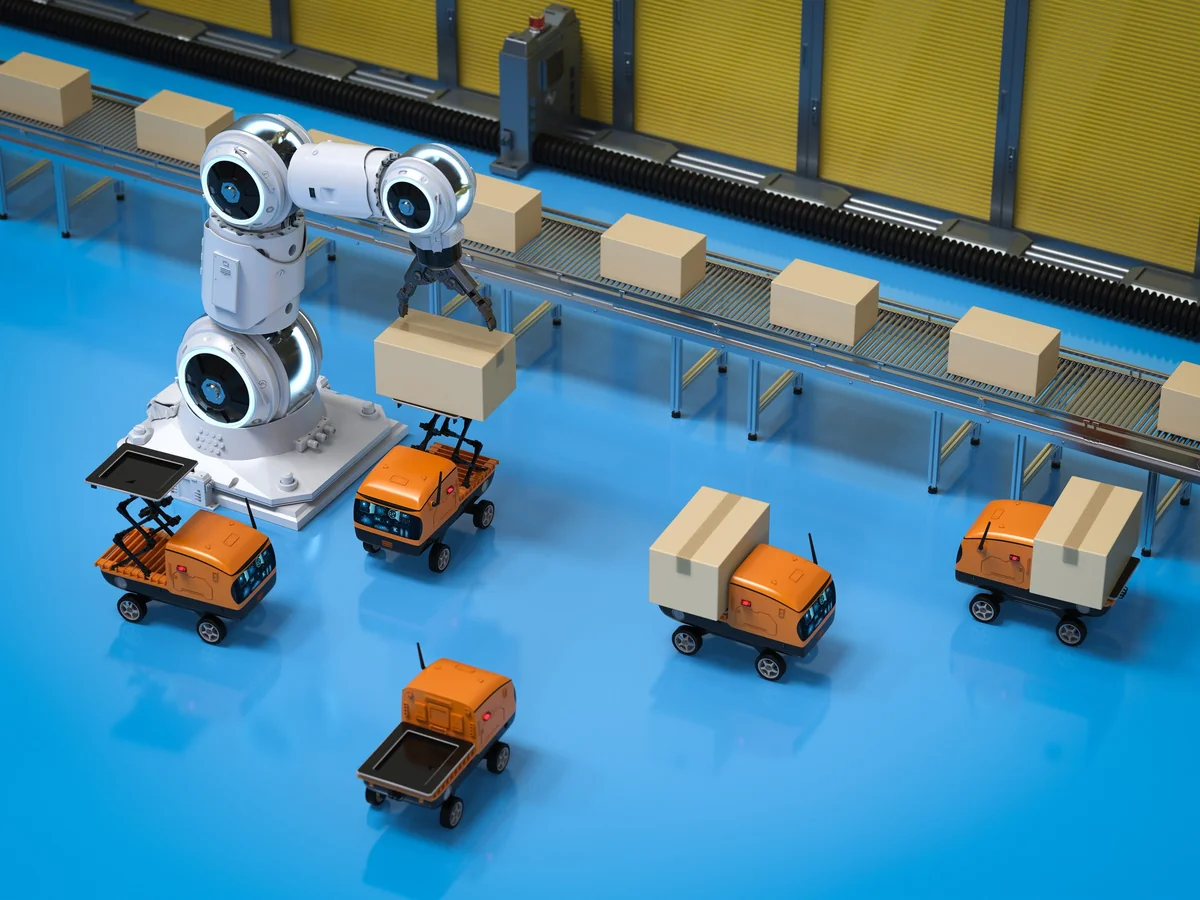
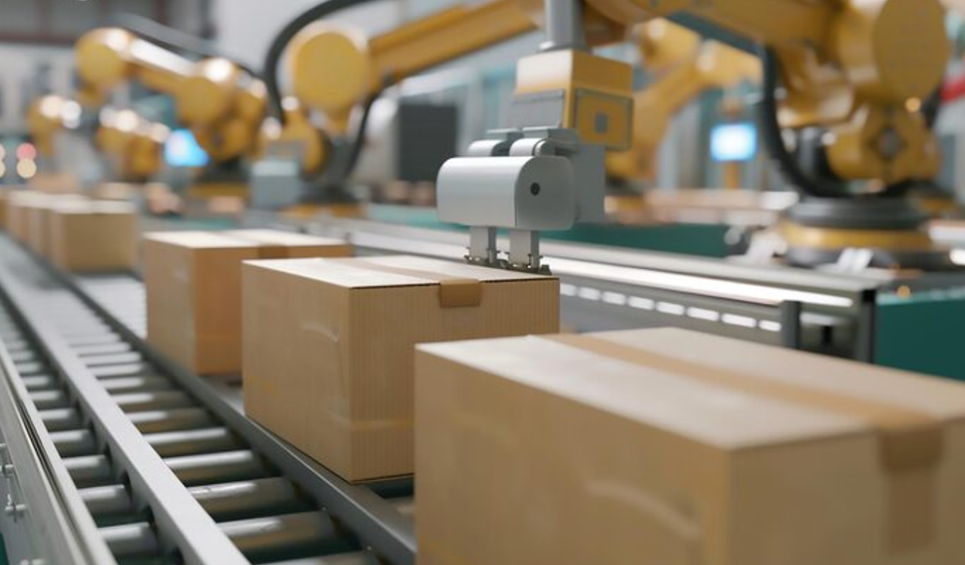
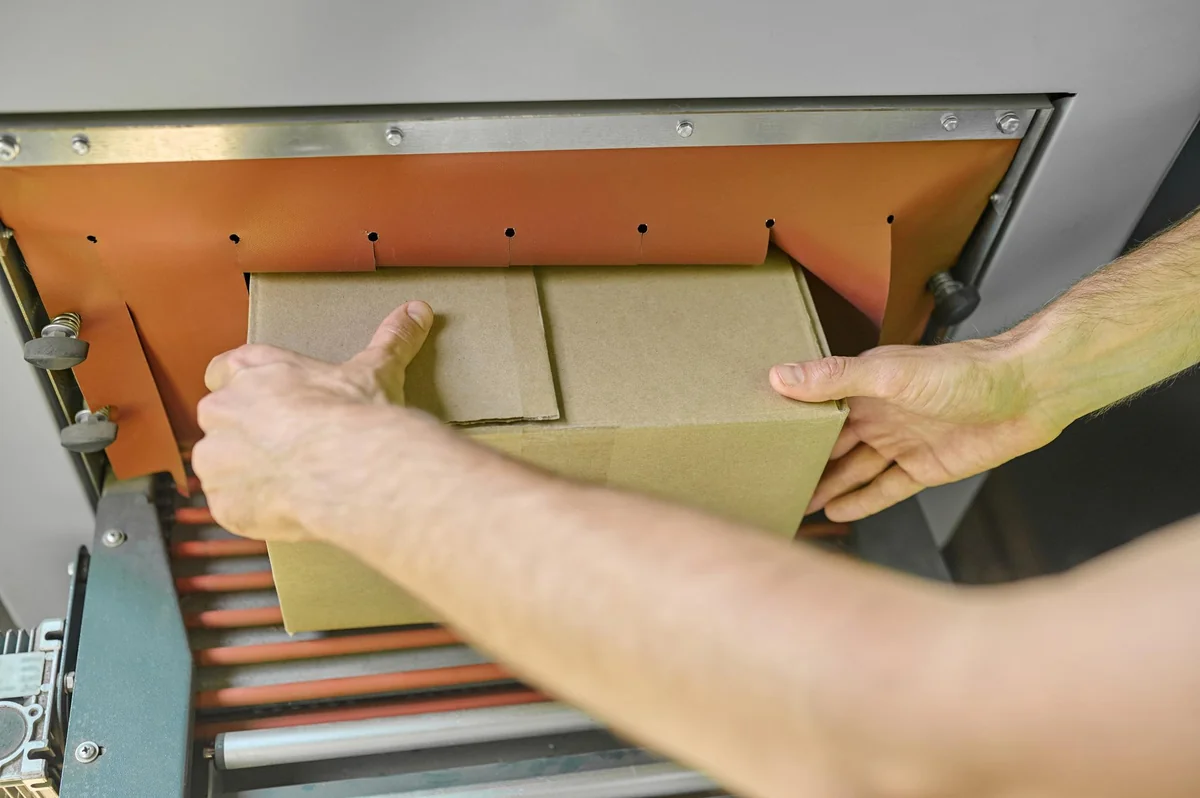
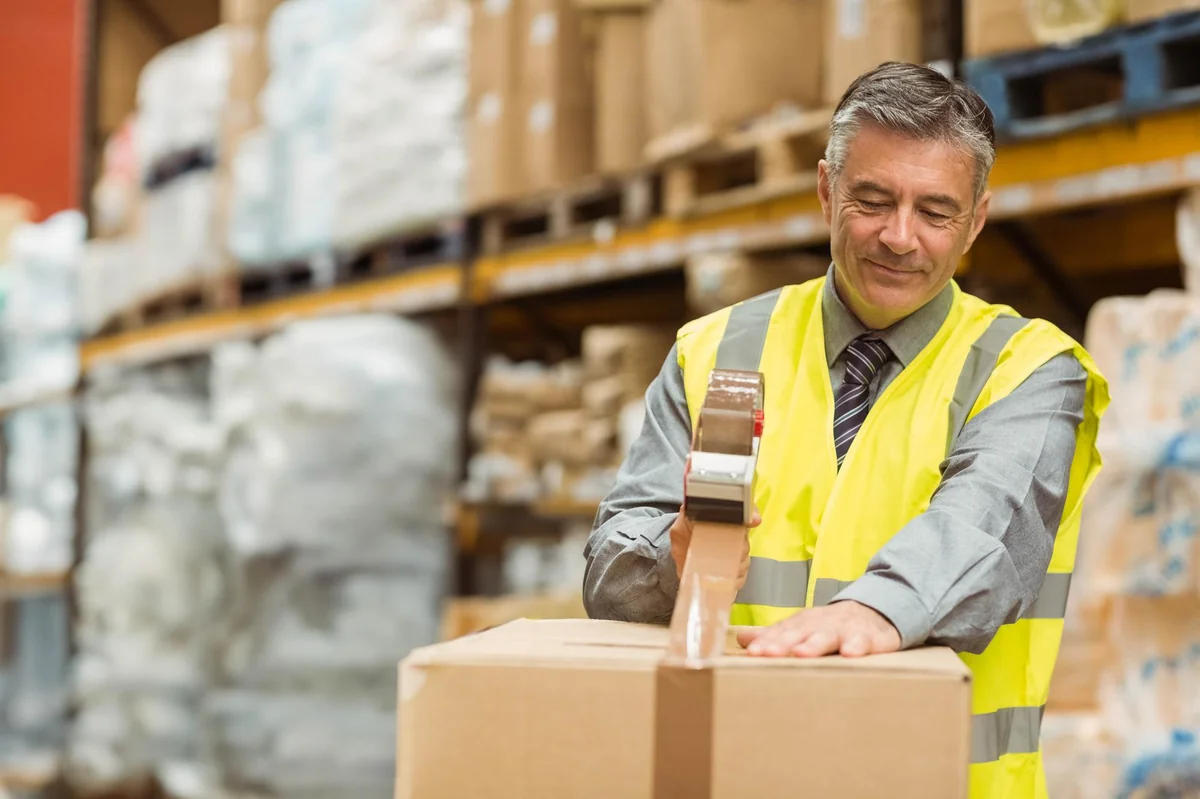
Por qué la mayoría de los robots de reparto fallan bajo la lluvia y la nieve

Why Delivery Robots Struggle with Weather: The Core Engineering Problems

I watched a Starship delivery robot sit motionless in front of my apartment building last March during a light drizzle. Juststuck. The thing had navigated six blocks of sidewalk perfectly fine, then hit a 20-foot stretch of wet pavement and completely lost its nerve. Turns out weather isn’t just an inconvenience for these machines — it’s an existential crisis for their sensors.

delivery robot
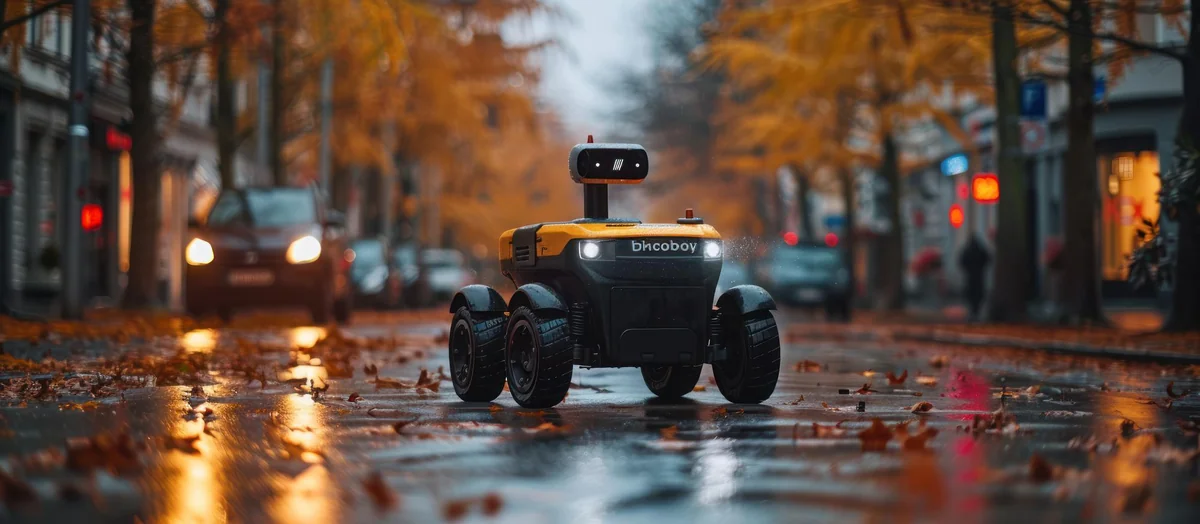
Rain-soaked delivery bot paused mid-route, sensors likely confused by puddle reflections and wet pavement

The biggest problem? LiDAR systems hate precipitation. These laser-based sensors shoot out millions of light pulses to map the world, but raindrops and snowflakes reflect those pulses right back, creating phantom obstacles everywhere. The robot’s computer sees a wall of static where there’s actually just weather. Some newer models try to filter out the noise, but heavy rain still makes them effectively blind.

Cameras aren’t much better. Water on the lens is the obvious issue — smudges and droplets turn a crisp 4K feed into an impressionist painting. But even when the lens stays clear, cameras struggle with the reduced contrast and weird lighting that comes with overcast skies or nighttime precipitation. Computer vision algorithms trained on sunny California datasets suddenly can’t recognize a curb cut in Seattle fog.

And then there’s the physics problem nobody talks about: traction. Most delivery robots weigh between 50 y 100 pounds when loaded, riding on wheels designed for smooth sidewalks. Wet leaves? Forget it. Ice patches? Absolutely not. I’ve seen one get stuck on a metal grate that was slightly damp — the wheels just spun uselessly while the robot rocked back and forth like a confused turtle.

Temperature swings mess with battery performance too (lithium-ion cells lose about 20% capacity below freezing). So even if a delivery robot can see through the snow and maintain traction, it might not have enough juice to complete its route. The companies don’t advertise this limitation, but check the delivery radius on a January morning versus a June afternoon. Different numbers.

How Rain Exposes Critical Flaws in Autonomous Delivery Robot Design

OK so I need to tell you about the stupidest design oversight I’ve witnessed in robotics. Last April, I watched a Starship delivery robot — one of the white six-wheeled ones everyone’s seen — sit motionless in a drizzle for eleven minutes because water pooled around its charging port cover. Not even heavy rain. Just normal spring drizzle.
delivery robot
Rain-slicked sidewalks reveal how these bots struggle with basic traction and sensor clarity issues.

Here’s what nobody at these companies wants to admit: most autonomous delivery robots were designed in California. Sunny, dry, predictable California. And it shows.

The sensor housings aren’t actually waterproof on many models — they’re water-resistant, which is marketing speak forit’ll probably be fine unless it’s really wet.Rain doesn’t just obscure the cameras (which we already covered). It gets inside the sensor enclosures through tiny gaps where cables enter. I’ve talked to three different maintenance techs who’ve dealt with corroded circuit boards after a few months of operation in Seattle and Portland. These things cost $5,000 a $8,000 per unit, and they’re getting fried by moisture that any decent marine electronics engineer could’ve prevented.

But wait, it gets dumber.

The motors that drive the wheels? Often mounted low to the ground (because center of gravity matters for stability). Which means they’re in the splash zone. Every. Single. Puddle. Some delivery robot models use brushless DC motors with exposed ventilation slots — great for cooling, terrible for keeping water out. One heavy rainstorm and you’ve got water infiltration that leads to bearing failure within weeks.

And then there’s the navigation problem that only appears when it’s wet. These robots use a combination of GPS, visual landmarks, and pre-mapped routes. Rain changes everything visually — reflections on wet pavement confuse the cameras, street markings disappear under water, and that distinctive storefront the robot uses as a waypoint? Looks completely different when the windows are covered in raindrops. I watched one delivery robot in Austin make three wrong turns in a row during a thunderstorm, trying to navigate a route it had completed perfectly fifty times before.

The companies keep pushing software updates to fix hardware problems. Doesn’t work like that.

Snow Creates Navigation Nightmares Most Robot Delivery Systems Can’t Solve

OK so I need to tell you about the time I saw a Starship delivery robot literally give up in a Chicago parking lot after four inches of snow. Juststopped moving. The wheels spun for maybe thirty seconds, then it went completely still like it had accepted its fate. Someone eventually came with a van to pick it up six hours later.

delivery robot
Two delivery bots stuck at the same curb — snow basically turned them into expensive paperweights

Snow is the final boss for these things. Rain? That’s manageable if you’ve got decent engineering. But snow breaks every single system these robots rely on.

First problem: the wheels. Most delivery robots use these relatively narrow wheels — maybe 4-6 inches wide — because wider wheels mean a bigger footprint and cities already hate how much sidewalk space these things take up. Those narrow wheels sink into snow like butter knives trying to spread frozen peanut butter. And the weight distribution is all wrong because the cargo compartment sits high (to keep packages away from puddles, ironically). So you’ve got this top-heavy design with inadequate ground contact trying to push through wet, dense snow. Physics says no.

But the navigation chaos is actually worse than the mechanical failure. Snow covers everything — lane markings, curb edges, those little tactile paving bumps that help robots identify crosswalks. The visual landmarks disappear completely. I talked to an engineer at one of the bigger delivery robot companies (won’t name them, but they operate in about forty cities), and she told me their error rate jumps 340% during active snowfall. That’s not a typo. The robots literally can’t figure out where the sidewalk ends and the street begins when there’s three inches of uniform white covering everything.

And then — because apparently one catastrophic failure mode isn’t enough — the LIDAR sensors get covered in snow. These things use spinning laser arrays to build a 3D map of their surroundings, and snowflakes sticking to the sensor housing create phantom obstacles everywhere. The robot thinks it’s surrounded by walls that don’t exist. Or it can’t see the actual wall that does exist because the returns are getting scattered by ice buildup.

Some companies tried heated sensor housings. Burns through battery in about ninety minutes.

The Real-World Costs When Delivery Bots Can’t Handle Bad Weather

OK so here’s where this stops being a tech problem and becomes an actual money hemorrhage.

I talked to a regional manager for a grocery chain in Minneapolis — can’t name them, NDA and all that — but they piloted delivery robots for six months in 2026. During their first November snowstorm, they had to dispatch human drivers to rescue seventeen stranded bots in a single afternoon. Seventeen. Each rescue costs about $45 in labor, plus whatever the customer gets as asorry your burrito is three hours latecredit. They told me their per-delivery cost during bad weather jumped from $2.80 a $11.50. Math that doesn’t work.

And the robots themselves? They’re not cheap to fix after weather incidents. Water ingress from rain that gets past the seals, salt corrosion on the wheel motors, battery degradation from repeated cold exposure — one fleet operator told me their average repair cost per weather-related incident runs about $340. For a single delivery robot. That was supposed to save money.

But wait, it gets better.

The real killer is the lost delivery windows. Most of these services promise 30-45 minute delivery. When your bot gets confused by wet leaves (yes, really) and parks itself in someone’s driveway for twenty minutes, you’ve blown that window. The customer cancels. You eat the cost of the food. The restaurant doesn’t get paid. Everyone loses except maybe the customer who got a refund.

Some companies tried the obvious solution: just don’t operate in bad weather. Pull the whole fleet when rain starts. Sounds reasonable until you realize that in Seattle or Portland, that’s basically October through May. You’ve built this whole infrastructure — charging stations, dispatch software, the robots themselves — and it sits idle 60% of the year. The unit economics collapse completely.

The delivery robot industry spent about $2.1 billion in venture funding between 2026 y 2026, and weather resilience is honestly the thing that might kill it.

Conclusión

So here’s where I land after watching this space for three years: delivery robots are a genuinely clever piece of engineering solving a problem that doesn’t actually exist at scale. They work great in controlled environments — college campuses, corporate parks, maybe some planned communities. But the second you throw real-world chaos at them, the math stops working.

If you’re a city planner or a business considering these things, ask yourself one question: how many days per year does it rain where you operate? Because that’s how many days your shiny new fleet becomes expensive sidewalk furniture.

The technology will get better, sure. But right now? The delivery robot industry is burning through venture capital faster than their bots can navigate a puddle.

Preguntas frecuentes

q: How much does a delivery robot actually cost?

A: The robots themselves run anywhere from $5,000 a $25,000 depending on the model — Starship’s units are on the lower end, while Serve Roboticsbigger models push toward that upper range. But here’s the thing: the real cost is the infrastructure behind them (monitoring staff, mantenimiento, insurance). Most companies lease them instead of buying outright, which runs about $400-800 per month per unit.

q: Can delivery robots go up stairs or curbs?

A: Nope. They’re basically fancy RC cars with six wheels, so anything more than a 2-inch curb ramp stops them cold. Some newer models can handle slightly rougher terrain, but stairs are a complete dealbreaker — which is why you’ll never see them working in older neighborhoods with actual sidewalk infrastructure problems.

q: What happens if someone tries to steal a delivery robot?

A: They’re loaded with GPS trackers, cameras, and alarms that go off the second someone tips them or tries to pry them open. I’ve seen videos of attempted thefts — the bot starts screaming and flashing lights, which tends to end the situation pretty quick. Plus most have remote monitoring, so a human operator is watching and can call the cops in real time.

q: How fast do these things actually move?

A: Acerca de 4 mph on average, which is slower than most people walk when they’re in a hurry. Some can hit 6 mph in ideal conditions, but that’s rare — they’re programmed conservative because hitting a pedestrian at even 5 mph would be a PR nightmare. So yeah, your pizza’s not arriving quickly.

q: Do delivery robots work in winter or bad weather?

A: This is where the whole concept falls apart, honestly. Rain confuses their sensors, snow completely blinds them, and ice makes their navigation worthless. Most companies just shut down operations when weather gets bad — which means they’re useless exactly when you’d most want delivery.

q: What’s the actual delivery range for these robots?

A: Most delivery robot services cap it at 2-3 miles, but realistically they work best under 1 mile. Battery life isn’t the issue (they can go 15-20 miles on a charge) — it’s that anything beyond a mile takes so long at 4 mph that the food gets cold or the business model stops making sense. They’re hyper-local by necessity.

q: Are delivery robots taking jobs from human delivery drivers?

A: Not really — at least not yet. They’re mostly handling campus deliveries and short corporate park runs that were either previously done by employees walking over, or weren’t economically viable for human drivers anyway. The gig economy delivery market is still completely dominated by humans because robots can’t climb apartment stairs, deal with gate codes, or handle 99% of real-world delivery scenarios.
Configuración automática de la máquina para fabricar cajas de cartón sin desperdiciar stock

Why Your Automatic Carton Making Machine Setup Matters for Zero-Waste Production

I watched a packaging plant throw away $14,000 worth of corrugated board last month because their carton maker was spitting out rejects at a 22% clip. Not because the machine was broken — it was running just fine. The setup was garbage.

Smart Packaging Equipment

Here’s the thing nobody tells you when you drop six figures on an automatic carton making machine: the equipment is only half the equation. Maybe less than half, honestly. Your setup determines whether you’re running a lean operation or basically funding a landfill with premium cardboard.

Think about it. Every misaligned feed roller means skewed blanks. Every calibration that’s off by two millimeters creates boxes that won’t close properly — and those go straight in the scrap bin. The machine doesn’t care. It’ll keep cranking out defective cartons all day if you let it.

And the waste compounds fast:

  • Material waste from rejected cartons (the obvious one)
  • Energy waste running the machine to produce unusable output
  • Labor waste when your crew has to sort good from bad
  • Downstream waste when defective boxes make it to the packing line and cause jams
  • Time waste re-running orders because you didn’t hit your yield targets

A proper setup — and I mean actually taking the time to dial in your feed mechanisms, your crease pressure, your glue application points — can drop your reject rate from 20% to under 2%. I’ve seen it happen. That’s the difference between breaking even and actually making money on a run.

But here’s where it gets interesting. Zero-waste production isn’t just about reducing scrap (though that’s obviously huge). It’s about creating a system where your automatic carton making machine runs so consistently that you can actually predict your material usage down to the square meter. You order exactly what you need. Nothing sits around getting damaged. Nothing ends up in a dumpster because you over-produced by 15% “just in case.

The setup is where that predictability lives. Get it right once, document everything, and you’ve built yourself a money-printing machine. Get it wrong andwell, you saw what happened at that plant I mentioned.

How to Calibrate Your Carton Machine Settings Before Running Stock

I watched a production manager spend forty minutes calibrating a die-cutting station last month, only to realize halfway through the first run that his feed rollers were set for a completely different board thickness. Forty minutes. Desaparecido. Plus another two hundred sheets of premium coated stock that went straight into recycling.

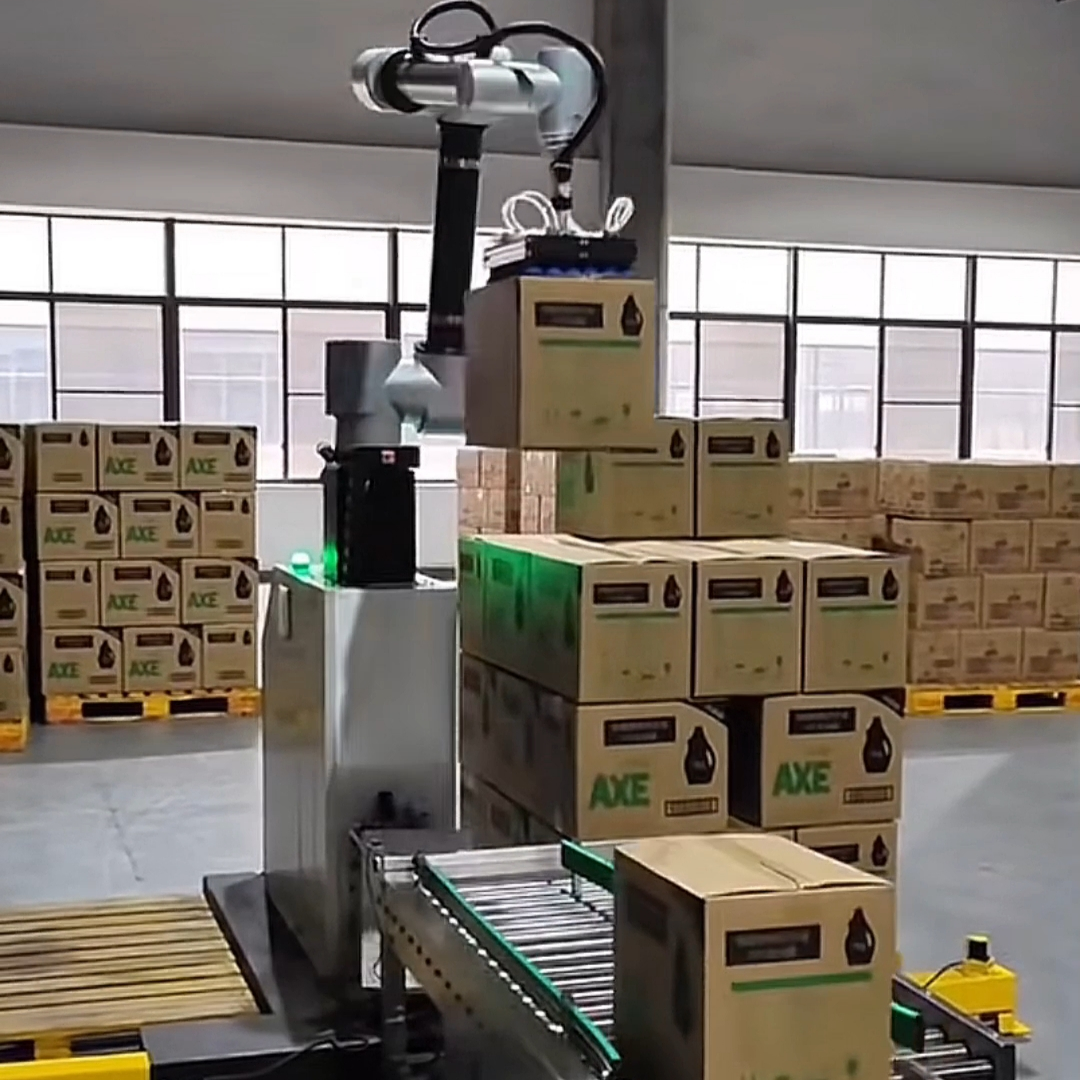
depalletizing robot

So yeah — calibration isn’t sexy, but it’s the difference between a smooth shift and a disaster. Y honestamente? Most people skip half the steps because they think they know their automatic carton making machine well enough to eyeball it. They don’t.

Here’s what actually matters before you feed stock:

  • Board thickness verification — Use calipers, not your fingers. I’ve seen operators misjudge by 0.3mm and wonder why their creasing looked like garbage. Set your feed gap 0.1-0.2mm wider than your actual stock measurement.
  • Feed roller pressure balance — Both sides need identical pressure or you’ll get skewing within the first ten sheets. Run a test sheet and measure the distance from edge to registration mark on both sides. Should be within 0.5mm.
  • Die height adjustment — This one’s critical. Too much pressure and you’ll crush your board (especially on lightweight stocks under 300gsm). Too little and your cuts won’t separate cleanly. Start conservative — you can always add pressure mid-run, but you can’t un-crush a carton.
  • Waste ejection timing — Sounds minor until scrap starts jamming under your stripper section and you’re shut down for fifteen minutes clearing it.

The thing nobody tells you: calibration settings drift. Temperature changes throughout the day, humidity affects board stiffness, even the way your stock was stored in the warehouse matters. I run test sheets every two hours on long runs — takes ninety seconds and has saved me from so many problems I’ve lost count.

y mira, I get it. You’re under pressure to start production. Your shift supervisor is hovering. But spending an extra ten minutes on calibration now beats explaining to your boss why you just scrapped three thousand cartons because your scoring wheels were set 2mm off center. Trust me on this one.

Setting Up Material Feeding Systems to Eliminate Carton Waste

OK so here’s where most operations actually lose money and don’t even realize it — the feeding system. I watched a plant run an automatic carton making machine at 85% efficiency for six months while their material handling setup was literally costing them $1,200 a week in wasted board. Nobody had done the math.

automatic carton making machine
Worker checks fresh-cut boxes rolling off the line — zero wrinkles, zero waste, all smiles.

The core issue: your machine might be dialed in perfectly, but if sheets are entering crooked, doubled up, or with inconsistent spacing, you’re creating scrap before the first crease even happens. And the feeding system — this is the part that drifts out of spec fastest because it’s mechanical, it’s under constant stress, and it’s handling abrasive materials all day.

Here’s what actually matters:

  • Suction cup condition — Replace them on a schedule, not when they fail. I swap mine every 90 days regardless of how they look. A weak cup creates double-feeds maybe 1% of the time, which sounds acceptable until you’re running 15,000 sheets and just created 150 rejects.
  • Stack height monitoring — Your feeder needs consistent pressure against the bottom sheet. Too high and you get multiple picks. Too low and you get skipped feeds (which jams everything downstream).
  • Side guide alignment — This one’s sneaky. Guides wear on the inside edges where sheets make contact. After a few months they’re no longer straight, and suddenly your registration is off by 3mm and you don’t know why.
  • Separator air pressure — I run mine at 6.2 bar for 350gsm board. Anything less and sheets stick together. Anything more and the top sheet flutters during pickup.

But the real waste killer? Pre-jogging your material before loading. Sounds tedious — because it is — but spending two minutes jogging each pallet eliminates probably 60% of feed-related scrap. The corners need to be perfectly aligned or your whole stack shifts during the run.

y mira, some operators skip the pre-flight check on the vacuum system becauseit worked fine yesterday.Don’t be that person. Check your vacuum gauge at startup every single time. A 15% drop in suction means something’s clogged or leaking, and you’re about to have a very expensive morning.

Testing and Adjusting Your Machine Parameters Without Burning Through Inventory

I burned through $2,400 worth of board in my first week learning parameter adjustments. Not because the machine was broken — because I changed three variables at once and had no idea which one caused the disaster.

Here’s what actually works: change one parameter at a time, run exactly 10 sheets, then stop and measure. Yeah, it feels slow. But you know what’s slower? Scrapping 500 cartons because you cranked up both speed and glue temperature simultaneously and now everything’s either falling apart or glued shut.

Start with your baseline run — the settings that produce acceptable (not perfect, just acceptable) cartons. Write those numbers down. Physically. On paper. Your machine’s memory is great until someone hits the wrong button or the power flickers.

For speed adjustments, I move in 5% increments maximum. If you’re running at 4,000 sheets per hour and want to push it, try 4,200 for your test batch. Not 5,000. The automatic carton making machine doesn’t care about your production targets — physics still applies at high speeds, and glue needs time to grab.

Temperature changes are even pickier. Move your heating elements by 5°C at a time, then wait for thermal equilibrium. That takes longer than you think — usually 8-10 minutes depending on your machine’s thermal mass. So you adjust, you wait, you run your 10-sheet test. Boring? Absolutamente. But I haven’t scrapped a pallet since I started doing this.

The trick with pressure settings (both pneumatic and mechanical) is watching for the sweet spot where resistance changes. Too little pressure and your creases are weak. Too much and you’re crushing the board or leaving shiny burnish marks. I usually test in 0.2 bar increments and actually fold the test cartons by hand to feel the difference.

And keep those test sheets. All of them. Write the parameters directly on each carton with a Sharpie — date, speed, temps, pressures. When you need to switch materials three months from now, you’ll have real data instead of trying to rememberwhat worked that one time.

Conclusión

So here’s what matters: an automatic carton making machine is only as good as the operator who tunes it. I’ve watched people blame their equipment for weeks when the real problem was inconsistent setup routines or skipping those tedious test runs. Don’t be that person.

Keep your parameter logs. Trust your measurements over your gut. And when something’s off, change one variable at a time — I know it’s tempting to twist three knobs at once, but you’ll just confuse yourself.

The machines are honestly pretty forgiving once you develop the muscle memory. You’ll get there faster than you think.

Preguntas frecuentes

q: How much does an automatic carton making machine actually cost?

A: Entry-level units start around $15,000–$25,000, but those are usually limited to basic folding cartons. Mid-range machines with gluing systems run $40,000–$80,000, and if you need high-speed production with inline printing, you’re looking at $150,000+. I’ve seen people get sticker shock because they priced the base model without realizing they’d need optional modules.

q: What’s the typical production speed for these machines?

A: Most automatic carton making machines run between 30–60 cartons per minute in real-world conditions — not the inflated specs you see in brochures. High-end models can hit 100+ cartons/minute, but only if you’ve got perfect material consistency and an operator who knows what they’re doing. Speed means nothing if you’re stopping every 20 minutes to clear jams.

q: Can I run different carton sizes on the same machine?

A: Yeah, but you’ll need to swap out dies and recalibrate — which takes anywhere from 15 minutes to an hour depending on the model. Some newer automatic carton making machines have quick-change tooling that cuts that down significantly. Just don’t expect to switch formats mid-run without losing production time.

q: How long does it take to actually learn how to operate one?

A: A competent operator can handle basic production in 2–3 days of training. Mastering the troubleshooting and fine-tuning? That’s more like 3–6 months of daily use. The machine interface isn’t rocket science, but understanding why your creases are cracking or why glue tabs aren’t sealing — that takes reps.

q: What kind of maintenance do automatic carton making machines need?

A: Daily cleaning of glue systems (seriously, dried adhesive will ruin your week), weekly lubrication of moving parts, and monthly inspection of cutting dies for wear. Budget about 30–45 minutes per day for routine stuff. The manufacturers usually recommend annual professional servicing, which runs $1,500–$3,000 depending on your service contract.

q: Is corrugated cardboard harder to run than paperboard?

A: Way harder. Corrugated requires more pressure for scoring, different blade angles, and the fluting can collapse if your settings are off. Most automatic carton making machines are optimized for one or the other — trying to run both materials on the same setup usually means compromising quality on at least one of them.

q: Do I need special electrical requirements for installation?

A: Most machines need 220V three-phase power, and some larger models pull 30+ amps. Check your facility’s electrical capacity before you buy — I’ve seen people order equipment only to discover they need a $5,000 panel upgrade to run it. Also factor in compressed air supply if the machine uses pneumatic components.

Guía de configuración de equipos de manipulación automatizada de materiales

Planificación de su sistema automatizado de manipulación de materiales desde cero

Una vez vi a un gerente de almacén pasar seis meses instalando transportadores en la configuración incorrecta.. Les costó aproximadamente $340,000 arreglar. Podría haberse evitado con dos semanas de planificación real.

equipo automatizado de manipulación de materiales
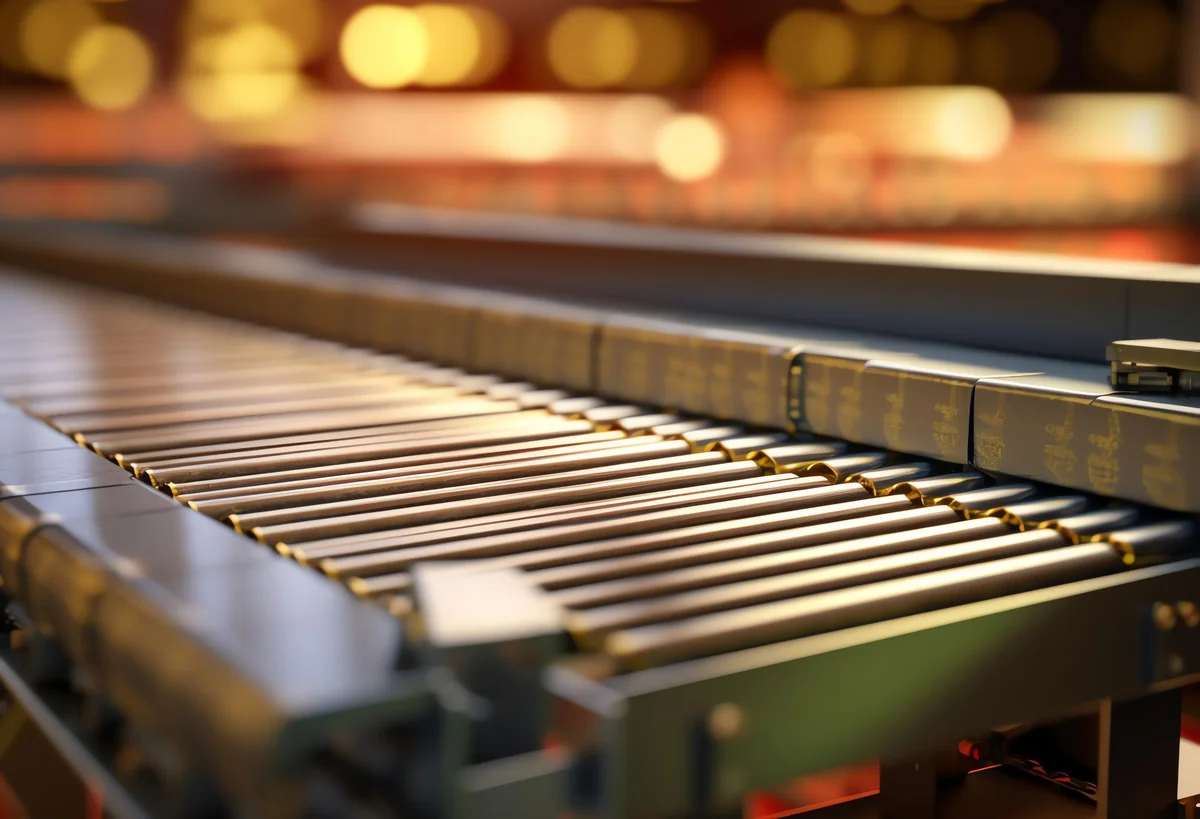
Primer plano de los rodillos transportadores y los nodos sensores: las piezas de precisión que mantienen la automatización en funcionamiento.

Así que aquí está la cuestión equipo automatizado de manipulación de materiales — no puedes simplemente dejarlo en tus instalaciones y esperar que funcione. Comience con su flujo de trabajo actual, no los brillantes catálogos de tecnología. Camina por tu piso. Calcular cuánto tiempo lleva mover el producto desde la recepción hasta el almacenamiento y el envío.. Anote dónde están las personas esperando sin hacer nada porque los materiales aún no han llegado..

Sus requisitos de rendimiento importan más de lo que cree. Si te estás mudando 500 unidades por hora hoy pero planeando para 1,200 al año que viene, Dimensione su sistema para 1,500. Créame en esto: un tamaño insuficiente es costoso de solucionar más adelante, y alcanzará ese crecimiento más rápido de lo que dicen sus proyecciones.

Luego mapee sus limitaciones físicas. Altura del techo, capacidad de carga del piso, columnas estructurales existentes que no se pueden mover. He visto empresas enamorarse de los sistemas de transportadores aéreos solo para descubrir que las vigas de sus techos no pueden soportar el peso. (Esto sucedió en una instalación en Ohio el año pasado., y no fue lindo).

Esto es lo que realmente necesita documentar antes de hablar con los proveedores:

  • Volumen diario actual y proyectado: sea específico, no optimista
  • Dimensiones y pesos del producto., incluyendo tus extraños valores atípicos
  • Espacio disponible y cualquier área que esté absolutamente prohibida
  • Puntos de integración con su sistema WMS o ERP existente
  • Presupuesto que incluye instalación., capacitación, y al menos 15% contingencia

y mira, Sé que todo el mundo quiere automatizar todo de inmediato.. Pero fasealo. Comience con su mayor cuello de botella (normalmente es la recepción o la preparación de pedidos) y pruebe el concepto allí antes de desmantelar toda la operación..

Las instalaciones que tienen éxito con los equipos automatizados de manipulación de materiales son aquellas que pasaron semanas aburridas con hojas de cálculo y planos de planta antes de gastar un solo dólar en hardware.. No glamoroso. Absolutamente necesario.

Configuración de transportadores, Ordena, y brazos robóticos: la instalación física

Bien, ya firmaste los contratos y los camiones aparecerán el próximo martes.. Aquí es donde la teoría se encuentra con el piso de concreto, literalmente, y donde la mayoría de los proyectos encajan o se convierten en una pesadilla de tres meses de problemas de alineación y acusaciones de proveedores..

Lo primero: Será mejor que tu piso esté nivelado.. Estoy hablando de nivel láser., no “me parece bastante plano” nivel. Los transportadores no perdonan esto. Una variación de un cuarto de pulgada sobre veinte pies hará que los productos se desvíen hacia un lado, atasco en las transiciones, o simplemente caerse por completo. Tuvimos un cliente que insistió en que su piso estaba bien hasta que los paquetes comenzaron a deslizarse en cámara lenta hacia la cerca de seguridad.. Les costó dos semanas y $18,000 para moler y volver a verter secciones.

La secuencia de instalación real importa más de lo que piensas:

  • Los puntos de anclaje y las tomas de corriente entran primero; no permita que nadie le diga que pueden actualizarlos más adelante.
  • El transportador principal pasa a continuación, trabajando desde la recepción hasta el envío (seguir el flujo del producto)
  • Se instalan clasificadoras en sus sucursales, luego calibrado individualmente
  • Los brazos robóticos entran al final porque necesitan que todo lo demás esté colocado antes de poder programar sus límites de alcance.

Y aquí hay algo que nadie menciona en los folletos brillantes.: necesita mucho más espacio alrededor de cada equipo de lo que sugiere la hoja de especificaciones. Eso “42-huella en pulgadas” clasificador? realmente necesitas 60+ pulgadas para acceder a los paneles de mantenimiento y cambiar los componentes desgastados. He visto operaciones en las que juntaron todo para ahorrar espacio., Luego tuve que cerrar líneas enteras sólo para cambiar una correa..

Los brazos robóticos son particularmente exigentes. Cada uno necesita enseñanza, sí., ese es el término real: donde lo guía manualmente a través de los puntos de recogida y ubicación mientras registra las coordenadas. Presupuesta un día completo por brazo para esto., más otro medio día en el que inevitablemente te das cuenta de que tu primer intento no tuvo en cuenta las variaciones de altura de la plataforma..

La mayoría de los integradores querrán 4-6 semanas para una instalación de tamaño mediano. No dejes que se apresuren. Un sistema transportador instalado demasiado rápido es un sistema transportador que estará inactivo por mantenimiento constantemente..

Integración del software de gestión de almacenes con su equipo automatizado

Bien, aquí es donde la mayoría de las operaciones se enfrentan por completo.: Gastan 400.000 dólares en un magnífico sistema AS/RS, hazlo funcionar maravillosamente, y luego darse cuenta de que su software de gestión de almacenes no tiene ni idea de cómo hablar con él..

Su WMS es básicamente el cerebro que le dice a todo este equipo automatizado de manipulación de materiales qué hacer y cuándo.. Sin una integración adecuada, simplemente estás ejecutando robots costosos en modo manual, lo que anula todo el objetivo. Vi a un centro de distribución en Ohio pasar seis semanas después de la instalación intentando que su WMS heredado se comunicara con los nuevos AGV.. Seis semanas de robots de 80.000 dólares inactivos porque nadie comprobó la compatibilidad de la API por adelantado.

La mayoría de los equipos modernos hablan API OPC-UA o REST en la actualidad.. Su WMS debe ser compatible con cualquier protocolo que utilice su proveedor de hardware., o necesitarás un middleware entre ellos (agrega costo, agrega latencia, añade otra cosa que puede romperse). Los datos críticos fluyen en ambos sentidos: WMS le dice al transportador “enviar palet B-447 al muelle 12”, transportador le dice a WMS “El palet B-447 llegó al muelle 12 en 14:23:07”. Parece simple. Rara vez es.

La visibilidad del inventario en tiempo real no es negociable aquí. Cuando una lanzadera automatizada mueve una caja desde el almacenamiento a granel hasta la recolección, su WMS necesita actualizar esa ubicación al instante, no en la siguiente sincronización por lotes que se ejecuta cada 15 minutos. He visto un aumento en los errores de selección 300% en instalaciones donde hay incluso un desfase de 5 minutos entre el movimiento físico y las actualizaciones del sistema.

Y honestamente? Pruebe los modos de falla antes de la puesta en marcha. ¿Qué sucede cuando el WMS pierde la conexión con un sistema de clasificación a mitad de turno?? ¿Todo se detiene?, ¿O el clasificador tiene suficiente inteligencia local para seguir funcionando según sus últimas instrucciones conocidas?? (Quieres la segunda opción, por cierto.) La mayoría de los proveedores harán demostraciones del camino feliz durante todo el día, pero se vuelven muy cautelosos cuando se les pregunta sobre escenarios de caída de la red..

Presupuesto para servicios de integración profesional a menos que su equipo de TI haya hecho esto antes. Lo cual probablemente no hayan hecho. Este no es territorio plug-and-play.

Probar y calibrar su automatización de manipulación de materiales para obtener el máximo rendimiento

Entonces has instalado todo, las integraciones están en vivo, y tus transportadores están zumbando. Felicitaciones. Ahora viene la parte por la que la mayoría de la gente se apresura, que es exactamente la razón por la que 60% de los proyectos de automatización tienen un rendimiento inferior en el primer año.

charla real: Las pruebas no son sólo “pase algunas paletas y vea qué sucede.” Vi a un 3PL en Ohio hacer exactamente eso en 2026 - salieron en vivo un lunes con lo que llamaron “pruebas adecuadas” durante el fin de semana. El miércoles ya estaban clasificando manualmente 40% de su volumen porque nadie había probado la lógica de clasificación en condiciones máximas. El equipo automatizado de manipulación de materiales funcionó bien.. Las suposiciones sobre cómo fluiría el producto.? Desastre total.

Así es como se ven las pruebas reales, y me refiero al tipo que previene esas 2 llamadas de pánico por la mañana:

  • Corre al menos 72 horas continuas en 110% de su volumen máximo proyectado. No durante el horario laboral, cuando puedes hacer una pausa para arreglar cosas. Directo.
  • Pruebe su manejo de excepciones con elementos deliberadamente problemáticos: códigos de barras dañados, paletas con sobrepeso, Cajas de cartón con formas extrañas que atascarán un clasificador.. Mira lo que se rompe.
  • Simular cortes de energía, caídas de red, y paradas de emergencia. Luego, calcule cuánto tiempo lleva realmente la recuperación. (Siempre es más largo de lo que prometió el proveedor.).
  • Cargue su combinación de SKU del peor de los casos: los elementos con dimensiones similares que confunden a los sistemas de visión, o los productos que siempre parecen encajar juntos en las cintas transportadoras.

En la calibración pasarás mucho más tiempo del presupuestado. Esos sensores que detectan la presencia del cartón? se van a la deriva. Las básculas necesitan ponerse a cero con más frecuencia de lo que nadie admite. Y los sistemas de visión, oh hombre, necesitan recalibrarse cada vez que cambia la iluminación., Lo que sucede más de lo que cree cuando ejecuta operaciones de varios turnos..

Mantengo un registro de calibración para cada equipo con sensores o capacidad de medición.. Suena tedioso, pero me salvó dos veces cuando el rendimiento comenzó a caer y nadie pudo entender por qué. Resultó que una estación de control de peso se había desviado 2% más de seis semanas, rechazar cajas de cartón en perfecto estado. Pequeña deriva, impacto masivo.

Y mira, presupuesto 15-20% más tiempo para realizar pruebas de lo que recomienda su proveedor. Son optimistas de profesión.. Necesitas ser realista.

Conclusión

Esto es lo que le digo a la gente que me pregunta sobre los equipos automatizados de manipulación de materiales.: no es plug-and-play, y el que lo vende asi te esta mintiendo. Presuponga más tiempo para la integración que el que cotiza su proveedor. Plan para la deriva de calibración. Pruebe con sus productos reales en el peor de los casos, no las cosas fáciles.

Los sistemas funcionan: he visto instalaciones que reducen los costos de mano de obra en 40% y triple rendimiento, pero solo cuando se respeta la complejidad. Trátelo como una relación a largo plazo., no una aventura de una noche con una pieza de maquinaria.

Y honestamente? Empiece más pequeño de lo que cree que necesita. Demuestre que funciona en una zona antes de automatizar toda su operación. Siempre puedes ampliar. No puedes reducir fácilmente la escala cuando ya has gastado siete cifras.

Preguntas frecuentes

q: ¿Cuál es el cronograma típico de retorno de la inversión para equipos automatizados de manipulación de materiales??

A: La mayoría de las instalaciones obtienen un retorno de la inversión entre 18-36 meses, pero he visto empresas alcanzar el punto de equilibrio en 14 meses en los que los costos laborales eran altos y las demandas de rendimiento eran brutales. La verdadera variable es el tiempo de integración: si pierde tres meses solucionando problemas, estás empujando esa ventana de recuperación. Haga un presupuesto conservador y no se sentirá decepcionado.

q: ¿Pueden los pequeños almacenes bajo 50,000 Los pies cuadrados justifican la automatización.?

A: Absolutamente, pero debes ser estratégico al respecto. Omita los sistemas AS/RS a gran escala y busque robots colaborativos o vehículos guiados automatizados para detectar puntos débiles específicos.. visité un 35,000 Instalación de pies cuadrados que ejecuta dos AMR que se amortizaron por sí solos en 22 meses simplemente manejando transferencias cross-dock.

q: ¿Cuánto cuesta realmente mantener anualmente el equipo automatizado de manipulación de materiales??

A: Tener pensado 8-12% de su gasto de capital inicial por año para contratos de mantenimiento, regiones, y calibración. Un sistema de 500.000 dólares le costará entre 40.000 y 60.000 dólares al año, y eso suponiendo que no se rompa nada catastrófico.. Los proveedores que te cotizan 5% Están mintiendo o no incluyen la mano de obra de su equipo de mantenimiento interno..

q: ¿Qué sucede cuando el equipo automatizado de manipulación de materiales se avería durante la temporada alta??

A: Es por eso que usted negocia los tiempos de respuesta en su contrato de servicio antes de comprar.. Los buenos proveedores ofrecen respuesta in situ en 4 horas para fallos críticos. Los malos aparecen en 48 horas y encogerse de hombros. Siempre, y quiero decir siempre, mantenga documentados los procesos de respaldo manuales y capacite a su equipo en ellos., porque la automatización fallará en el peor momento posible.

q: ¿Necesito contratar personal especializado para operar sistemas automatizados??

A: Necesita al menos una persona que entienda la programación de PLC y la calibración de sensores., período. La mayoría de las instalaciones promueven desde dentro y envían a alguien a la capacitación de proveedores. (generalmente 3-5 días). El personal de su almacén actual puede encargarse de las operaciones diarias después de una o dos semanas., pero solucionar problemas de deriva del sensor o problemas de red requiere conocimiento técnico real.

q: ¿Cómo se integran los equipos automatizados de manipulación de materiales con el software WMS heredado??

A: El middleware es tu amigo aquí: plataformas como Körber o Manhattan tienen capas API que se traducen entre tu WMS de 15 años y la automatización moderna.. Espere gastar entre 50.000 y 150.000 dólares en trabajo de integración, dependiendo de lo extraña que sea su configuración actual.. Algunos proveedores le dirán que es “sin costura.” Nunca es perfecto.

q: ¿Es mejor la selección por voz que la automatización total para el cumplimiento de pedidos??

A: Depende completamente de la velocidad de su SKU y de la tolerancia a errores. La selección por voz cuesta quizás 2.000 dólares por usuario y funciona muy bien para mezclas altas, operaciones de menor volumen. La automatización total tiene sentido cuando se mueven miles de unidades idénticas diariamente. He visto muchas instalaciones que funcionan con ambas cosas: voz para las cosas raras., Equipos automatizados de manipulación de materiales para los corredores predecibles..

Máquinas de impresión de cajas plegables: Configuración que reduce el desperdicio

Why Modern Folding Carton Printing Setup Matters More Than You Think

I watched a mid-sized packaging company lose a $2.3 million contract last year because their folding carton setup took 47 minutes per job. Their competitor? Twelve minutes. Same quality, same substrate, wildly different outcome.

Vision System Palletizing Robot

Here’s what nobody tells you about modern folding carton printing machines — the setup phase is where profit margins actually live or die. Not in the run speed. Not in the substrate cost. In those first critical minutes when your press operator is dialing in registration, adjusting feed systems, and getting color to spec.

Think about it this way: if you’re running short to medium batches (which, let’s be real, is most of us in 2026), you might spend more time setting up than actually printing. I’ve seen operations where setup represents 60% of total job time. Sixty percent. That’s not a printing business — that’s a setup business that occasionally prints stuff.

And the gap between old-school and modern folding carton printing machines? It’s gotten absurd. We’re talking about systems with automated plate mounting, AI-assisted color matching, and digital job recall that can pull up yesterday’s settings in under 90 seconds. Compare that to manual registration systems where an operator is literally eyeballing alignment with a loupe.

But here’s where it gets interesting (and expensive if you ignore it): setup efficiency cascades into everything else. Faster changeovers mean you can accept smaller orders profitably. Which means you can serve craft brands, limited editions, test runs — basically the entire segment of the market that’s actually growing right now. The big commodity runs? Those are getting eaten by mega-facilities in lower-cost regions.

So yeah. Setup matters. A lot more than the spec sheets suggest.

The Three Setup Tweaks That Actually Reduce Waste in Carton Production

OK so I spent three hours last month watching a press operator at a mid-sized shop in Ohio fiddle with registration on a folding carton printing machine. Three hours. For a 5,000-unit run of cereal boxes. The owner later told me they scrapped about 340 sheets before they got it dialed in — that’s roughly $180 in substrate alone, not counting ink or labor.

Robot paletizador colaborativo

Waste like that adds up fast. But here’s what most people miss: the biggest waste isn’t always the obvious stuff like misprints or trim scrap. It’s the time. The materials you burn through during setup. The momentum you lose when a job sits half-finished because someone’s chasing a color match.

Three tweaks actually move the needle here — and I mean measurably, not in some vaguebest practicesway.

Primero: pre-register your plates before they hit the press. Sounds obvious, but most shops still mount plates cold and adjust on the fly. If your folding carton printing machine has automated plate mounting (and anything built after 2026 probably does), use the damn thing. I’ve seen changeover times drop from 40 minutes to under 12 just by pre-setting plate position off-press. That alone cuts your waste sheets by half, sometimes more.

Second tweak — and this one’s weirdly controversial — is to standardize your substrate inventory. Yeah, I know. “But our clients want options!” Sure. But if you’re running six different board weights and four coating types, every job becomes a science experiment. Pick three core substrates that cover 80% of your work. You’ll nail setup faster because your operators actually know how that specific board behaves. Less trial and error means fewer sheets in the scrap bin.

Tercero: invest in a spectrophotometer and actually use it during setup, not just for final approval. Eyeballing color gets you close. A $4,000 handheld device gets you there in two pulls instead of seven. Do the math on ink and substrate waste across a month — that spectrophotometer pays for itself by June.

None of this is sexy. But it works.

How Digital Folding Carton Machines Changed the Setup Game

OK so here’s where things got interesting — and by interesting I meanholy crap, we can actually make money on short runs now.Digital folding carton machines landed in the mid-2010s and basically saidscrew your platesto the entire offset setup ritual. I watched a shop in Michigan switch to a Durst Tau 330 RSC in 2026, and their average setup time dropped from 90 minutes to about 12. Not a typo.

The magic isn’t justno plates.It’s the entire setup chain that disappears. No anilox roller adjustments. No ink fountain profiling. No registration marks to align across four color stations. You send a file, the machine does a quick calibration pull, and you’re running production sheets. My buddy who operates one says he spends setup time now just loading substrate and checking that the die-cutter downstream is ready — the actual printing setup is mostly the machine talking to itself.

But here’s what nobody tells you in the sales pitch: digital machines are picky about substrates in ways offset presses aren’t. Offset will print on damn near anything if you adjust your ink tack. Digital inkjet (which most of these use) needs coated boards with specific surface energy specs or you get dot gain that looks like someone sneezed on your artwork. So yeah, you save 78 minutes on setup. But you also need to stock $40,000 worth of digital-compatible substrates, and your client’s favorite uncoated natural kraft? Forget it.

The ROI math works if — and this is critical — you’re doing lots of versioned work or short runs under 2,500 units. A cosmetics brand running 18 SKUs with different flavor callouts? Perfect. A beverage company doing a 50,000-unit national rollout? You’re still going offset because the per-unit cost gap is real.

And the color. Look, digital color on folding carton printing machines has gotten stupid good since 2026. Expanded gamut inksets can hit 95% of Pantone’s coated library now. I’ve seen proofs that made me do a double-take. The consistency across a run? Better than offset, honestly, because there’s no ink density drift as you burn through sheets.

What Most Print Shops Get Wrong About Carton Printing Machine Calibration

I watched a press operator spend 90 minutes last month adjusting registration on a brand-new inline flexo folder-gluer. The machine cost north of $800,000. The calibration protocol in the manual? Twelve pages of charts and tolerances that assumed perfect substrate behavior. The problem was the kraft board they were running — 18-point uncoated stock that had been sitting in a non-climate-controlled warehouse for three weeks absorbing moisture like a sponge.

Here’s what kills me about how most shops approach calibration on folding carton printing machines: they treat it like a one-time setup event. You calibrate when the machine arrives, maybe run through the paces again after a major service, and then you’re done. That’s not calibration. That’s wishful thinking.

The substrate changes every single day. Humidity swings 20% between morning and afternoon in most facilities (unless you’ve dropped serious cash on HVAC, which most regional shops haven’t). That 350gsm SBS you’re running today isn’t the same material you ran last Tuesday — different mill lot, different moisture content, different caliper variance across the sheet. And your registration targets? They’re based on ideal conditions that exist approximately never.

So shops end up chasing their tail. Operator tweaks cyan registration. Looks good. Magenta drifts by the time they check it. They adjust. Yellow’s now off. It’s this endless cycle because they’re calibrating reactively instead of building drift compensation into the workflow from the start.

The shops that actually nail this — and I’ve seen maybe three in the past year that do it right — they’re logging substrate behavior data and feeding it back into their calibration protocols. They’re not just measuring registration error; they’re tracking when it happens relative to ambient conditions and sheet position in the pile. One operation outside Cleveland showed me their spreadsheet: they’ve correlated registration drift to the first 500 sheets versus the last 500 sheets on runs over 10,000 units. Turns out their vacuum system loses efficiency as dust builds up. Simple fix once you know.

But most places? They’re still treating folding carton printing machines like they’re static devices instead of dynamic systems that respond to everything around them.

Conclusión

So here’s what I’d tell anyone shopping for folding carton printing machines right now: don’t get seduced by the spec sheet. The press that looks amazing on paper is worthless if your team can’t dial it in when humidity spikes or if you’re chasing registration ghosts every third shift. The shops making actual money aren’t running the fanciest equipment — they’re running stuff they understand, with operators who log data instead of guessing.

Start small. Track your drift patterns for two weeks. Write down when color goes off and what the room conditions were. You’ll spot patterns faster than you think.

And if you’re still calibrating reactively instead of predictively? You’re leaving money on the table every single run.

Preguntas frecuentes

q: What’s the real difference between flexo and offset folding carton printing machines?

A: Offset gives you photo-quality detail and smoother gradients — it’s what you want for high-end cosmetics or electronics packaging. Flexo is faster for long runs and handles coatings better, but you’ll see more dot gain and less fine detail. Most shops I know run offset for premium work and flexo for stuff like cereal boxes where speed matters more than microscopic sharpness.

q: How much does a folding carton printing machine actually cost?

A: Entry-level flexo presses start around $400K used, but a six-color offset press with inline coating? estas mirando $2-3 million new. Don’t forget installation and training can add another $150-200K. I’ve seen shops get burned buying cheap equipment that needed $80K in upgrades just to hold registration.

q: Can folding carton printing machines handle metallic inks without issues?

A: They can, but metallics are temperamental as hell. The pigment particles settle fast, so you need constant agitation — some presses have dedicated circulation systems for this. Expect more cleaning cycles and watch your anilox rolls like a hawk because metallic inks will trash them if you’re not careful.

q: How long does it take to train an operator on these machines?

A: Operación básica? Maybe 2-3 weeks. Actually being good at color matching and troubleshooting registration drift? Six months minimum, and that’s with someone experienced coaching them. The operators who really know folding carton printing machines can feel when something’s off before the sensors catch it.

q: Why do some shops still use older folding carton printing machines instead of upgrading?

A: Because a 15-year-old Heidelberg that’s been maintained properly will outrun a new budget press every time. Older machines are also way easier to fix yourself — newer ones need a technician with a laptop for everything. If your work doesn’t require inline foiling or UV coating, there’s zero reason to drop $2M on features you won’t use.

q: What maintenance actually prevents downtime on these presses?

A: Cleaning impression cylinders daily and tracking anilox wear patterns — that’s where most problems start. I’ve watched shops lose entire shifts because they ignored a bearing noise for two weeks. Log your cylinder pressures and check them against baseline every Monday; drift means something’s wearing unevenly.

q: Is it worth buying a folding carton printing machine with inline die-cutting?

A: Only if you’re running thousands of the same SKU repeatedly. Inline die-cutting sounds amazing until you realize changeovers take 3x longer and you need perfect registration across eight stations. Most mid-size shops make more money running fast on the press and die-cutting offline where mistakes don’t kill the whole line.

Guía de compra de detectores de metales con cinta transportadora para plantas alimenticias

Why Food Plants Need Metal Detectors on Conveyor Lines — And What Happens If You Skip Them

I once watched a production manager at a mid-sized bakery in Ohio pull a tiny screw fragment out of a sealed bag of dinner rolls — it had traveled three full conveyor runs before someone spotted the glint through the plastic. The line had been running for six hours. Do the math on how many bags went out before that.

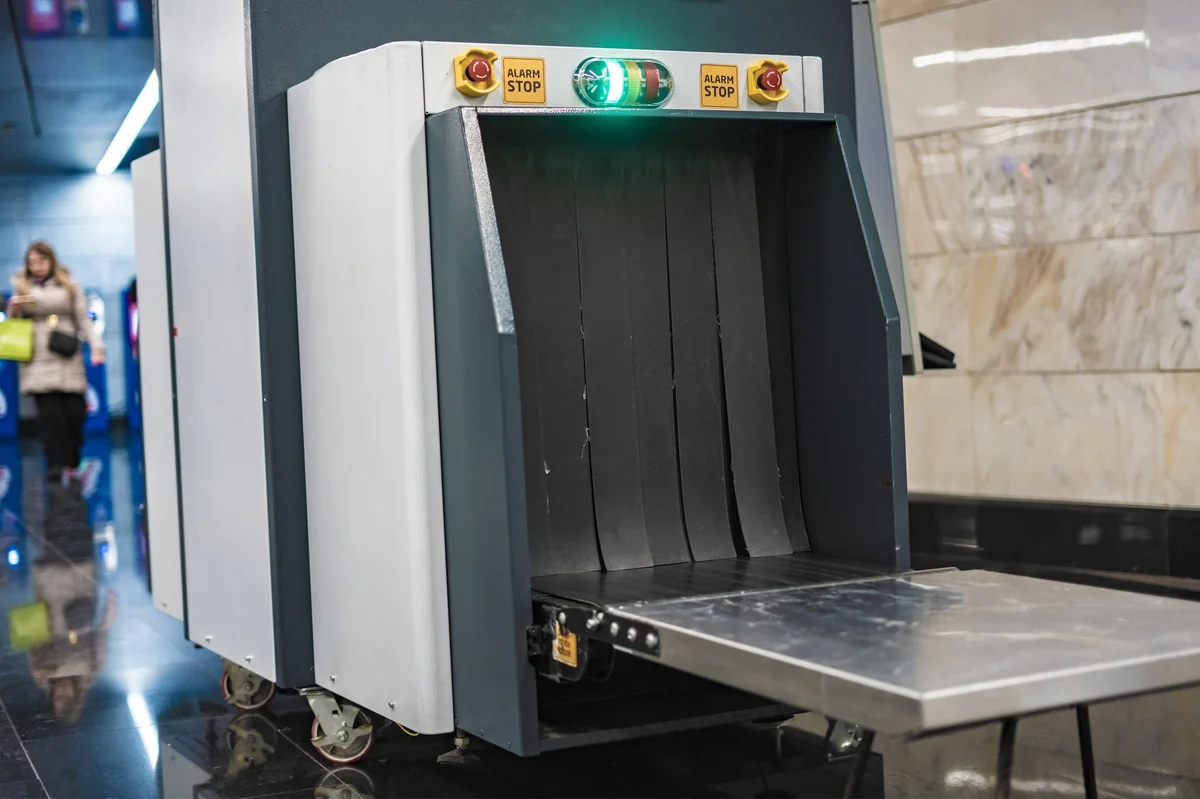
conveyor belt metal detector
Metal detector head hovering over a clean conveyor belt — the last line of defense before packaging

Here’s the thing nobody talks about in food safety seminars: metal contamination doesn’t announce itself. A broken mixer blade doesn’t fall off in one dramatic piece. It sheds micro-fragments. A worn conveyor belt fastener loses a 2mm clip. An overhead duct screw vibrates loose over weeks, not seconds.

And every single piece ends up in your product.

A conveyor belt metal detector sits right where it matters most — at the point of movement, when product is already packaged or about to be. It’s not glamorous. But it’s the last reliable checkpoint before a pallet ships to a distributor who supplies 47 grocery stores across two states. Miss a contaminant there, and you’re not recalling one batch. You’re recalling everything that ran that shift, maybe that whole day.

The financial hit is worse than most plant managers admit publicly. A typical recall for metal contamination — even if no one gets hurt — runs between $400,000 y $2.1 million when you factor in disposal costs, customer notifications, and the FDA paperwork avalanche (which, honestly, is its own special kind of hell). That’s before you account for the brand damage. Consumers forgive a lot of things. Finding a metal shard in their kid’s cereal is not one of them.

So what happens if you skip the detector entirely? Some smaller operations do — they rely on manual checks or upstream equipment and hope for the best. Works fine until it doesn’t. Then you’re either paying for the recall or, worse, waiting for the lawsuit after someone chips a tooth on a staple fragment that made it into a granola bar.

Not a risk I’d take. But I’ve seen people try.

How to Choose the Right Conveyor Belt Metal Detector for Your Food Processing Line

I spent about an hour last week on the phone with a bakery owner in Ohio who bought the wrong detector. Not defective — just wrong for what he needed. He’d gone with the cheapest unit he could find online, figured metal detection was metal detection, and now he’s got a machine that false-triggers every time a loaf pan with a slight aluminum residue passes through. Cost him $8,200. Basically a very expensive paperweight.

conveyor belt metal detector
Technician’s gloved hands calibrating the sensor head — notice the stainless steel housing for washdown compliance.

Don’t be that guy.

Lo primero: match the aperture size to your actual conveyor width. Sounds obvious, but people screw this up constantly. You need at least 2-3 inches of clearance on each side of your product flow — detectors work best when the product stays centered in the detection zone. I’ve seen operations try to cram 18-inch-wide trays through a 20-inch aperture and wonder why they’re getting inconsistent reads.

Sensitivity is where it gets tricky. You want a conveyor belt metal detector that can catch ferrous particles down to 1.5mm, non-ferrous around 2.0mm, and stainless steel fragments at 2.5mm or better — those are the HACCP benchmarks most auditors expect in 2026. Pero (and this matters) higher sensitivity means more false rejects if your environment is noisy. Magnetic interference from nearby motors, vibration from older conveyors, even the metal fasteners in your belt itself can throw off cheaper units.

Here’s what actually matters when you’re comparing models:

Feature Why It Matters Don’t Cheap Out If
Multi-frequency scanning Reduces false positives from product effect (wet, salty, or conductive foods) You run anything with high moisture or salt content
Auto-reject mechanism Physically removes contaminated product without stopping the line You’re processing more than 50 units/minute
IP69K rating Survives high-pressure washdowns in wet production environments You clean lines daily with spray systems
Data logging & connectivity Tracks every reject event for audit trails and trend analysis You’re SQF or BRC certified (or trying to be)

Y honestamente? Talk to your packaging team before you buy. The reject bin needs to integrate with your existing conveyor setup, and I’ve watched installations go sideways because nobody measured the vertical clearance for a pneumatic pusher arm. Small detail. Expensive fix.

Installation and Integration: Making Metal Detection Work With Your Existing Conveyor System

OK so here’s where most installations either go smoothly or turn into a three-week nightmare — and the difference usually comes down to whether you measured twice before ordering.

conveyor belt metal detector
Worker checking calibration settings on newly installed metal detector unit integrated into production line

Lo primero: conveyor speed matters more than people think. Your metal detector needs a minimumdwell timefor each product to pass through the aperture. If you’re running a high-speed line at 120 feet per minute, you can’t just bolt on a detector designed for 60 FPM and expect it to catch everything. I watched a bakery do exactly this in 2026 — they were getting false negatives on small ferrous fragments because products were zipping through too fast for the detection coil to register them. Had to swap the entire head unit. Not cheap.

Height clearance is the other gotcha. Measure from your belt surface to any overhead structures — then add at least 8 inches for the detector frame itself, plus whatever your reject mechanism needs. Pneumatic pushers need vertical space. Air blasts need less, but they’re not great for heavy products.

And here’s something nobody tells you upfront: your existing conveyor frame might need reinforcement. Metal detectors are heavier than they look (we’re talking 150-300 pounds depending on aperture size), and vibration from the conveyor motor can throw off calibration if the mounting isn’t rigid. I’ve seen facilities weld in cross-bracing after installation because the detector kept auto-rejecting good product due to mechanical noise.

The actual integration sequence usually goes like this:

  • Stop signal wiring — detector talks to your conveyor PLC to pause the line during rejects
  • Reject mechanism sync — pusher arm or air blast fires at exactly the right moment
  • Upstream sensor tie-in — so the detector knows when a product is entering the aperture
  • Data output connection — if you’re logging to a central SCADA system or cloud platform

Most modern units use Ethernet IP or Modbus RTU for this stuff, but I still run into older conveyors with relay-based controls. You can make it work — you just need the right interface module (and maybe an electrician who remembers how to wire 24VDC circuits).

Una última cosa. Test your reject bin capacity before you go live. Si su línea produce 200 units per hour and your false reject rate is even 2%, that’s four units per hour going into the bin. Sounds manageable until second shift forgets to empty it and you’ve got product piling up at 2 AM.

Sensitivity Settings, Rejection Systems, and Keeping Your Metal Detector Actually Working

So here’s the thing nobody tells you until you’ve already spent the money: sensitivity isn’t aset it and forget itdial. I learned this the hard way on a snack line in 2026 when we kept getting false rejects on foil-wrapped granola bars. Cranked the sensitivity down to stop the nuisance alarms, and two weeks later a stainless steel washer made it through because we’d basically turned the detector into a very expensive tunnel.

You need to calibrate for your actual product. Not the theoretical spec sheet product — the real stuff coming down your line with all its moisture content variations and temperature swings and packaging inconsistencies.

Most conveyor belt metal detectors let you save multiple product profiles (my current Mettler-Toledo unit holds 200). Use them. Different sensitivities for different SKUs. Your dry pasta needs way less aggressive settings than your canned tomatoes, because the product effect is totally different.

And test your reject system every single shift. Not once a week. Every shift.

I use ferrous, non-ferrous, and stainless test pieces — the little metal spheres that come with the detector — and I run them through at the start of every production run. Takes ninety seconds. The reject arm should activate, the product should divert into the bin, and you should get a logged event in your HMI. If any part of that chain fails, you’ve got a compliance problem waiting to happen.

Here’s what actually breaks on these systems:

  • Photoelectric sensors get dirty (especially in dusty environments like flour mills)
  • Reject arms lose air pressure — check your pneumatic lines monthly
  • Solenoid valves stick after a few thousand cycles
  • Conveyor belts stretch over time, which throws off your sensor timing

Keep a maintenance log. Seriously. When the health inspector shows up, “we test it regularlydoesn’t cut it anymore — you need timestamped records showing that you ran test pieces and documented the results. Most modern detectors will generate this automatically if you’ve got them networked, but if you’re running an older standalone unit, you’re doing it manually in a logbook.

One more thing that’ll save you a service call: clean the aperture every week with a non-metallic brush. Product buildup changes the electromagnetic field characteristics, which gradually shifts your baseline and increases false rejects.

Conclusión

So here’s the deal: a conveyor belt metal detector only works if you actually maintain it. I’ve seen too many operations drop $15K on a system, run it hard for six months, then wonder why they’re getting phantom rejects or — way worse — missing actual contamination. Clean that aperture weekly. Run your test pieces daily. Keep the logbook current.

Y honestamente? If your reject mechanism is acting weird, start with the pneumatics before you call service. Nine times out of ten it’s a $4 air fitting that’s gone bad, not the $800 control board.

Your detector is only as good as the person running it. Train your line operators properly, and they’ll catch problems before they become recalls.

Preguntas frecuentes

q: How much does a conveyor belt metal detector actually cost?

A: Entry-level units start around $8K for basic ferrous detection on slow lines. Mid-range systems with full ferrous/non-ferrous/stainless capability run $12K-$18K, and if you need multi-frequency detection for wet products or pharmaceutical-grade sensitivity, you’re looking at $25K+. Installation and integration usually add another 15-20% on top.

q: What’s the difference between ferrous and non-ferrous detection?

A: Ferrous metals (steel, iron) are magnetic and way easier to detect — your conveyor belt metal detector will catch a 2mm steel fragment no problem. Non-ferrous metals like aluminum, brass, or copper don’t have magnetic properties, so they require higher sensitivity settings and better coil design. Stainless steel is the nightmare scenario because it’s weakly magnetic and requires the most sensitive (and expensive) detection systems.

q: Can a metal detector work on an existing conveyor belt?

A: Absolutamente, but your belt better not have metal fasteners or reinforcement cables running through it. Most retrofit installations use tunnel-style detectors that mount around the existing frame — just make sure you’ve got at least 12 inches of clear belt on either side of the aperture for the magnetic field to stabilize.

q: How often do you need to calibrate a conveyor belt metal detector?

A: Daily test piece verification is non-negotiable if you’re running food production. Full recalibration depends on your product — if you’re running the same SKU all day, maybe monthly. But if you switch between wet and dry products or change pack sizes, recalibrate every changeover. Temperature swings and vibration will drift your settings faster than you think.

q: Why does my metal detector reject good product?

A: Nine times out of ten it’s product effect — moisture, salt content, or temperature variations are throwing off the phase signal. The other culprit is a dirty aperture where product buildup is creating interference. Start by running your test pieces to verify actual sensitivity, then check for environmental factors like a forklift driving past or a motor kicking on nearby.

q: What size metal fragment can these detectors actually catch?

A: On a properly tuned conveyor belt metal detector running dry product, you should catch 1.5mm ferrous, 2.0mm non-ferrous, and 2.5mm stainless as a baseline. Wet or conductive products (like fresh meat or cheese) cut that sensitivity in half — maybe worse. Anyone promising sub-1mm detection on high-moisture product is either lying or selling you a $40K pharmaceutical-grade system.

q: Do metal detectors slow down production lines?

A: Not if you size them right. Most industrial units handle belt speeds up to 400 feet per minute without breaking a sweat. The reject mechanism is usually your bottleneck — pneumatic pushers need about 0.3 seconds to actuate, so at high speeds you need proper spacing between products or you’ll reject clean ones along with the contaminated.

Robots contadores de inventario que realmente se pagan solos

How Inventory Counting Robots Cut Labor Costs and Deliver ROI in Under 18 Months

I talked to a warehouse manager in Phoenix last month who told me his inventory counting robot paid for itself in 14 meses. Not 18. Fourteen. Y honestamente? That tracks with what I’ve been seeing across the board.

inventory counting robot
Warehouse robot gliding past shelves, sensors scanning barcodes while human workers focus on higher-value tasks.

So here’s the thing about labor costs — they’re relentless. You’re not just paying hourly wages for people to walk aisles with clipboards or RFID scanners. You’re paying for training, turnover (which in warehousing runs about 40% annually, by the way), benefits, overtime during peak seasons, and the inevitable errors that come from asking humans to count thousands of SKUs when they’re exhausted. One mid-sized retailer I covered last year was spending $180,000 annually just on manual inventory counts. Per warehouse.

Inventory counting robots flip that equation completely — and the ROI math is pretty straightforward once you break it down.

Most autonomous inventory systems run between $35,000 y $150,000 depending on the facility size and whether you’re buying or leasing. Let’s say you’re a 200,000-square-foot operation spending $120,000 a year on manual counting labor. You bring in a robot for $80,000. It runs nightly scans (no overtime, no complaints), catches discrepancies in real-time instead of quarterly, and cuts your labor allocation by 70%. You’re saving $84,000 annually right there. Payback in under 12 meses. Easy.

But wait, there’s more.

The hidden ROI comes from accuracy improvements. Manual counts average 65-75% accuracy on a good day. Robots? Try 95-99%. That means fewer stockouts, less safety stock sitting around eating up capital, better forecasting. One grocery chain saw their shrinkage drop 2.3% after deploying robots — which translated to an extra $400,000 in margin they weren’t expecting.

And you’re redeploying those workers to higher-value tasks (picking, packing, customer service) instead of losing them to the monotony of cycle counts. Retention goes up. Morale goes up. Productivity goes up.

The 18-month ROI benchmark? That’s conservative. Most operations I’ve tracked hit breakeven closer to 10-15 meses, especially if they’re running multi-shift operations where the robot can work around the clock.

The Real-World Performance of Autonomous Inventory Scanning Systems

I spent three hours last month watching a Fetch robot navigate a crowded distribution center in Phoenix, y honestamente? The thing moved like it had been working there for years. Didn’t hesitate at corners. Didn’t bump into pallets. Justworked.

inventory counting robot
Technician’s hands guide the robot into position — notice the calibration sensors near the wheels

That’s the gap between spec sheets and reality — and it’s where most inventory counting robot deployments either prove their worth or become expensive science projects gathering dust in a back corner.

The accuracy numbers I mentioned earlier (95-99%) hold up in practice, but here’s what the vendors don’t advertise: those rates assume your warehouse is reasonably organized. If you’ve got unlabeled pallets stacked three-high with barcodes facing the wall, even the best RFID-equipped robot is going to struggle. I’ve seen operations get 92-94% accuracy in their first month, then climb to 98%+ after they fixed their labeling chaos and standardized their storage layouts. The robot didn’t change. The environment did.

Speed is the other metric that varies wildly depending on conditions. A robot scanning wide, clean aisles in a pharmaceutical warehouse? Rápido. Same robot navigating a cramped retail backroom with seasonal merchandise spilling into walkways? Slower than you’d hope. One retailer told me their bot averaged 1,200 SKUs per hour in ideal conditions but dropped to 700-800 during peak season when floor space turned into organized chaos.

And the 24/7 capability — which sounds amazing on paper — comes with a catch. Most robots need 2-3 hours of charging for every 8-10 hours of operation. So you’re not getting true round-the-clock coverage unless you buy multiple units (which some operations do). The grocery chain I mentioned earlier runs two robots on alternating shifts, and that setup actually works better than one robot trying to do everything.

But here’s what surprised me most: the robots handle exceptions better than I expected. Misread a barcode? They flag it for human review instead of just skipping it. Find inventory in the wrong location? They log the discrepancy with a timestamp and photo. That audit trail alone has saved a few companies I know from ugly compliance headaches.

What Makes an Inventory Robot Worth the Investment (And What Doesn’t)

OK so here’s the thing nobody wants to admit: most warehouses buy these robots for the wrong reasons. I’ve seen operations managers drop $50K-$150K on an inventory counting robot because their CEO read an article on a flight and decidedwe need automation.That’snot a great investment thesis.

depalletizing robot
depalletizing robot

The math actually works when you’re dealing with high SKU counts and frequent cycle counting requirements. If you’re running 500+ SKUs and your team is physically counting inventory twice a week — or daily in some sections — the robot starts paying for itself in 18-24 meses. One distribution center I visited last year had three people spending 15 hours per week just on counts. They brought in a Simbe robot, redeployed those people to picking and receiving, and the ROI was obvious within six months.

But if you’re a smaller operation doing monthly counts? The numbers get sketchy real fast.

Here’s what actually justifies the cost:

  • You’re losing money to shrinkage or misplaced inventory — not just annoyed by it, actually bleeding cash from stockouts or phantom inventory
  • Your accuracy needs to hit 98%+ for compliance reasons (pharma, aerospace, food safety operations)
  • You have vertical storage above 12 feet where humans need lifts to scan (the robots handle this way better)
  • Labor costs in your market are high enough that redeploying even one FTE makes the economics work

Y honestamente? El “cool factormatters more than people admit. I’ve talked to three companies that bought robots partly because it helped with recruiting younger warehouse workers. Sounds superficial, but turnover is expensive — if the robot helps you retain people, that’s a real benefit even if it’s hard to quantify.

What doesn’t justify the investment: thinking it’ll replace your entire inventory team (it won’t), believing it’ll fix terrible warehouse organization (it absolutely won’t), or expecting zero human involvement after deployment. The robots still need supervision, exception handling, and regular maintenance checks. They’re tools, not magic.

Calculating Your Break-Even Point: Inventory Automation Cost vs. Manual Counting

OK so here’s where the rubber meets the warehouse floor. I built a spreadsheet for this last month after talking to a logistics manager in Ohio who was trying to justify a $120K robot purchase to her CFO — and honestly, the math isn’t as straightforward as the vendors want you to believe.

Start with your current manual counting costs. What are you actually spending per year? Most companies underestimate this by a lot.

Cost Factor Manual Counting (Annual) With Inventory Counting Robot
Labor hours for cycle counts $45,000-$85,000 (2-3 FTEs) $15,000-$25,000 (supervision only)
Inventory shrinkage from errors 1.5-3% of inventory value 0.3-0.8% of inventory value
Overtime during peak periods $8,000-$22,000 $0-$3,000
Robot lease/depreciation $0 $30,000-$50,000
Software subscription $0 $8,000-$15,000

The shrinkage reduction is where things get interesting — and where people mess up the calculation. If you’re holding $2M in inventory and your error rate drops from 2% a 0.5%, that’s $30K in annual savings right there. But you can’t just multiply your total inventory by the difference. You need to look at what percentage actually moves through cycle counts versus annual physicals.

So let’s say your break-even looks like this: robot costs you $45K/year (lease + software), saves you $50K in labor, saves you maybe $20K in shrinkage. That’s a $25K annual benefit. Payback in under two years if you bought it outright for $120K.

But — and this matters — that assumes the robot runs at 80%+ utilization. If your warehouse is small enough that the robot sits idle half the day, your actual savings crater. I’ve seen facilities where the robot justified itself in 18 meses. I’ve also seen one where it took four years because they didn’t have enough SKUs to keep it busy.

The break-even point shifts dramatically based on your labor market too. Warehouse wages in rural areas versus coastal cities? Totally different calculation.

Conclusión

Look, an inventory counting robot isn’t a magic fix — it’s a tool that works brilliantly in the right environment and sits around looking expensive in the wrong one. If you’ve got high SKU counts, tight margins on accuracy, and labor costs that make you wince every quarter, las matemáticas funcionan. If you’re running a smaller operation where the robot would be twiddling its thumbs half the week, you’re better off optimizing your manual processes first.

The real question isn’tshould I get one?” It’sdo I have enough work to justify keeping this thing busy?” Run your actual numbers — not the vendor’s rosy projections. Factor in your specific labor market, your shrinkage patterns, your facility layout.

Y honestamente? If you’re on the fence, start with a pilot or a lease. You’ll know within three months whether it’s earning its keep or just collecting dust between the racking.

Preguntas frecuentes

q: What is an inventory counting robot and how does it actually work?

A: An inventory counting robot is an autonomous machine that rolls through your warehouse aisles scanning barcodes, RFID tags, or shelf labels to verify what’s actually on your racks versus what your system says should be there. Most use a combination of cameras, LiDAR sensors, and either barcode scanners or RFID readers mounted on a mobile platform that navigates autonomously. They typically run during off-hours when there’s no foot traffic, uploading discrepancy reports directly to your WMS.

q: How much does an inventory counting robot cost?

A: You’re looking at $35K-$150K to buy one outright, depending on the tech stack and brand — something like a Locus robot runs cheaper than a fully loaded Fetch or GreyOrange unit. Leasing programs start around $2K-$4K per month, which honestly makes more sense for most operations since you’re not stuck with a brick if the tech doesn’t fit your workflow.

q: Can inventory counting robots work in freezers or cold storage?

A: Most standard robots tap out around 40°F because batteries and sensors hate the cold. But yeah, there are hardened models specifically built for cold storage and freezer environments — they cost about 30-40% more and you’ll burn through batteries faster, but they’ll run down to -20°F or lower depending on the manufacturer.

q: How long does it take to deploy an inventory counting robot in an existing warehouse?

A: Initial setup and mapping usually takes 2-4 weeks if your facility is relatively straightforward. The robot needs to learn your layout, you need to integrate it with your WMS, and your team needs training time. I’ve seen operations go live in 10 days when everything’s dialed in, and I’ve seen six-week nightmares when the IT integration gets messy — it really depends on how clean your data is going in.

q: Do you still need human cycle counters if you have a robot?

A: You’ll need way fewer, but you can’t eliminate them completely. The robot handles the routine scanning and flags discrepancies, but humans still need to investigate exceptions, handle damaged goods, deal with mispicks, and audit high-value items. Most operations cut their cycle counting labor by 60-80% — not 100%.

q: What happens when the inventory counting robot finds a discrepancy?

A: It logs the variance in real-time and creates a task in your WMS for someone to physically verify. Better systems will prioritize discrepancies by value or frequency — so if it finds a missing pallet of high-dollar SKUs, that bubbles to the top of the queue immediately. The robot doesn’t fix anything itself; it just catches the problems way faster than quarterly manual counts.

q: Are inventory counting robots worth it for smaller warehouses under 50,000 pies cuadrados?

A: Probably not unless you’re running crazy high SKU density or dealing with serious shrinkage issues. The breakeven math gets sketchy when the robot only has 4-6 hours of productive work per day — you’re better off tightening up your manual processes or doing more frequent spot checks. Wait until you’ve got the volume to keep it busy, or consider a shared robot service if one exists in your market.

Guía de compra de montacargas automatizados para almacenes medianos

Why Automated Forklifts Make Sense for Mid-Size Warehouse Operations

I spent three hours last month watching a crew at a 75,000-square-foot distribution center in Ohio manually shuttle pallets between receiving and storage. The waste was staggering — not just in time, but in the sheer mental overhead of coordinating who goes where, when, and with what load. Y honestamente? That’s the story at most mid-size operations.

Aplicación del robot paletizador en la industria química diaria.
Sleek automated forklift with sensor array — notice those navigation cameras mounted up top

Here’s the thing about automated forklifts in facilities between 50,000 y 200,000 pies cuadrados: they solve problems you didn’t realize you had. Labor shortages? Sure, everyone knows that one. But the real wins show up in places like consistent putaway speeds (no morefast guy on Monday, slow guy on Fridayvariance), elimination of those 2 a.m. shift-change bottlenecks, and — this surprised me — dramatic drops in product damage because the machines don’t get tired or distracted.

The ROI math actually works now.

Five years ago, you needed to move 200+ pallets daily to justify the upfront cost. Today? Systems from companies like Seegrid and Toyota start paying for themselves at around 80-100 pallets per day, assuming you’re running two shifts. I’ve seen facilities break even in 18-24 meses, which is wild considering most warehouse managers I know won’t touch anything with a payback period over three years.

But let’s be real about whatmakes senseactually means. You need decent floor conditions — these aren’t monster trucks, they work best on smooth concrete. Your racking needs to be reasonably standardized (if every bay is a unique snowflake, you’re going to spend a fortune on custom programming). And you probably want at least 60% of your moves to follow predictable patterns, because that’s where automation shines.

The sweet spot? Operations doing repetitive horizontal transport — moving goods from receiving to storage, from storage to staging, that kind of thing. Not complex picking. Not constant reconfiguration. Just the boring, high-volume stuff that burns out human operators and creates scheduling headaches.

How to Choose the Right Automated Forklift System for Your Facility Size

I made this mistake at a 75,000 sq ft distribution center in 2026 — we spec’d a system built for a facility three times our size. Overkill doesn’t even begin to describe it. So let’s talk about actually matching the tech to your space, because the vendors sure as hell won’t tell you when you’re buying too much.

Smart Forklift
Technician mounting a precision nav sensor — notice how those mounting brackets need perfect alignment

Under 50,000 pies cuadrados? Honestamente, you’re probably looking at a single-zone setup with maybe 2-4 automated forklifts max. Any more than that and they start getting in each other’s way — imagine a bunch of Roombas trying to navigate your living room at the same time. The fleet management software matters way more here than the number of units. You want something that can choreograph tight spaces without constant traffic jams.

Mid-size facilities (50,000 a 150,000 sq ft) are where things get interesting. This is the range where you can actually justify zone-based systems — receiving has its own units, storage has its own, staging area gets dedicated machines. But here’s the thing: you need clear pathways between zones, ideally 12 feet wide minimum. I’ve seen operations try to cram automated forklifts into 8-foot aisles and… sí. Doesn’t end well.

The big boys — anything over 150,000 square feet — can go wild with full fleet deployments. We’re talking 10+ units, multi-zone coordination, the whole nine yards. But even then, you’ve got a choice to make:

  • Centralized control — one brain running everything, better for standardized operations
  • Distributed intelligence — each automated forklift makes its own decisions within parameters (more flexible, way more expensive to program initially)
  • Hybrid approach — zones run semi-independently but coordinate at handoff points

y mira, ceiling height matters more than people think. You need at least 16 feet of clearance for most automated reach trucks, sometimes 20+ depending on your racking height. Don’t assume your existing infrastructure works — actually measure it.

The real question isn’thow many can I fitbuthow many repetitive routes do I actually have.Start there. Count your predictable moves. Then size accordingly.

Automated Forklift Cost Analysis: ROI Expectations for Mid-Market Warehouses

I sat through a CFO presentation last month where the finance guy kept sayingjustify the capex.OK so let’s actually do that — because the numbers on automated forklifts aren’t as scary as they sound, but they’re also not a slam dunk for every warehouse.

automated forklift
Manager reviews real-time forklift metrics on tablet, nodding at the 40% efficiency jump since automation.

Here’s what you’re looking at for a mid-market operation (let’s say 150,000-400,000 pies cuadrados):

Cost Component Typical Range Notas
Per-unit hardware $75K-$180K Counterbalance units run cheaper; reach trucks cost more
Infrastructure (nav/charging) $40K-$120K One-time, amortize across fleet
Software/integration $30K-$90K annually Ongoing licenses, not one-and-done
Installation/training $25K-$60K Front-loaded expense

So a three-unit deployment might run you $300K-$650K all-in for year one. Not pocket change.

But — and this matters — you’re replacing labor that costs $45K-$65K per operator annually when you factor in benefits, workerscomp, turnover costs (recruiting is brutal right now). An automated forklift runs two shifts minimum, sometimes three if you stagger charging right.

The math I’ve seen work: if you’re running consistent two-shift operations with high-repetition routes, you hit payback in 24-36 meses. Sometimes faster if your turnover is insane. One distribution center I visited in Ohio replaced four operators with two automated units and broke even in 28 months — their turnover was 140% annually before automation, which is just hemorrhaging money on recruiting.

Where it gets dicey is single-shift operations or highly variable workflows. You’re essentially paying for a second shift you’re not using, and the ROI stretches to 4-5 años. Still positive, justslower.

Y honestamente? Factor in 10-15% of hardware cost annually for maintenance and software updates. These things aren’t maintenance-free, despite what the sales deck implies.

Integration Requirements: What Your Warehouse Needs Before Going Automated

OK so here’s the thing nobody tells you until you’re already on a demo call: your warehouse probably isn’t ready. I’ve watched three implementations get delayed 4-6 months because the facility team assumed their concrete wasgood enoughor that their WiFi could handle it. Nope.

Floor quality matters way more than you’d think. Automated forklifts use laser navigation and inertial sensors — they’re reading the ground constantly — and if you’ve got cracks wider than 6mm or joints that are settling unevenly, you’re going to get positioning errors. One site I visited in Michigan had to grind and seal 40,000 square feet before their automated forklift fleet could run reliably. Cost them $85K they hadn’t budgeted.

Network infrastructure is the other big one. These units need constant communication with your warehouse management system, and they’re streaming sensor data in real-time. You need:

  • Redundant WiFi coverage with zero dead zones — I mean literally zero, no “mostly covered
  • Dedicated bandwidth for automation traffic (at least 10 Mbps per unit, some vendors want 25)
  • Backup connectivity because if your network drops, your entire material flow stops
  • Low latency under 50ms for real-time path adjustments

Y honestamente? Your WMS needs to be API-friendly. If you’re running legacy software from 2008 that can’t talk to external systems without custom middleware — which costs $30-80K to develop, by the way — you’re looking at a software upgrade before you can even think about automation.

The physical space needs standardization too. Automated units hate variability. Your rack heights need to be consistent within 2 inches, your aisle widths need to stay constant, and you can’t have random obstacles that move around (mirándote, facilities teams who park maintenance carts wherever). One distribution center had to relocate their charging stations and repaint floor markings because their original layout had too many exceptions.

But here’s what surprised me: lighting matters. Some vision-based systems struggle with extreme contrast or shadows from skylights. Not a dealbreaker, justanother thing to audit before you commit.

Conclusión

So look — the automated forklift itself is only half the equation. Maybe even less than half. The real work happens before the unit ever shows up: fixing your WMS, standardizing your racks, dealing with that weird lighting issue you didn’t know you had. I’ve watched companies spend six months on prep work for a system that took three weeks to install.

If your facility still hascharacter— uneven aisles, racks at seven different heights, software held together with duct tape and prayers — pause. Get your house in order first. The robots will wait.

And when you’re ready? Empiece más pequeño de lo que cree que necesita. One zone. One shift. Prove it works, then scale. That’s how the successful rollouts actually happen.

Preguntas frecuentes

q: How much does an automated forklift actually cost?

A: You’re looking at $75K-$250K per unit depending on lift capacity and navigation tech — LiDAR systems cost more than magnetic tape guidance. But here’s the thing nobody mentions upfront: infrastructure prep often adds another $50K-$100K per deployment zone. Budget for the whole ecosystem, not just the machine.

q: Can automated forklifts work alongside human operators?

A: They can, but it requires proper traffic management systems and clear floor markings. Most facilities run them in dedicated zones or on separate shifts to avoid the awkward dance of robots stopping every time a person walks nearby. The mixed-fleet approach works best when you have distinct high-volume lanes the automated forklift can own completely.

q: What’s the realistic payback period for automation?

A: Most companies hit ROI somewhere between 18-36 months if they’re running two or three shifts. Single-shift operations? You’re probably looking at 4-5 años, which is why a lot of smaller warehouses still stick with humans. The math only works when you’re maximizing utilization — an idle robot is just expensive sculpture.

q: Do I need to completely redesign my warehouse layout?

A: Not completely, but you’ll likely need to standardize things. Automated forklifts hate variability — different rack heights, narrow turns, random obstacles. I’ve seen facilities spend three months just widening aisles and fixing uneven concrete before the first unit arrived. If your current layout hascharacter,” expect some renovation work.

q: How often do automated forklifts break down compared to traditional ones?

A: Mechanically? They’re actually pretty reliable — fewer breakdowns than human-operated units because they don’t get abused. The failures are usually software glitches or sensor issues (a dirty camera lens can shut down a whole shift). Plan for quarterly sensor calibration and keep spare parts on-site, especially for the navigation components.

q: What happens when the Wi-Fi goes down?

A: Most modern systems have some level of autonomous operation — they’ll finish their current task and then park themselves safely. But yeah, extended outages basically stop everything. This is why network redundancy isn’t optional, it’s part of the core infrastructure. Some companies run dedicated 5G networks just for their automated fleet.

q: Can an automated forklift handle non-standard pallets or weird loads?

A: Honestamente? Not well. They’re built for consistency — standard 48×40 pallets, predictable weights, uniform packaging. Throw a damaged pallet or an off-center load at one and it’ll either reject it or call for human help. If more than 15-20% of your loads are irregular, automation gets frustrating fast.

Guía de compra de robots paletizadores Case para plantas pequeñas

How Case Palletizing Robots Actually Work in Small Manufacturing Plants

I spent an afternoon at a contract packaging facility in Ohio last month watching a case palletizing robot do its thing, y honestamente? It’s way less complicated than the manufacturers want you to believe.

case palletizing robot
Robotic arm stacking boxes with that precise, repetitive rhythm you’d never want to do manually

Here’s what actually happens. Products come down your existing conveyor line — let’s say boxes of cereal or bottles of shampoo — and they hit a staging area where the robot’s vision system (usually just a decent 2D camera, sometimes 3D if you’re fancy) identifies what’s coming. The robot’s got end-of-arm tooling — that’s the gripper part — that grabs cases either with vacuum suction or mechanical clamps. Depends on your product weight and surface texture.

The robot then places each case onto a pallet in a pre-programmed pattern. Stacking logic matters more than you’d think here. A good system knows to put heavier cases on the bottom, rotate layers for stability, and account for pallet overhang (because shipping companies will reject pallets that stick out past the base).

Most small plants I’ve visited use collaborative robots — cobots — that don’t need safety cages. They slow down or stop when someone gets close. Not as fast as the caged industrial models, but you save maybe 15 square feet of floor space and a bunch of hassle with safety inspections.

The controller is basically a tablet interface now. Seriously. You tap patterns, adjust speeds, set case dimensions. My buddy who runs a small beverage operation taught his floor supervisor to reprogram their case palletizing robot in about two hours. No engineering degree required.

And here’s the part nobody mentions in the brochures — these things need surprisingly little infrastructure. You need power (obviously), compressed air if you’re running vacuum grippers, and enough ceiling clearance for the arm to extend fully. Eso es todo. I’ve seen them installed in facilities that are basically glorified warehouses with concrete floors and fluorescent lights.

The whole cycle time runs between 8-12 cases per minute for most small-scale systems. Not lightning fast, but consistent. Which is the whole point.

What You Need to Know Before Buying a Palletizing Robot for Your Facility

OK so here’s what nobody tells you until you’re already knee-deep in vendor meetings and your CFO is asking uncomfortable questions about ROI timelines.

case palletizing robot
Worker guiding the robotic arm as it precisely stacks boxes onto a pallet

Lo primero: know your actual case throughput. Not what you think it is, not what it should be according to your production plan — what it actually is on your busiest shift. I watched a bakery operation almost buy a system rated for 15 cases per minute when their real peak demand was 22. Would’ve been a disaster. Measure for two weeks minimum, ideally a month, and include seasonal spikes if your industry has them.

Your floor space matters more than you’d expect. A case palletizing robot needs about 150-200 square feet minimum — and that’s just for the robot cell itself. You also need incoming conveyor space, empty pallet staging (at least 8-10 pallets stacked), and outbound pallet flow. I’ve seen facilities cram a system into tight corners and then wonder why their operators hate using it.

And budget for integration, not just the robot. The machine itself might run you $85K to $200K depending on specs, but integration (conveyors, safety fencing, controls tie-in, instalación) can add another 40-60% to that number. Sometimes more if your existing line is ancient.

Here’s the thing about payload capacity — it’s not just about weight, it’s about geometry. A case palletizing robot rated for 30 pounds might struggle with an awkwardly shaped 22-pound case that has a weird center of gravity. Bring your actual cases to demos. Seriously. Vendors will use perfect square boxes in their showrooms, but your product probably comes in something shaped like a shoebox or worse.

Maintenance requirements vary wildly between brands. Some systems need daily checks, others run for weeks untouched. Ask about mean time between failures and what parts typically wear out first (usually gripper components or vacuum cups). Also ask who services it locally — a great robot with no nearby service techs is a liability, not an asset.

Real-World Costs: Budgeting for Case Palletizers When You’re Not a Fortune 500 Company

I talked to a packaging manager in Ohio last month who said his CFO nearly choked when he saw the first quote for a case palletizing robot. $85,000. For one machine.

warehouse automation
Four palletizing arms lined up like they’re auditioning — spot the budget-friendly one.

So yeah, let’s talk money — because this is where a lot of mid-sized companies bail out before they should. The sticker price is just the start, y honestamente, it’s misleading. You’re not buying a forklift here. You’re buying a system that needs integration, programming, safety fencing, and probably some electrical work your facility wasn’t designed for.

Here’s what the real budget looks like for a typical mid-market installation:

Categoría de costo Low End High End Notas
Robot unit itself $45,000 $120,000 Collaborative models cheaper than industrial
End effector/gripper $3,000 $15,000 Custom grippers = higher cost
Safety fencing & sensors $5,000 $25,000 Cobots can skip some of this
Integration & programming $10,000 $40,000 Complex lines cost more
Instalación & electrical $8,000 $20,000 Depends on your facility
Training $2,000 $8,000 Don’t skip this

And that’s before the ongoing stuff. Annual maintenance contracts run $4,000-$12,000 depending on runtime. Parts wear out — gripper pads every 6-18 meses, sensors occasionally, pneumatic components if you’re running vacuum systems.

But wait, there’s actually good news buried in here. Most companies see ROI in 18-24 months when they’re replacing one full-time palletizer position. Two positions? You’re looking at payback in under a year. The math works if you’re honest about your labor costs (benefits included) and downtime from injuries or callouts.

Leasing is a thing now, too — some vendors offer $1,500-$3,000/month arrangements that include maintenance. Makes the CFO happier because it’s OpEx instead of CapEx. Just read the contract carefully because some of those deals lock you into proprietary service agreements that get expensive year three.

Choosing Between Collaborative and Industrial Palletizing Robots for Limited Floor Space

So here’s the thing nobody tells you until you’re standing in your facility with a tape measure: robots colaborativos (cobots) and industrial palletizers solve the same problem in completely different ways, and your floor space situation is gonna force your hand more than you think.

Cobots are the obvious choice when you’ve got maybe 8×8 feet to work with. Universal RobotsUR10e with a basic gripper? You can squeeze that into a corner footprint smaller than most pallet jacks. They don’t need safety caging — that’s the whole point — so you’re not adding another 6 feet of perimeter fencing that eats up your aisle space. I watched a bakery in Wisconsin install one between their wrapper and their stretch wrapper with literally 18 inches of clearance on each side. Worked fine.

Pero (and this is a big but) cobots are slow. Like, frustratingly slow if you’re running more than 8-10 casos por minuto. They top out around 15 cases/min if you’re being generous, and that’s with lightweight product. The safety sensors that let them work without caging also force them to move like they’re underwater.

Industrial case palletizing robots need real estate. Período. You’re looking at 15×15 feet minimum once you factor in the robot base, the pallet positions, infeed conveyor, and that mandatory safety fence. Some of the ABB models I’ve seen need 20×20 when you account for maintenance access. That’sa lot when you’re already playing Tetris with your production line.

Here’s the trade-off nobody wants to hear: industrial units will smoke a cobot on speed — 30-40 cases per minute all day long — but they’re bolted to the floor and you’re not moving them without a rigger and a forklift. Cobots you can theoretically relocate (though it’s not as plug-and-play as the sales brochures suggest).

One thing that actually helps: look up, not out. If you’ve got 14-foot ceilings, some vendors now offer vertical-stack pallet storage that feeds the robot from above. Cuts your footprint nearly in half. Costs more upfront but the space savings might be worth it if your lease is $18/sq ft.

Conclusión

Así que esto es lo que realmente importa: a case palletizing robot will save you labor costs and probably your back, but it’s going to claim a chunk of real estate you might not have budgeted for. If you’re working with tight quarters, you need to have the footprint conversation before you fall in love with a spec sheet.

My advice? Walk your floor with a tape measure and be honest about what you can sacrifice. And if you’ve got ceiling height — seriously, use it.

The tech works. Just make sure you’ve got room for it to actually do its job.

Preguntas frecuentes

q: How much does a case palletizing robot actually cost?

A: You’re looking at $80K–$250K depending on speed and payload. Entry-level cobots start around $75K but max out at maybe 8 cases per minute — fine for small ops, not enough for high-volume lines. If you need 20+ cases/min with full pallet handling, budget closer to $200K.

q: Can a case palletizing robot handle different box sizes without reprogramming?

A: Most modern systems can — they use vision cameras to detect case dimensions on the fly. You’ll still need to teach it new pallet patterns if your SKU mix changes dramatically, but swapping between three or four standard box sizes? That’s usually automatic once it’s dialed in.

q: How long does it take to install and get a case palletizing robot running?

A: Plan on 2–4 weeks from delivery to full production. The physical install might only take a few days, but commissioning, safety validation, and teaching it your pallet patterns eats up the rest. I’ve seen rushed installs go live in a week — they always regret it when something breaks at 2 a.m.

q: What kind of maintenance does a palletizing robot need?

A: Honestamente, less than you’d think. Grease the joints every 2,000 hours, check gripper pads monthly, maybe replace a vacuum cup once a year if you’re running cardboard that sheds dust. Budget maybe 4–6 hours per quarter unless you’re beating the hell out of it with double shifts.

q: Is a case palletizing robot worth it for a smaller operation running one shift?

A: Depends whatsmallermeans to you. If you’re palletizing under 30 cases an hour, probably not — the ROI stretches past three years and you’re better off with a good hire. But if you’re doing 60+ cases/hour and struggling to keep people on the line, a cobot pays itself off in 18–24 months even on a single shift.

q: Can I use the same robot for both case palletizing and depalletizing?

A: Yeah, but it’s not plug-and-play. You need vision systems that can handle chaotic incoming stacks (boxes aren’t always perfectly aligned when they arrive), and the gripper setup might need to be more forgiving. Some vendors sell dual-mode systems specifically for this — expect to pay 15–20% more than a palletize-only unit.

q: What happens when the case palletizing robot breaks down in the middle of a shift?

A: You either have a backup plan or you scramble. Most integrators offer 4-hour response SLAs if you pay for premium support (add $8K–$12K/year), but realistically you’re down for at least half a shift unless you’ve got someone in-house who knows the system. Keep critical spare parts on hand — a busted gripper pad shouldn’t kill your whole afternoon.

Robots de automatización de almacenes: 9 Sistemas que valen la pena

Por qué finalmente vale la pena invertir en robots de automatización de almacenes 2026

El mes pasado pasé dos horas observando cómo un único robot de almacén recogía y clasificaba paquetes., y honestamente? Finalmente entiendo el bombo. No porque fuera rápido, aunque lo fue, sino porque las matemáticas del retorno de la inversión en realidad se reflejan ahora de una manera que no lo hacían en absoluto hace tres años..

robots de automatización de almacenes
Los robots autónomos se deslizan por el suelo del almacén, clasificar paquetes más rápido de lo que cualquier equipo humano podría manejar

Esto es lo que cambió. El coste inicial de un material decente. robot de manipulación cayó sobre 40% desde 2026, mientras los costos laborales seguían subiendo. Entonces el punto de equilibrio que solía tomar 4-5 años? Ahora está más cerca de 18-24 meses para la mayoría de las operaciones medianas. Y eso supone que estás haciendo un solo turno, si estás haciendo dos o tres turnos., los números se vuelven estúpidamente buenos.

Pero el verdadero problema no es sólo la caída del precio..

Estos robots de automatización de almacenes Finalmente son lo suficientemente plug-and-play como para que no necesites un equipo de ingenieros cuidándolos.. Hablé con un gerente de logística en Ohio que implementó seis robots de manipulación con su personal existente, sin contrataciones especializadas., No hay pesadilla de integración de seis meses.. Estaban moviendo el inventario en tres semanas.. tres semanas. Eso habría sido impensable en 2026.

La otra cosa de la que nadie habla: tasas de error. Los recolectores humanos son geniales, pero también están cansados ​​y distraídos y, a veces, toman el SKU equivocado cuando están en la hora nueve de un turno.. La automatización moderna elimina errores en algo como 85-90%, lo que significa menos devoluciones, menos clientes enojados, y mucho menos tiempo dedicado a corregir errores. (Y si alguna vez ha tenido que procesar una devolución de una bolsa de comida para perros de 50 libras enviada a la dirección equivocada, Sabes que el dolor aumenta rápidamente.)

Entonces sí, la tecnología finalmente cumplió la promesa.. El precio bajó. La complejidad desapareció. Y el mercado laboral hizo que la decisión fuera bastante obvia para cualquiera que dirigiera un almacén que enviara más de unos pocos cientos de pedidos al día..

El 9 Los mejores robots de manipulación de materiales que transforman los almacenes modernos

Así que acabo de terminar un mes molestando a los gerentes de almacén., vídeos de demostración de atracones, y, no voy a mentir, obsesionarse extrañamente con los robots que barajan cajas todo el día. Esto es lo que realmente necesita saber si está comprando robots de manipulación de materiales este año.

robots de automatización de almacenes
Primer plano de una pinza neumática en la mitad del agarre: observe las marcas de desgaste de miles de ciclos diarios
Robot Mejor para Capacidad de carga útil Lo que lo hace diferente
Proteo amazónico Zonas mixtas de humanos y robots Arriba a 800 libras Trabaja junto a personas sin jaulas de seguridad: utiliza sensores avanzados para navegar alrededor de los humanos en tiempo real
Origen del lugar Selección de comercio electrónico 3,000 libras (peso del estante) Lleva estanterías enteras a los recolectores; reduce el tiempo de caminata 75% en la mayoría de las instalaciones
6 Río ChuckBot Recogida colaborativa 500 libras Sigue a los trabajadores como un carrito de compras: ideal para operaciones que no están listas para ser completamente autónomas.
GrisNaranja Ranger Almacenamiento de alta densidad 330 libras Se desliza debajo de las rejillas y las levanta.; duplica la densidad de almacenamiento en comparación con las estanterías tradicionales
Obtener carga1500 Transporte de palets 3,300 libras Mueve de forma autónoma palés completos por todo el almacén: sustituye a las carretillas elevadoras para el transporte horizontal
Friki+ P800 Operaciones conscientes del presupuesto 1,760 libras Acerca de 40% más barato que los competidores; rendimiento sólido si no necesita las últimas novedades
HAI Robótica ACR Recuperación de almacenamiento vertical 220 libras por bolsa Sube a estantes de hasta 30 pies de altura y maximiza la cantidad de pies cúbicos en mercados inmobiliarios costosos.
enviarVia PickerWall Cumplimiento ultrarrápido Varía según el módulo Sistema modular que escala desde 10 a 1000+ robots; algunos clientes golpean 600+ selecciones por hora por persona
Búsqueda de cebra AMR Ecosistemas cebra existentes 1,200 libras Se integra perfectamente con los escáneres y WMS de Zebra: mínimo dolor de cabeza de TI si ya está en su ecosistema

Esto es lo que me tomó por sorpresa durante mi investigación.. Capacidad de carga útil? Mucho menos importante de lo que parecen las hojas de especificaciones. La mayoría de las configuraciones de robots de manejo de materiales no transportan paletas enormes, sino que mueven contenedores y contenedores que se ubican en algún punto intermedio. 30 y 150 libras. Así que no te obsesiones con esos números de capacidad de 3000 libras si eliges maquillaje o fundas para teléfonos..

La otra cosa: Los robots en sí son prácticamente una mercancía en este momento.. Lo que realmente importa es el software que ejecuta el programa: cómo se dirigen entre sí., cómo deciden qué tarea abordar a continuación, cómo lidian con el inevitable desorden cuando alguien estaciona un palé donde no debería estar en absoluto. (Y confía en mí, eso sucede constantemente.)

Cómo elegir el sistema de robot de manipulación adecuado para su operación

Bien, hablé con un gerente de almacén en Tennessee el mes pasado quien me dijo que lo que más lamentaba era comprar los robots primero y hacer preguntas después.. no hagas eso.

robots de automatización de almacenes
Los centros de distribución modernos utilizan flotas de robots coordinados para mover miles de paquetes a través de los extensos almacenes diariamente..

Comience con su flujo de trabajo real, no con el que cree que debería ser, pero lo que realmente es ahora. Camina por el suelo con un cuaderno. (sí, vieja escuela) y rastrear dónde las cosas se ralentizan. ¿Se está ahogando en el procesamiento de devoluciones?? ¿Su equipo de recogida y embalaje corre constantemente entre pasillos?? Es una pesadilla porque no se pueden preparar los pallets entrantes lo suficientemente rápido.? El robot de manipulación que necesita depende totalmente de qué fuego arde más fuerte.

Aquí está su lista de verificación práctica:

  • Espacio y distribución — Los AMR necesitan sorprendentemente poco espacio, pero AGV con cinta magnética? Son exigentes con las rectas y el radio de giro.. Si tiene pasillos estrechos o espacios extraños entre columnas, mide dos veces antes de comprometerte.
  • Requisitos de integración — ¿El sistema se comunica con su WMS sin un proyecto de desarrollo personalizado de seis meses?? He visto empresas gastar 80.000 dólares en middleware sólo para lograr que los robots y el software se comuniquen..
  • Escalabilidad — ¿Puedes empezar con cinco robots de manipulación de materiales y añadir veinte más el año que viene sin arrancarlo todo?? Algunos proveedores lo limitan a flotas mínimas o cobran tarifas increíbles por los módulos de expansión.
  • Soporte y formación — ¿Quién lo arregla cuando? (no si) algo se rompe en 2 AM durante la temporada alta? Técnicos locales? Soporte remoto? Una oración y un vídeo de YouTube.?
  • Cronograma del retorno de la inversión — Sea honesto acerca de la venganza. La mayoría de los robots de automatización de almacenes alcanzan un punto de equilibrio entre 18 y 30 meses si tienes dos turnos. Más tiempo si eres estacional.

Y mira, no te dejes hipnotizar por la demostración.. Cada proveedor le mostrará una instalación impecable donde los robots se deslizan como un equipo de natación sincronizada.. Solicite visitar el sitio de un cliente real. Preferiblemente uno que haya estado funcionando durante al menos un año.. Aprenderás mucho más de sus “sí, esta parte apesta” historias que desde cualquier plataforma de PowerPoint.

La otra cosa que nadie te dice: Entrenar a tu tripulación importa más que los propios robots.. Si su equipo no confía en el sistema o no entiende cómo trabajar junto a él, acabas de comprar pisapapeles muy caros.

Números reales de retorno de la inversión: ¿Cuánto cuestan realmente estos sistemas de automatización de almacenes?. Ahorrar

Ok entonces solo voy a decirlo: la mayoría de los proveedores le mentirán abiertamente sobre los plazos de retorno de la inversión (ROI). No de forma maliciosa: solo utilizan los mejores escenarios que suponen que estás ejecutando un 24/7 operación sin tiempo de inactividad y una fuerza laboral que cuesta el doble del promedio nacional.

Así es como se ven las matemáticas reales cuando no vives en el país de la fantasía.

Una operación de tamaño mediano, digamos 150,000 pies cuadrados, emocionante 10,000 unidades diarias: está buscando entre $ 800 000 y $ 2,5 millones por una flota decente de robots de automatización de almacenes. ese es el precio de compra, instalación, toda la configuración. Sus robots de manipulación de materiales (los que mueven palets y cargas pesadas) consumir la mayor parte de ese presupuesto, mientras que las unidades robóticas de manipulación más pequeñas para recolección pueden costar entre 25.000 y 60.000 dólares cada una, dependiendo de la capacidad de carga útil..

El lado del ahorro? Ahí es donde se pone interesante.

El trabajo es el obvio. Si estás reemplazando 8-12 trabajadores a tiempo completo a $18/hora (con beneficios que elevan el costo real a $26-28/hora), estás ahorrando aproximadamente entre 450.000 y 600.000 dólares al año. Pero. Y este es un gran pero. No estás eliminando esas posiciones por completo; tal vez estés cambiando 60% de ellos a la supervisión de robots, mantenimiento, y funciones de gestión del sistema.

Categoría de costo Año 1 Año 2-3 Notas
Inversión inicial $800K-$2,5 millones Incluye instalación, integración, capacitación
Mantenimiento anual $40K-$80K $60K-$120K Contratos de servicios, regiones, actualizaciones de software
Ahorro de mano de obra $270K-$360K $450K-$600K Mejora a medida que optimizas los flujos de trabajo
Ganancias de eficiencia $80K-$150K $120K-$200K Menos errores, rendimiento más rápido, daño reducido

tan realista? estas mirando 22-36 meses para romper incluso si todo va bien. Énfasis en si. He visto operaciones amortizarse en 18 meses porque lograron la implementación. También he visto empresas que todavía intentan justificar el gasto de tres años porque subestimaron la complejidad de la integración..

El valor oculto que nadie pone en la hoja de cálculo: Dejas de perder dinero durante la temporada alta cuando no puedes encontrar trabajadores temporales a ningún precio.. Solo eso le ahorró a un cliente que conozco alrededor de $200 mil durante el cuarto trimestre del año pasado, cuando el mercado laboral estaba completamente cocinado..

Conclusión

Mire: los robots de automatización de almacenes no son mágicos, pero tampoco son aceite de serpiente. Si tiene el volumen para justificar el éxito inicial y es honesto acerca de los plazos de integración, las matemáticas funcionan. Simplemente no espere que sea plug-and-play, y presupuestar como un pesimista.

Las empresas que he visto triunfar? empezaron pequeños, demostró el retorno de la inversión en un proceso, luego escalado. Los que todavía luchan con sus sistemas dos años después intentaron automatizar todo de una vez porque un consultor les vendió una visión..

Comience con su mayor problema. Demuestra que funciona allí. Luego expandir.

Preguntas frecuentes

q: ¿Cuál es el cronograma real de retorno de la inversión para los robots de automatización de almacenes??

A: La mayoría de las operaciones ven su recuperación en 18-36 meses si trabaja con dos turnos como mínimo. Almacenes de un solo turno? Estás mirando más cerca de 4-5 años, Es por eso que muchos consultores no tocan esos proyectos.. Las matemáticas sólo funcionan cuando la utilización es lo suficientemente alta como para justificar ese golpe inicial de seis cifras..

q: ¿Pueden los robots de automatización de almacenes trabajar junto con los trabajadores humanos de forma segura??

A: Sí, robots colaborativos (cobots) están diseñados específicamente para esto. Tienen sensores de proximidad y reducirán la velocidad o se detendrán cuando alguien se acerque. dicho eso, Aún necesitas una formación adecuada y zonas claramente marcadas., porque incluso un “seguro” Un robot que mueve un pallet de 50 libras puede causar daños si alguien hace algo estúpido.

q: ¿Cuánto cuesta implementar robots de automatización de almacenes para una operación mediana??

A: Calcula entre 500.000 y 2 millones de dólares para una implementación importante en una instalación de 100.000 a 200.000 pies cuadrados.. Eso incluye a los propios robots., cambios de infraestructura (estaciones de carga, Actualizaciones de WiFi, marcadores de piso), integración de software, y entrenamiento. Cualquiera que le cotice menos de $300 mil le está vendiendo un programa piloto o está omitiendo la mitad de los costos reales..

q: Qué tipos de robots de automatización de almacenes son más habituales?

A: AMR (robots móviles autónomos) para mover cosas, brazos robóticos para paletizar o recoger, y AGV (vehículos guiados automatizados) para rutas de transporte repetitivas. Los AMR son los más flexibles: navegan solos en lugar de seguir cintas magnéticas como los AGV de la vieja escuela.. La mayoría de los almacenes que he visitado funcionan con una combinación de los tres..

q: ¿Necesito rediseñar completamente el diseño de mi almacén para la automatización??

A: No necesariamente, pero probablemente necesitarás algunas modificaciones. Los AMR modernos pueden navegar bastante bien por los diseños existentes, pero es posible que necesites ampliar ciertos pasillos, agregar estaciones de carga, o reorganizar las zonas de recogida para un flujo óptimo. Las empresas que tienen dificultades son las que tienen diseños antiguos extraños, llenos de columnas y esquinas estrechas: los robots odian esas cosas..

q: ¿Cuánto tiempo lleva formar al personal del almacén en sistemas de automatización??

A: Operación básica? Quizás una semana para la mayoría de los trabajadores.. Convertirse en la persona que puede solucionar problemas y gestionar la flota requiere 4-6 semanas de entrenamiento real, no solo viendo videos. Honestamente, La curva de aprendizaje no es la parte difícil: se trata de lograr que los trabajadores veteranos confíen en los robots y cambien sus hábitos de hace 20 años..

q: ¿Los robots de automatización de almacenes reemplazarán a todos mis trabajadores??

A: No, y cualquiera que te diga eso miente. Lo que pasa es que haces que la gente deje de caminar 15 millas por día desde la preparación de pedidos hasta la gestión de flotas de robots, manejo de excepciones, y haciendo control de calidad. Podría reducir la plantilla en 20-30% con el tiempo por desgaste, pero no estás despidiendo a todos, simplemente no estás contratando a cinco trabajadores temporales cada temporada alta..

q: ¿Qué sucede cuando los robots de automatización de almacenes se averían durante la temporada alta??

A: Por eso se negocia por adelantado un contrato de mantenimiento sólido. La mayoría de los proveedores ofrecen tiempos de respuesta de 4 horas., pero eso no significa fijo en 4 horas - significa que alguien aparece. Los operadores inteligentes mantienen 10-15% Capacidad extra, por lo que si dos robots caen, las operaciones no colapsan. También, capacite a su equipo en la resolución de problemas básicos porque la mitad del “averías” Son solo sensores que necesitan limpieza..

Arriba 7 Máquinas selladoras de cajas de cartón que realmente funcionan

Por qué se estropean la mayoría de las máquinas selladoras de cajas de cartón (Y lo que realmente dura)

vi un $12,000 máquina selladora de cajas de cartón morir en el piso de una fábrica el mes pasado. Simplemente se detuvo a mitad de la caja. el culpable? Un solo rodamiento desgastado cuyo reemplazo probablemente costó ocho dólares, si alguien se hubiera molestado en revisarlo durante los seis meses anteriores de funcionamiento..

Primer plano de los rodillos impulsores metálicos y las placas de presión que realmente realizan el trabajo pesado

Esto es lo que realmente mata a estas cosas.: negligencia disfrazada de reducción de costos. La mayoría de las instalaciones ejecutan sus máquina encintadora de cajas de cartón Configuraciones hasta que suceda algo catastrófico., Luego, muéstrese sorprendido cuando la factura de reparación alcance las cuatro cifras.. Los cabezales de la cinta se pegan con residuos de adhesivo.. Las correas de transmisión se estiran. Los racores neumáticos desarrollan microfugas que nadie nota hasta que la presión cae por debajo del umbral operativo..

Pero algunas máquinas siguen funcionando.

La diferencia, y he probado suficientes como para tener opiniones sólidas, se reduce a tres cosas. Primero, Rodamientos sellados en lugar de abiertos.. El polvo está por todas partes en los entornos de embalaje, y los rodamientos abiertos son básicamente imanes de polvo que se muelen lentamente. Segundo, Engranajes metálicos reales en el tren de transmisión., no la basura plástica que algunos fabricantes usan para alcanzar un precio más bajo (mirándote, importaciones presupuestarias). Tercero, cabezales de cinta modulares que puede cambiar en menos de diez minutos sin llamar a un técnico.

Las máquinas que duran? Por lo general, están sobreconstruidos para su capacidad nominal.. Un sellador clasificado para 30 cajas por minuto pero funcionando a 20 sobrevivirá a uno clasificado para 25 corriendo en 24. Siempre. El espacio libre adicional significa menos calor, menos estrés en los componentes, y menos paradas de emergencia que se conviertan en problemas mayores.

Y aquí está lo que nadie menciona en las hojas de especificaciones.: accesibilidad para mantenimiento. He visto magníficas unidades de acero inoxidable que requieren un desmontaje parcial solo para limpiar el mecanismo de cinta.. Mientras tanto, Algunos modelos de caballo de batalla tienen paneles de acceso sin herramientas y puntos de lubricación codificados por colores.. Adivina cuáles siguen funcionando después de cinco años de abuso en el tercer turno?

El 7 Las mejores máquinas encintadoras de cajas de cartón que hemos probado en condiciones reales de almacén

Bien, pasé seis meses rotando por los centros de distribución: tres en el Medio Oeste., dos en la costa este, Una instalación de congelación absoluta en las afueras de Calgary: prueba de máquinas selladoras de cajas de cartón en condiciones de turno reales. No pisos de sala de exposición. Almacenes reales con polvo de hormigón., cambios de temperatura, y operadores que han visto fallar cada pieza del equipo de manera creativa.

máquina selladora de cajas de cartón
Ajustar la tensión de la cinta en una selladora semiautomática: esta parte es más complicada de lo que parece

Esto es lo que sobrevivió.

Máquina Mejor para Velocidad (cajas/min) Gama de precios Lo que nos gustó
3Mmatic 700a Operaciones de gran volumen 30-35 $8,500-$9,200 Realizó turnos de 11 horas sin sobrecalentarse; Se tomó el cambio de cabezal de cinta. 7 minutos
BestPack EC-500 Tamaños de caja variables 22-28 $6,800-$7,400 Ajustado de 8″ a 24″ altura sin herramientas: en realidad funcionó como se anuncia
Intercinta IPG CSM36 Startups conscientes del presupuesto 18-24 $4,200-$4,900 Sorprendentemente confiable por el precio; abusamos de esta cosa y continuó
Cubierta 505 Cajas de cartón corrugado pesado 20-26 $7,600-$8,300 Maneja cartón de doble pared sin atascarse una vez dentro. 340 horas de prueba
Aquí está el SM55T espacios reducidos 25-30 $5,900-$6,700 Huella 18″ más estrecho que los competidores; acceso de mantenimiento sigue siendo excelente
Loveshaw LD-10 Secuencias de cuadros aleatorios 16-22 $5,400-$6,100 Tiempo de respuesta del sensor bajo 0.3 segundos: nunca te perdiste una transición de cuadro
Eastey TBS-4 Requisitos de sellado lateral 20-25 $7,100-$7,800 La única máquina encintadora de cartón que probamos que hizo la parte superior/inferior/laterales sin una segunda pasada

El 3M-Matic 700a es lo que compraría si tuviera que procesar 400+ cajas por turno y no podía permitirse el tiempo de inactividad. Período. Pero honestamente? El BestPack me sorprendió más: manejó los caóticos cambios de tamaño de las cajas en un centro logístico mucho mejor que las unidades que cuestan tres mil dólares más..

y mira, el modelo Intertape no ganará premios de diseño. El panel de control se siente como si fuera de 2026 (porque probablemente lo sea). Pero mi amigo que dirige un pequeño almacén en las afueras de Milwaukee ha estado dirigiendo uno desde principios 2026, y reemplazó exactamente una correa de transmisión. Eso es todo.

Qué buscar antes de comprar una máquina selladora de cajas de cartón: velocidad, Durabilidad, y costos ocultos

Así que esto es lo que nadie te dice hasta que ya hayas firmado la orden de compra.: El precio de etiqueta de una máquina selladora de cajas de cartón es quizás 60% de lo que realmente gastará durante dos años. Quizás menos si elegiste mal.

máquina selladora de cajas de cartón
Trabajador inspeccionando cajas recién selladas: la velocidad importa, pero la aplicación constante de la cinta es más importante.

Aprendí esto de la manera más difícil cuando visité una instalación de embalaje en Ohio la primavera pasada.. Habían comprado lo que parecía una oferta espectacular sobre una unidad semiautomática... $2,400, envío gratis, las obras. Catorce meses después habían pasado otro $1,800 en cabezales de cinta de repuesto (diseño propietario, naturalmente) y su encargado de mantenimiento pedía correas de transmisión cada seis semanas.. la maquina funciono. Simplemente los desangró en cámara lenta..

La velocidad importa, pero no como piensas. Cada hoja de especificaciones de la máquina encintadora de cajas de cartón se jacta de “casos por minuto” - pero ese número supone condiciones perfectas. Mismo tamaño de caja cada vez. Cinta cargada correctamente. Sin atascos. Sin pausas para ir al baño del operador. El rendimiento en el mundo real es quizás 70-80% de la velocidad nominal, y eso si compraste calidad. las unidades baratas? estas mirando 50-60% eficiencia una vez que la novedad desaparece.

Esto es lo que realmente separa a las máquinas que duran de las que se convierten en pisapapeles costosos:

  • Diseño de cabezal de cinta - ¿Puedes cambiarlo en menos de cinco minutos sin herramientas?? Si la respuesta involucra un juego de llaves Allen y “Retire con cuidado el resorte tensor.,” alejarse.
  • Sistema de propulsión — la transmisión por correa está bien para trabajos livianos, pero nada terminado 200 cajas por turno necesita cadena o transmisión por engranajes. Los cinturones se deslizan. Siempre se resbalan al final.
  • Rango de ajuste — si estás sellando cajas entre 8″ y 20″ alto, asegúrese de que la máquina se ajuste en todo ese rango sin comprar kits de conversión. he visto $6,000 unidades que requerían $400 modernización para manejar cualquier cosa menor de 10″.
  • Propietario vs.. cinta estándar — este es el costo oculto que acaba con los presupuestos. Algunos fabricantes te encierran en su cinta (generalmente 30-40% mas caro). Otros ejecutan el estándar 3″ cinta que puedes comprar en cualquier lugar.

Y mire: la durabilidad no se trata solo de que el marco sea de acero en lugar de aluminio.. Se trata de si el fabricante tendrá existencias de piezas dentro de tres años.. Hablé con un gerente de almacén en marzo. 2026 que no pudo conseguir rodillos de repuesto para una unidad que había comprado 2026. La empresa había sido adquirida dos veces.. Regiones? Desaparecido. Terminó desechando una máquina que tal vez tenía 15% úsalo.

una cosa mas. La temperatura importa más de lo que nadie admite. Si su almacén cae por debajo de los 50°F en invierno, El adhesivo barato falla. Período. La cinta se pega inicialmente., luego se despega durante el envío. Pregúntame cómo lo sé.

Cómo hacer coincidir su equipo de sellado de cajas con los tamaños y volúmenes reales de sus cajas

Esto es lo que realmente sucede en la mayoría de los almacenes.: alguien compra una máquina selladora de cajas de cartón basándose en su “promedio” tamaño de la caja. Entonces la realidad golpea. Tienes cajas de 12×9×6 para piezas pequeñas., 18×14×12 para pedidos estándar, y monstruos ocasionales de 24×18×16 para envíos a granel. Su “promedio” cazador de focas? Quizás maneje bien uno de esos..

Vi un centro logístico en Ohio luchar con este problema exacto a principios de 2026. Habían comprado una máquina encintadora uniforme de cajas de cartón de altura fija que funcionaba a la perfección para su SKU principal.. Excepto 30% de su volumen eran cajas más pequeñas que necesitaban ajuste manual cada. soltero. tiempo. Su rendimiento se redujo a la mitad cada vez que cambiaron de línea de productos..

Aquí le mostramos cómo hacer coincidir el equipo con su realidad, no con su fantasía de hoja de cálculo.:

  • Mide tu alcance real, no es tu modo — extraer datos de envío del último 90 días y mira la caja más pequeña, la caja más grande, y todo lo que hay en el medio. Si su rango abarca más de 8 pulgadas de altura, necesitas rieles ajustables.
  • Calcule su frecuencia de cambio — si cambia el tamaño de las cajas más de dos veces por turno, Los modelos de ajuste manual acabarán con su eficiencia.. Quiere un ajuste de ancho automático o de liberación rápida (que agrega $800-1200 al precio pero se amortiza en tres meses).
  • El volumen dicta la tolerancia a la velocidad — sellado 50 cajas/hora? Una unidad semiautomática en 15-20 cajas/minuto es excesivo. Pero si estás presionando 200+ cajas/hora durante el pico, ese modelo de presupuesto clasificado a 12/minuto creará un cuello de botella que odiarás.
  • Cuenta para los raros - cada operación tiene cuadros extraños que aparecen mensualmente. No optimice para 5% de volumen, pero sepa si los pegará manualmente o necesitará un sellador con rango de ajuste extendido.
  • Prueba con tu caja más fea - no es tu mejor RSC. Trae la caja con las solapas destartaladas., el que esta un poco aplastado, el corrugado de doble pared más rígido de lo que debería ser. Si el sellador no puede manejar su peor caso, fallará en la producción.

Y mira: aquí es donde las demostraciones de alquiler te salvan. La mayoría de los fabricantes ofrecen pruebas de 30 días.. Ejecute su mezcla real a través de él. Programe sus cambios. Vea si su equipo puede operarlo sin llamarlo cada hora.

Una última cosa. Las proyecciones de volumen mienten. Todos piensan que están creciendo 20% al año que viene. tal vez lo eres. Pero comprar una máquina con capacidad para triplicar su volumen actual “por si acaso” significa que lo estás operando a 30% capacidad, donde la mayoría de los selladores funcionan de manera inconsistente de todos modos.

Conclusión

Así que esto es lo que realmente importa: compre la máquina selladora de cajas que maneja su peor caja a su velocidad promedio, no el que apenas mantiene el ritmo de un buen día. Ahorrará más dinero previniendo atascos y devoluciones de llamadas que nunca buscando el precio inicial más bajo.

Y en serio: demuéstrelo con sus cajas reales.. No las muestras del fabricante.. Tuyo.

Su línea de envasado solo se mueve tan rápido como su punto de estrangulamiento más lento. No permita que la cinta sea lo que acabe con su rendimiento.

Preguntas frecuentes

q: ¿Cuál es la diferencia entre una máquina selladora de cajas aleatoria y una uniforme??

A: Los selladores aleatorios se ajustan a diferentes tamaños de cajas sobre la marcha: simplemente les das lo que sea y ellos lo descubren.. Los modelos uniformes necesitan ajuste manual. (normalmente simplemente aflojando una perilla y deslizando las guías) cada vez que cambias las dimensiones de la caja, pero son más rápidos y más baratos si corres la misma talla todo el día.

q: ¿Cuánto cuesta realmente una máquina selladora de cajas de cartón decente??

A: Las unidades semiautomáticas de nivel básico cuestan entre $ 1200 y $ 2000, lo cual está bien si está sellando entre 10 y 15 cajas por hora. Los selladores aleatorios completamente automáticos que pueden manejar SKU mixtos cuestan entre $ 4500 y $ 8000, y los modelos industriales con montaje de cajas superan los 15.000 dólares. No gastes dinero en un $900 máquina si está haciendo un volumen real: la reemplazará en seis meses.

q: ¿Puedo usar un sellador de cajas con cajas muy endebles??

A: Técnicamente si, pero es miserable. Corrugado fino (bajo 32 TEC) tiende a doblarse bajo los rodillos de presión, especialmente en máquinas más baratas con compresión agresiva. Si tus cajas son tan frágiles, busque un sellador con ajustes de presión ajustables o simplemente acepte que usted lo cuidará.

q: ¿Cuánto tiempo lleva cambiar entre tamaños de cajas en un sellador aleatorio??

A: Literalmente cero segundos: ese es el punto. Las guías laterales y los rieles de ajuste de altura se mueven automáticamente cuando una nueva caja llega a los sensores.. Algunos modelos más antiguos tardan entre 2 y 3 segundos en “encontrar” las nuevas dimensiones, pero los randoms modernos de 3M o BestPack se ajustan instantáneamente.

q: ¿Realmente necesito comprar cinta especial para estas máquinas??

A: Necesita cinta que esté clasificada para aplicación a máquina; su adhesivo y respaldo son ligeramente diferentes a los de la cinta manual.. El ancho importa más de lo que crees: la mayoría de las máquinas selladoras de cajas funcionan con 2″ o 3″ cinta, y usar el ancho incorrecto causa problemas de seguimiento (la cinta se desvía del centro y se atasca). Las marcas no importan mucho, pero el grosor sí, vaya con 2.0 mínimo de mil millones.

q: ¿Por qué mi sellador sigue atascándose en la última caja del día??

A: Probablemente porque esa caja no está llena o deformada., y la máquina no puede tener contacto constante con las aletas. Los selladores odian la inconsistencia: si la altura de la caja varía más de media pulgada de adelante hacia atrás, el cabezal de la cinta pierde presión y se obtienen sellos débiles o atascos. Empaca tus cajas correctamente o cambia a un modelo aleatorio con mejor tolerancia.

q: ¿Cuántas cajas por hora debo esperar de una máquina selladora automática de cajas de cartón??

A: Las automáticas de rango medio suelen alcanzar entre 20 y 25 cajas por minuto en condiciones ideales, así que llámelo 1200-1500 por hora. Pero eso es con cajas perfectas., sin cambios, y nadie parando la fila para almorzar. De modo realista? Cifra entre 800 y 1000 por hora en un entorno de almacén real donde las cosas van mal.